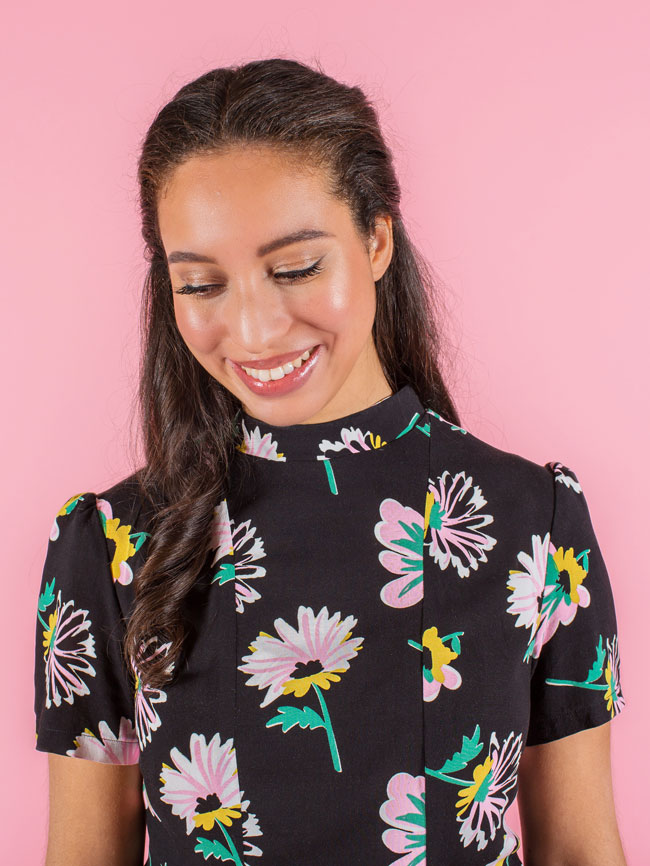
Sewing the Martha dress? Vanessa here today to talk about pattern changes you might want to make for a beautiful fit.
While it's tempting to get sewing straight away, as the Martha dress has a fitted bodice and our bodies are all different shapes, this is one of those patterns where it's definitely worth pausing to consider any fitting alterations you might want to make, and to make a toile (AKA muslin) of at least the bodice. A toile is a mock-up in a cheap fabric that gives you an opportunity to adjust the fit according to your shape, before you cut into your nice fabric.
- Choosing your size - if you're not sure which to start with
- Lengthening the bodice or skirt - if you have a long torso or want to lengthen the knee-length hem
- Shortening the bodice or skirt - if you have a short torso or want to shorten the mini hem
- Combining pattern sizes - if your bust, waist or hip measurements fall into different sizes
- Adjusting the bust - if you have a full or small bust size
- Fitting a toile, including various adjustments to the seams, waist, back and shoulders - always recommended for a fitted bodice!
This is a reeeally long post, but don't let that put you off! Just skip straight to the bits that apply to you, for example, if you have a long torso, jump to the section on lengthening the bodice. Let's do this!
Choosing your size
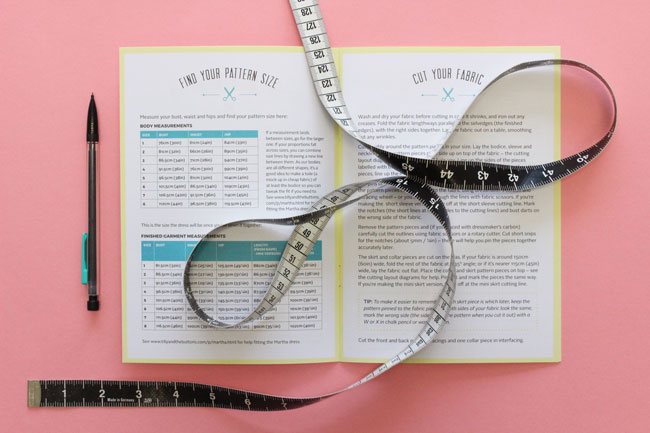
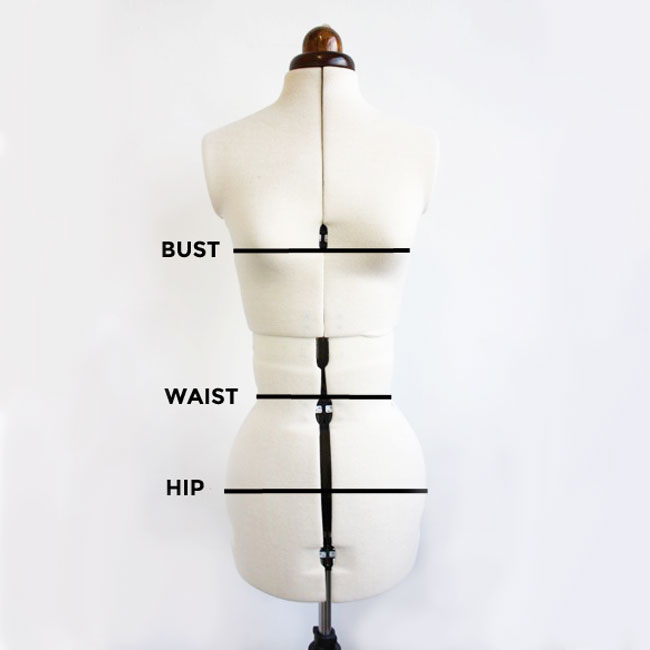
First up is choosing the right pattern size for your measurements. Using a flexible tape measure, find the circumference of your bust, waist and hips, by which we mean:
• Bust – the fullest part of your bust, ie. around your nipples
• Waist – the point at which you bend to the side
• Hips – the fullest part of your hips - it helps to turn to the side and look in a mirror to see where this is, and to check the tape is sitting level to the floor.
As tempting as it can be, don't hold the tape measure too tightly around your body!
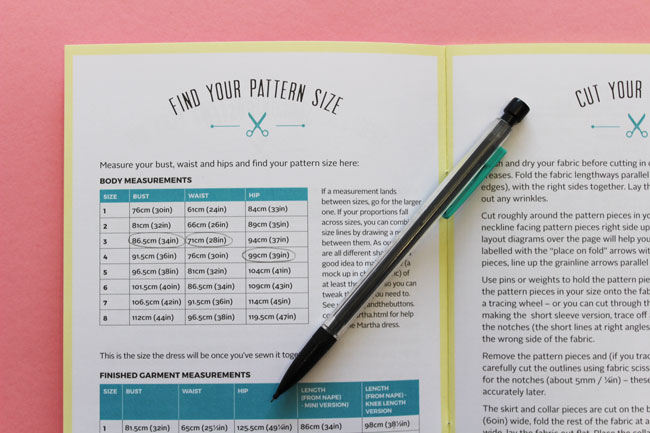
Circle your measurements on the ‘Body Measurements’ chart in the pattern instructions. If your measurement falls in between a size (for example, if your hips are 38in rather than 37in or 39in), it’s nearly always better to choose the larger size. It’s easier to take the dress in as you're sewing if it’s too big than to let it out if it’s too small.
If your bust, waist and hip measurements all fall into one pattern size – fantastic! That’s your size! There’s a key on the pattern sheets that shows the solid or dashed line for your size – that’s the one to follow when you cut out your fabric.
However, if your bust, waist and hip measurements span 2 or 3 different sizes – don’t worry! Every body has different proportions and the beauty of making your own clothes is that you can mix and match bust, waist and hip sizes. See ‘Combining pattern sizes’ below.
Lengthening or shortening the bodice or skirt
If you know that you have a particularly long or short torso, you can adjust the pattern pieces using the "lengthen or shorten here" lines marked on the bodice pattern pieces.
As for the skirt, the pattern includes two hemline options - mini and knee-length. If you want to shorten the mini skirt further without losing the fullness, or lengthen the knee-length one without making the panels too flared, you can use the "lengthen or shorten here" lines on the skirt pieces instead of adding or removing at the hem.
Lengthening the bodice or skirt
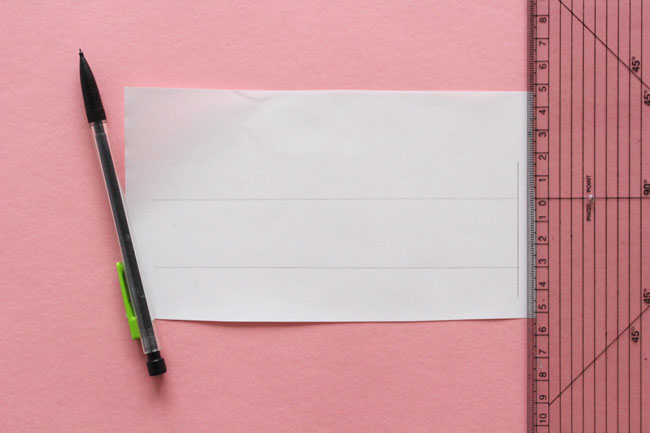
First, draw two parallel lines on a scrap of paper with a vertical line joining one end - the distance between them should be the amount you want to lengthen the bodice or skirt by. Repeat on three more pieces of paper so that you have a set of lines for each bodice or skirt pattern piece.
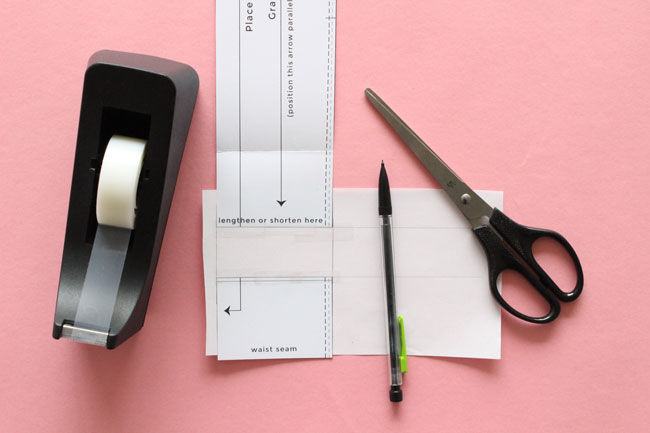
Cut along one of the "lengthen or shorten here" lines marked on the pattern pieces. Place a paper strip underneath the front and back bodice/skirt pieces, aligning the cut edges with the parallel lines, and align the vertical line with the long straight edge. Stick them down with tape or a glue stick. Extend the princess seam line so it joins up and cut away the excess paper.
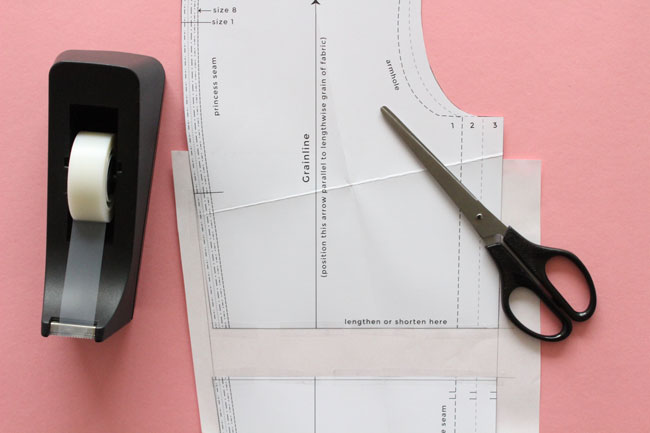
Repeat for the front and back side bodice/skirt pieces. But as the seams are angled, it is easier to attach the paper strip to one of the cut pattern pieces, extend the side seam line, and use this as the guide for where to stick the other cut bodice piece. Re-draw the princess seam so the two pieces join with a smooth curve.
Shortening the bodice or skirt
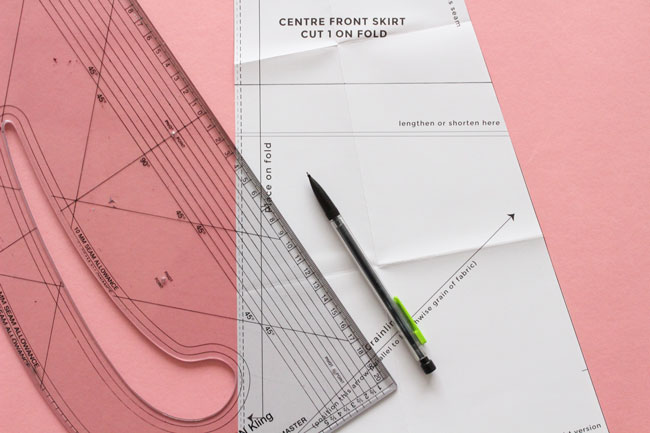
Draw a parallel line above the "lengthen or shorten here" lines on all four bodice/skirt pieces. The distance between the two is how much you want to shorten the pattern by.
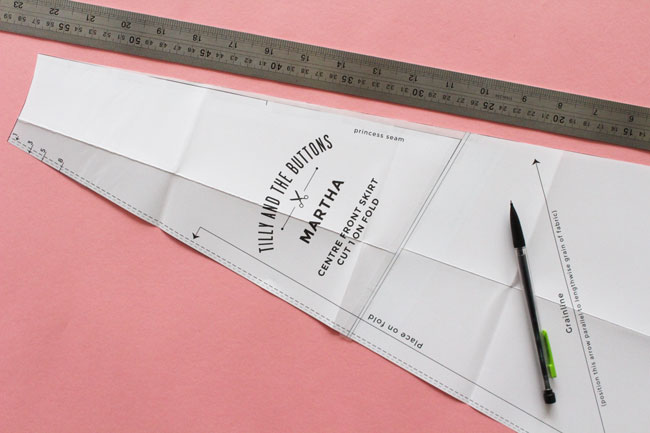
Cut along one of the "lengthen or shorten here" lines and move the lower pattern piece straight up until it meets the line you drew in the previous step. Tape or stick it down. Re-draw the side seams into straight lines and princess seams into smooth curves. When re-drawing the skirt seams, you may need to stick a wedge of paper onto the pattern to get a straight line from waist to hem.
Combining pattern sizes
If your measurements don’t match one pattern size – for example, you’re a size 4 at the bust, 3 at the waist and size 6 at the hips – you can mix and match sizes.
If your bust measurement is particularly larger or smaller than the other two measurements, you might want to make a small or full bust adjustment instead of or as well as combining sizes – see 'Adjusting the bust' below.
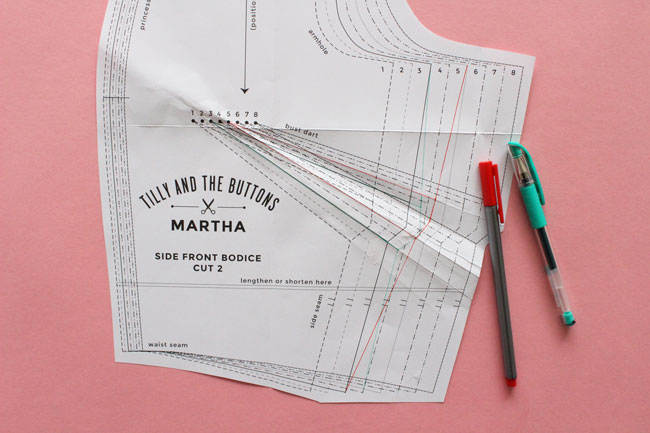
To combine sizes, re-draw each seam from top to bottom so that it gradually tapers from one size to another. This photo shows a combination of size 3 bust and size 4 waist in green, and a size 5 bust and size 3 waist in red. If you're combining sizes between the waist and hip, it's simply a matter of drawing a straight line. But if you're combining between bust and waist, you'll notice that it's not a straight line as the dart is in the way...
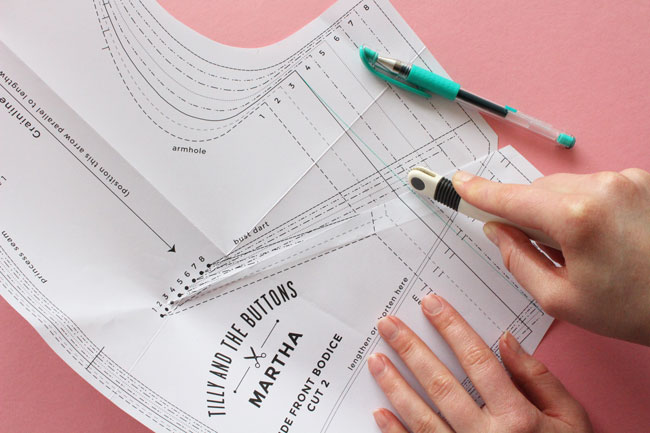
To combine sizes where there's a dart in the way, choose the dart that matches your bust measurement, and temporarily fold it closed by bringing together the two legs (lines), folding the dart downwards, and taping it in place. Redraw a smooth side seam across your new (folded) dart, then roll a tracing wheel over it.
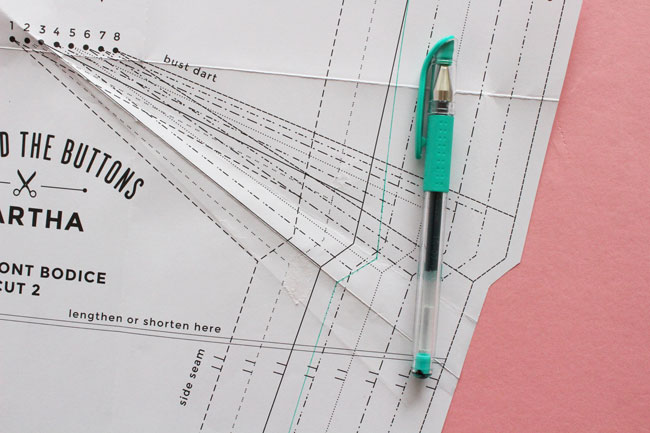
Open up the dart and draw over the indentations made by the tracing wheel to mark the dart tip.
Adjusting the bust
If your boobs are on the larger side, you may find that the pattern fits your bust but is baggy at the upper chest and shoulders. On the other hand, if your bust is on the smaller side, you may find that while the full bust fits you, the upper chest and shoulders are too tight. One way to resolve this is to choose a pattern size based on your "high bust", and then add or subtract room at the full bust. This is known as a full bust adjustment (FBA) or small bust adjustment (SBA).
One thing to bare in mind - we designed the bodice to have quite a narrow middle panel, the kind that you can embellish with lace, ruffles or trims. Unlike some princess seam bodices, the seam lines aren't supposed to sit directly over your boobs - so don't worry about moving the lines out!
Back to the bust adjustments - how do you know if you need to do a bust adjustment and, if so, how much by?
Our sewing patterns include a 5cm (2in) difference between the full bust (measured around your nipples) and high bust measurement (measured around your upper chest just under your armpits). Measure your full bust and high bust and work out the difference between them. If the difference between them is significantly more than 5cm (2in), you may want to try making a bust adjustment to the pattern.
To work out how much you need to add or subtract to the bust area, add 5cm (2in) to your high bust measurement. Choose the pattern size with that measurement at the bust to do your bust adjustment on. Now compare your full bust measurement to the bust size of that pattern size (or your high bust + 5cm/2in) - if your full bust is 2.5cm (1in) bigger, you’ll do an FBA and add 2.5cm (1in); if it’s 2.5cm (1in) smaller, you’ll do an SBA and subtract 2.5cm (1in), and so on.
On the Martha dress, we're going to make the adjustments to the side front bodice pattern piece. Since the piece is cut twice, the pattern represents one half of the change you need to make - so you'll be adding or subtracting half of the difference - 1.25cm (1/2in) in this example. Trace off a copy of the pattern pieces so you can keep the original intact. Make sure you trace off the notches and grainline arrow too.

Both full and small bust adjustments start off the same way by marking some cutting lines on your pattern, slashing them open, then either spreading them apart or overlapping them, to add or remove space at the bust.
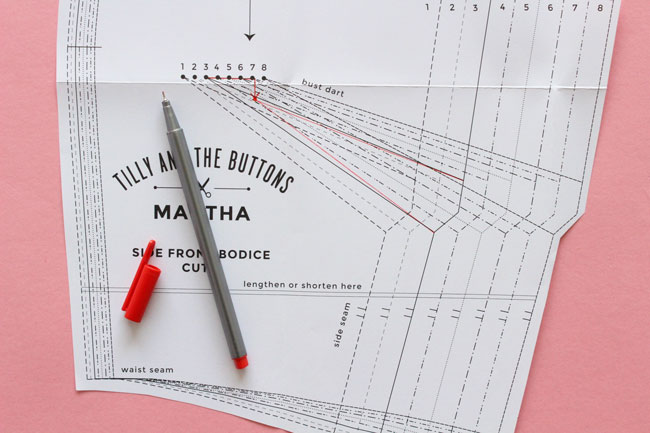
To start we need to set up the lines we’ll use to cut up the bodice. The first is a line the runs from the centre of the dart at the side seam, through to 2.5cm (1in) beyond the dart tip. This is the bust point. The second line goes straight from the bust point down to the waist seam, parallel to the grain line. I've marked the two lines above in black.

The third line runs from the dart tip to the armhole notch. Mark a point along this line that is 15mm away from the armhole.

Cut from the waist seam up to the dart tip and then to the point 15mm away from the armhole. Snip in the other direction at the armhole, so the pieces remain attached by a small ‘hinge’ at the sewing line. What we've done here is ignore the seam allowance to ensure the armhole stitching line stays the same length. Finally, cut up the centre of the dart, again leaving it attached by a little hinge at the dart tip.
Full Bust Adjustment
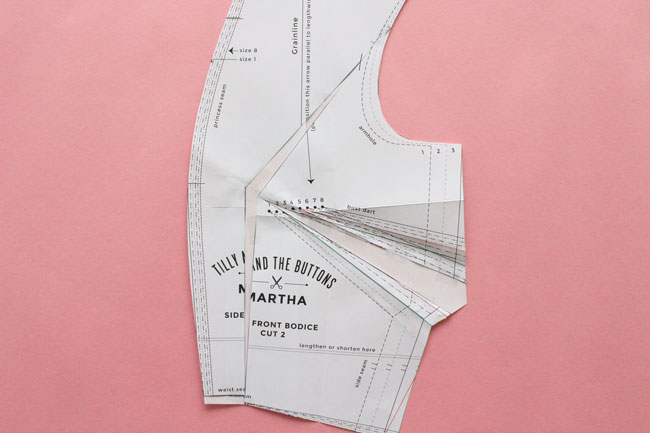
If you’re doing a full bust adjustment you will now pivot the two right-hand pieces away from the left-hand piece so that they open up at the bust point by the amount that you worked out above - 1.25cm (1/2in) in our example. Stick or tape the pieces down on a new piece of paper.

Mark a point 2.5cm (1in) back (towards the side seams) from the bust point and re-draw the dart lines from here to their original starting points at the side seams. The dart tip is a bit back from the actual bust point so you don't get pointy boob dress syndrome!
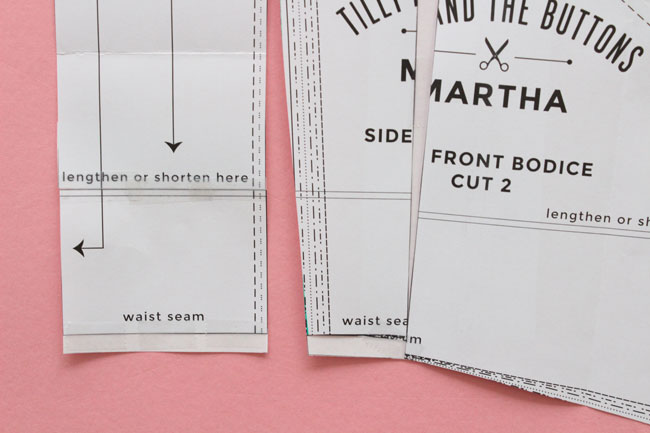
The side of the bodice will have moved down a bit to accommodate a larger bust, so we need to even out the waist seam. Add a strip of paper under the pieces on the left and cut them so they join up with the waist seam of the piece on the right.
Small Bust Adjustment
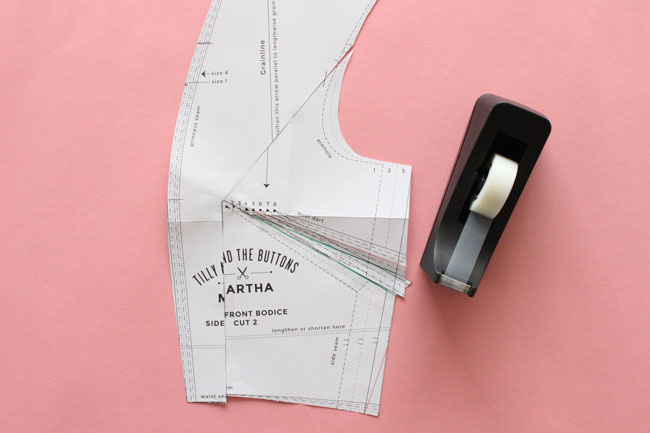
If you’re doing a small bust adjustment you will now overlap the two right-hand pieces over the left-hand piece at the bust point by the amount that you worked out above - 1.25cm (1/2in) in our example. Stick or tape them down.
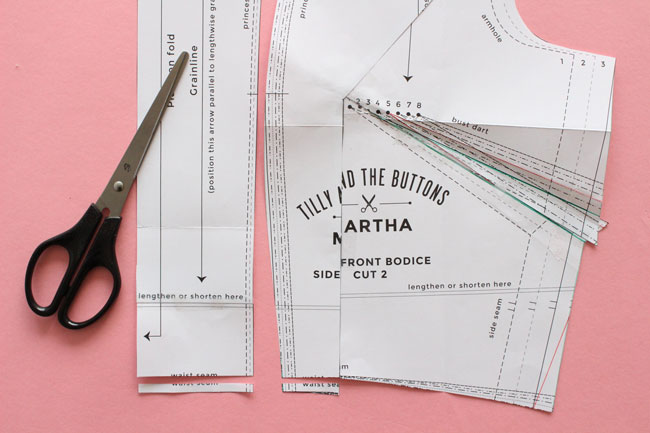
The side pieces will now be shorter than the left piece as less room is needed for a smaller bust. Trim off the excess on the left piece so the waist seam is the same level. Trim off the same amount on the front bodice pattern piece too so they match up when sewn together.
Fitting a toile
Once you've made any changes to the length, proportions or bust on the flat pattern pieces, I would recommend making up a toile of the bodice so you can check how it looks on you and make any other tweaks. If you haven't done one before, read more about making a toile. Be sure to pick a fabric with similar weight and drapiness to your final fabric, as the fabric will affect how it looks and feels.
Don't worry about making a toile of the skirt - it's so full, and you only need it to fit your waist. If you adjust the waistline on the bodice, just be sure to make the same changes to the waistline on the skirt pieces so the vertical seam lines match up.
The bell sleeves are designed to be full and drapey, so I wouldn't bother toiling those either. But you might want to add the short sleeves if you're making those ones, particularly if you know that sleeves tend to feel tight on you.
Common fitting issues to look out for on a toile include...
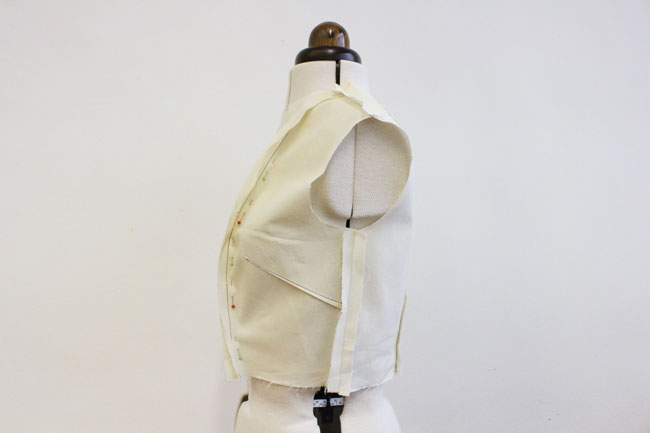
Seam panels too loose or too tight
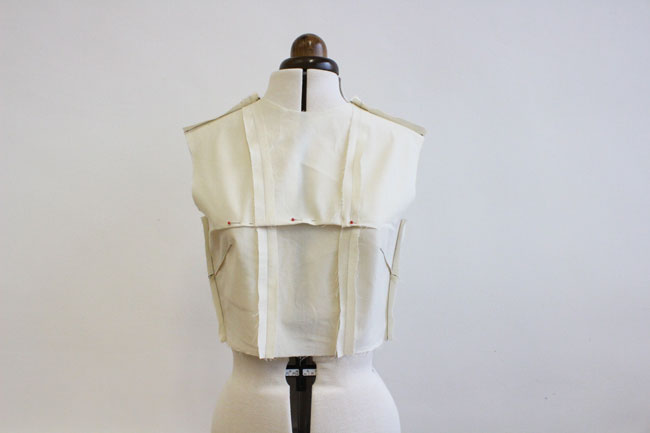
The princess seam panels on the bodice make the bodice relatively easy to fit, as you can pin them in or add extra fabric as needed to fit your curves. Try the bodice on, and pin out any excess fabric where you need to. Don't be tempted to over-fit it though - you still need to be able to move! If it feels too tight at the sides or princess seams, you can unpick the seams and add in extra fabric.
Transfer the changes to your pattern - redraw the seams, using the pins as a guide for the stitching lines and adding 15mm (5/8in) seam allowance.
If you do take in or let out the side or princess seams of the bodice, remember to add or remove the same amount at the top of the skirt seams so that the seam lines match up.
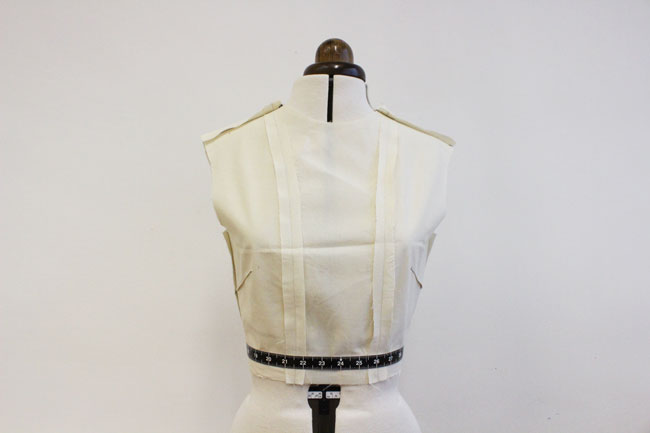
Waistline too high or low
The bodice of the Martha pattern is designed to sit on your natural waistline before flaring out into a beautiful bias-cut skirt. The toile gives you an opportunity to check the length (remember it includes 15mm / 5/8in seam allowance, so the waistline will sit 15mm / 5/8in higher). Lengthen or shorten it if you need to, following the steps outlined near the top of this post.
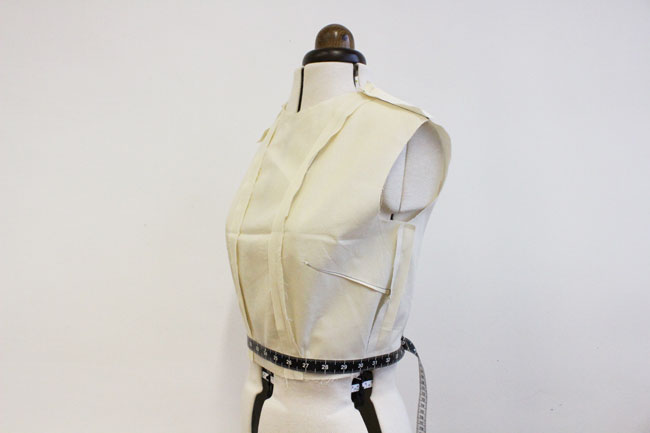
Waistline not sitting level
Another thing to check is that the waistline is level all the way round - you can wrap a tape measure around you to check this. It may be that it just requires lengthening or shortening at the front and not the back, or vice versa.
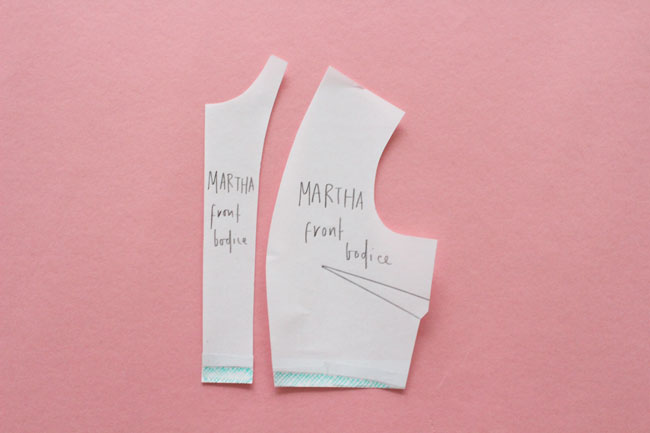
If you need to add more length at the front, stick some extra paper under the bottom of the front bodice pattern pieces to add in a bit more room.

Fabric pooling at the back waist
If you have a particularly curved lower back, you may notice excess fabric pooling at your back waist. This is easily removed by pinning out the extra fabric on your toile, measuring how much you’ve pinned out, then trimming this off the back bodice pattern pieces.
Drag lines, tightness or rippling at the bust
This may be a sign that you need to make a bust adjustment - see the instructions earlier in this post.
Alternatively, it may be that the curve going over your bust is too long, in which case you can pinch away the excess fabric horizontally and cut this off the corresponding pattern pieces. If it is too short, causing drag lines, you can slash the bodice open horizontally, patching it up with extra fabric, and cutting and adding paper to your pattern pieces to match.
Moving dart tips
The darts should end about 2.5cm (1in) from the fullest part of your bust so they don't end up too pointy If they’re coming up too high, low, far apart or close together, they can be easily moved.
Mark on your toile where your nipples are, then mark 2.5cm (1in) away towards the side seam. Make a note of how much they need to be moved - for example, 2cm away from centre and 1cm down.
On your pattern piece, draw a vertical and horizontal line through your size’s dart tip and mark where you want your new dart tip to sit, following your notes from the previous step.

Widening and narrowing shoulders
If you have wide or narrow shoulders, you can adjust the shoulder seams on the pattern so the sleeve starts in the right place - ideally at the end of your shoulder, where you can feel the socket move. Move the armhole end of the shoulder seam line in or out, then re-draw the armhole curve to meet this point, making sure the corner is a right angle.
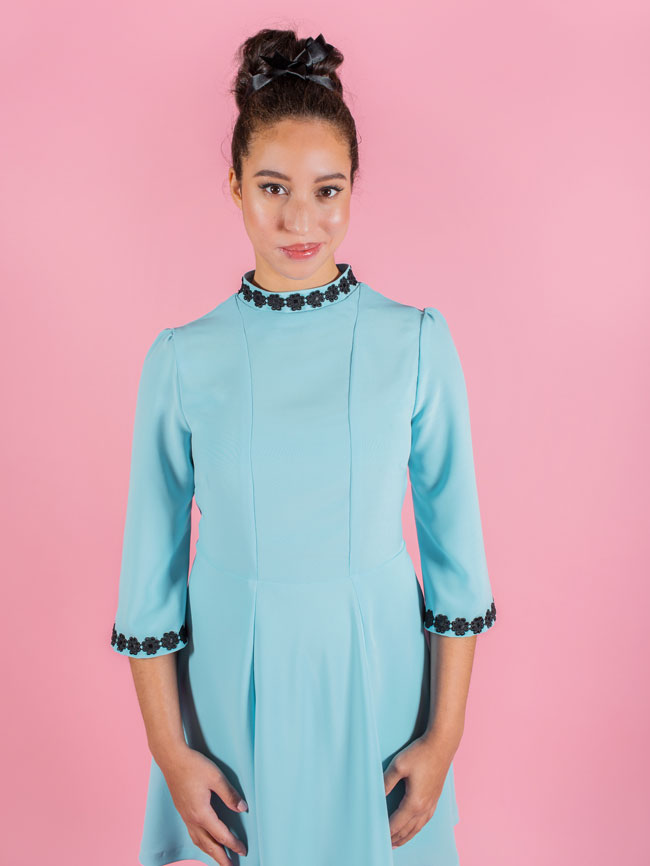
Phew! This is a mega bumper post today, guys. Congrats if you’ve made it this far, your reward shall be a beautifully fitted Martha dress :)
I think we’ve managed to cover the most common fitting issues there are, but fitting is a huge topic, so if you need a more comprehensive list of fitting alterations, we like the books Fit for Real People by Pati Palmer and Marta Alto and The Complete Photo Guide to Perfect Fitting by Sarah Veblen. (These are affiliate links.)
One final word of advice. When you spend all that time fitting and sewing your own dress, you're bound to notice little things that you'd never spot on shop-bought clothes. Make a dress that you're happy with, but don't get so caught up on tweaking the teeniest things that you take the joy out of sewing, or forget to live your life :)
