
A "snap" is a type of fastener which connects two pieces of fabric together by connecting two interlocking discs. They are also known as studs or poppers and can be made in either metal or plastic. If you want a bit more info about the different types of snaps out there, Closet Case Patterns have written an excellent post which explains the difference between "ring" and "spring" snaps.
The pictures I have included here are of spring snaps, specifically Prym 15mm anorak snaps (this is an affiliate link). They are my favourite kind of snaps and I've used them on both jackets and skirts. Our latest pattern, the Eden coat or jacket, has the option of using snaps, and I love how they look on a bright jacket. And, they're fun to insert once you know how!
So without further ado, read on for my top tips for stress-free snaps.


1) Tools
You can install snaps in a few different ways - either with a good old fashion hammer or a specialist snap tool. Both methods will get the job done and it's not necessary to buy a special tool if you don't think you'll be inserting snaps often into your projects, or if your budget doesn't allow it.
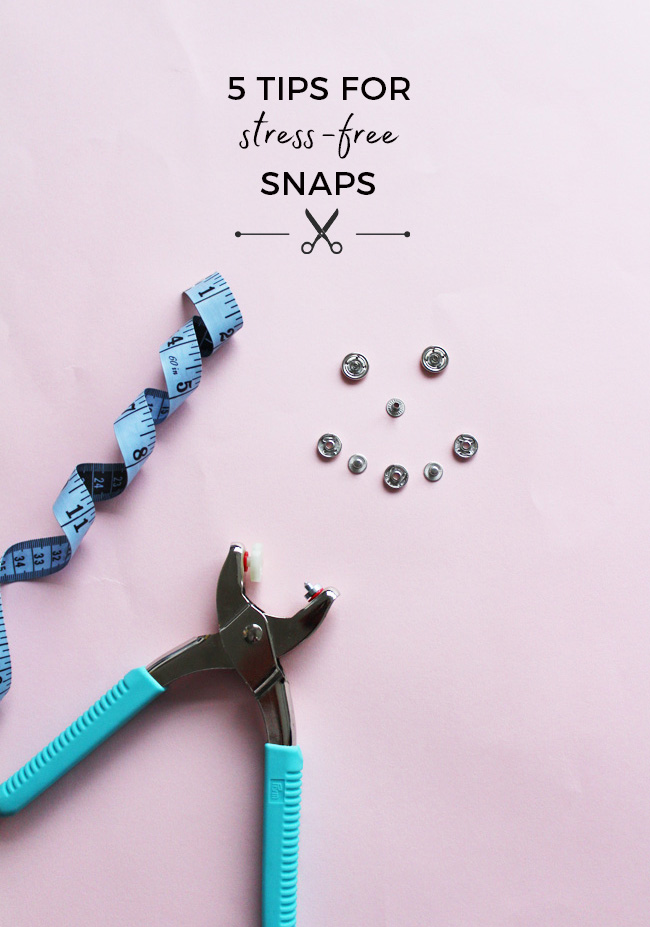
However, it is significantly easier to use a snaps tool and I'd thoroughly recommend investing in one if you see a moderate amount of snaps installation in your future. It also has the benefit of being a lot quieter. In the studio, we use the Prym Vario Pliers, which can be used for attaching both snaps and jeans buttons - win!


2) Organisation and understanding
Chances are, if you're using snaps for the first time you'll be a little bamboozled about which bit goes with what. I know I was! So let's dive into a brief lesson on the anatomy of a snap.
Have a look at a ready to wear item (a jacket or a bag, for example) that has a snap closure and look at how it works. The smooth, outside bit is the "cap" and is the only bit that's seen when it's closed. If you flip it over there'll be a "socket" keeping it in place. The socket connects to a "stud" which is held in place by a "post". The cap and socket connect together on one piece of fabric, and the stud and post are on another.
It's vitally important when installing snaps that the correct bits are matched together, else you'll end up in a bit of a muddle. You don't have to memorise the names but I'd definitely advise laying out all the pieces and checking the back of the box to see what piece goes with which. I like to line them up neatly in rows, with the caps and sockets on one side, and the studs and posts on another side so I don't get them mixed up. You could even label them to make it extra clear.
When it comes to installing snaps, the method can differ on whether you're using a tool or hammer, or what type of snaps you're using. Whatever brand you opt for, make sure you buy a pack of snaps with the attachments included instead of a just a refill pack as they assist in getting a good finish. The manufacturer's instructions will explain which attachment is used to stabilise which bit, so make sure you give them a read so you understand the process :)


3) Practise
It might be tempting to dive straight in and start inserting snaps into your exciting new project that you're desperate to wear but woah, slow down buddy! It's always a good idea to practise on a spare snap to two to make sure you're totally sure which way round to do it and to finesse the technique.
When practising, make sure you're mimicking how it will be on your real garment - interface the fabric and practice on the same number of layers as the real thing. Make sure you're happy with what you need to do, such as the amount of force you need to apply and the way in which you do it before moving on to your shiny new garment.

With four different bits of a snap to deal with, plus a hammer or plier tool, it's easier than you think to accidentally insert one of the snap pieces the wrong way round (*ahem* speaking from experience). In fact, on my first Eden coat, I somehow inserted the top snap back to front so the nice smooth cap bit was facing the inside of the jacket. Noooooooo! I managed to wrench it out with a pair of pliers, did some emergency darning on the offending area and inserted another one correctly, but it did cause a stressful thirty minutes that were not necessary to a happy sewing life.
So, make sure you check, check and double check when you are inserting each snap that it's going in the right way round i.e. the socket and studs will click together when it's closed. When using the snap pliers, the cap sits in a smooth bowl shaped attachment and isn't held in place firmly, which means you need to flip the garment so the cap is on the bottom and the socket is on the top. The same applies to the stud and posts - the stud sits on the bottom and the force is applied to the stud on the top to insert it.

5) Approach
By the time you get to the point where you are inserting snaps, you may have already marked the fabric in chalk pencil or washable pen to indicate where they should go. Before you crack on inserting them, make sure you're still happy with the positioning. To get the best results, start with the snaps on the outside of the garment (the cap and socket), and insert all of these before moving on to the inner ones.
To make sure everything is lined up as it should be, close the garments and mark where the studs and posts will go, using the snaps you've just inserted as a guide. This bit's a little tricky but will make sure everything is lined up beautifully.

So those are my top tips for stress-free snaps! Don't forget to go slowly and double check everything to avoid any mishaps, and you'll be left with an amazing garment to treasure for years to come :)
PS. If you liked this post, you may also like How to Sew One-Step Buttonholes and How to Sew a Zip Fly - With Video!
