

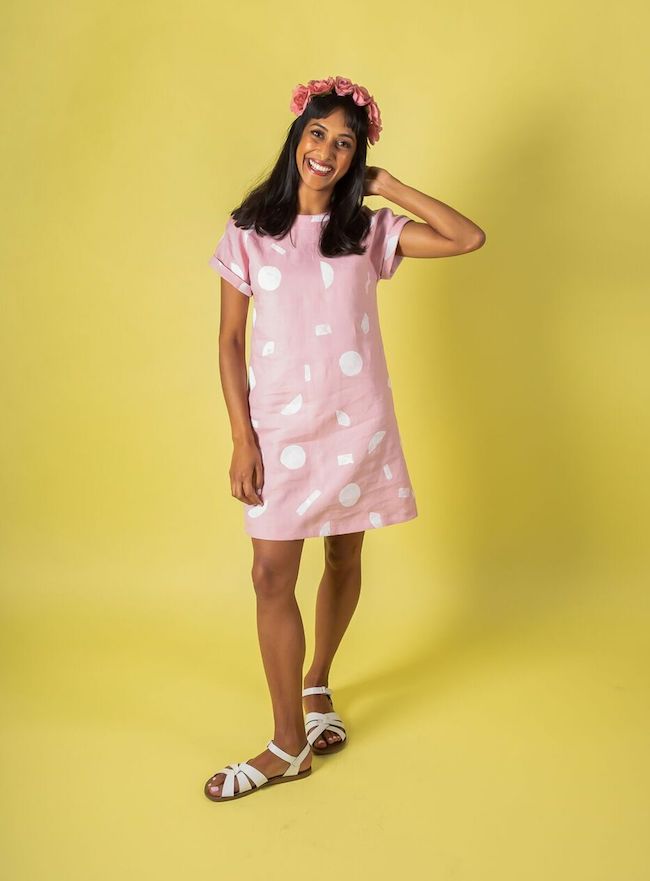
We've had lots of questions about this gorgeous pink fabric featured in our Stevie tunic pattern shoot. Where did we find it? Well, the model, Zeena Shah, hand-printed it herself - using a parsnip!
As you may know, rather than using model-models for our patterns, we like to hire non-professional models with other creative talents, most of whom we know personally. Zeena is a designer, print maker and author, as well as creator of the most inspiring Insta account - and today we have a special treat for you as she's going to show you how to print your own fabric. With root vegetables. As you do...

Hi guys, it’s Zeena Shah here for a special guest post celebrating the launch of Tilly’s newest patterns!
If you don’t already know me, I’m a London based print designer, maker, illustrator and author of the book How to Print Fabric and illustrator of Scandia, a colouring in book journey. I’m a trained print designer and teach creative workshops in print and pattern design. I love sharing my skills and getting everyone making!
I was lucky enough to be asked to model these dreamy dresses and had such a fun day shooting in the studio with the team. I’m super excited to share with you a simple printmaking technique to create your own printed fabric at home that you can turn into this gorgeous Stevie dress I’m wearing!
I’m sure most of you reading this blog sew and make your own garments already so I’m going to show you a wonderful technique for creating a printed pattern onto fabric at home. If you’ve ever tried potato stamp making this is not far off but instead of a potato we’ll be using a parsnip to create this gorgeous pattern. (Yes you read that correctly - a parsnip!).
Read on to find out how and all of my top tips for perfect printmaking!

You will need:
- White opaque water based fabric printing ink - available in all good craft stores. I used this one
- Hard vegetable - parsnips, turnips and carrots will work best as they’re firm and less soggy than a potato
- Fabric - I used a 100% pink linen fabric from my stash for this make. You can find a similar one here. *Set aside a fat quarter or some scraps to test print onto as well as enough for your chosen pattern*
- Ink roller
- Chopping board and knife
- Plate or ink tray
- Wet wipes and kitchen roll (you may get a little bit messy!)
- Masking tape
- Hairdryer (optional)
- Trick marker and ruler (optional)

1) Choose a hard vegetable to print with. I suggest large turnips, parsnips, carrots or similar for this pattern design. With a knife and chopping board cut into discs, chop again into halves to create a selection of circles, triangles and then rectangles. Set aside on a plate.
2) Prepare your fabric for printing. Make sure you have washed and pressed your fabric as any creases in the material will affect the quality of the print. Set aside along with the smaller test piece.
3) Prepare your printing surface by covering a flat surface with some old fabric or a wipe-down tablecloth. Lay the fabric test piece you set aside down. Secure in place with a small amount of masking tape at the edges so it doesn’t move.
4) Spoon some ink out onto a tray or plate and slowly roll it out into a thin layer. Press a piece of your chosen vegetable firmly into the ink ensuring it is completely covered with ink and then press down firmly onto your test piece of fabric.
Experiment with the amount of ink you use and pressure to create a mark you are happy with. The beauty of printing by hand are the irregularities you wouldn’t get through any other method so don’t expect a perfectly crisp print. It will be completely unique.
5) When you are happy, repeat this process on your final fabric length. Dry each area of print with a hairdryer for a few minutes before moving to ensure a smudge free fabric.
I'd recommend printing your shapes organically to create a random all over pattern design. If you like more regimented designs then just use a rule and trick maker to measure out where you’d like each shape to fall. The marker will then disappear and be hidden by the print.
6) Leave the fabric for 24 hours to dry completely before pressing on the reverse to cure the ink.
It is now ready to cut into pattern pieces and is 100% washable.

FABRIC FAQs
What type of fabric should you use?
100% natural fabrics will always work the best for any type of printmaking. I use 100% cottons or linens (washed and pressed) when printing with this technique. Always refer to your printing ink guidelines before purchasing your fabric and check the recommendations as they can vary from brand to brand.
Can I wash my fabric?
Leave your print to dry for 24 hrs and iron it on the reverse to cure the ink. It’ll then be completely washable. From my experience wash at 30 degrees to keep your print looking pristine. Always refer to the instructions on your inks for their recommended best practices.
TOP TIPS
Make sure you have a clean and flat surface to print onto. I’d suggest covering your surface with a wipe down table cover or some old fabric to protect it from any stray ink.
When you feel confident printing directly onto fabric you can cut out the pattern pieces and work onto these to save time. Just don’t drop any ink! If you do a baby wipe is the best way to remove it, make sure not to let it dry.
There are no rules for printmaking - experiment with pattern design, scale and direction of print to build an organic print design.

I hope you’ve enjoyed learning how to start printmaking and this has given you the printing bug. It really is addictive! I’d love to see what you make - tag me @heartzeena #printwithzeena to share your prints and @tillybuttons #SewingStevie to show us your Stevie makes.
For more printmaking projects and inspiration check out my book How to Print Fabric and find me on Instagram for all my daily goings on. Oh and go and get making Stevie right now!
Zeena x
Thanks so much Zeena! We don't know about you guys but we can't wait to try printing fabric for ourselves!
