

Finishing the seams on your handmade clothes is important to neaten them, strengthen them and prevent them from fraying. If you don't have an overlocker or serger, a simple way to finish seams is by using the zigzag stitch on your sewing machine. It's how I was first taught to finish my seams and is a technique I used all the time before I got my overlocker.

I would recommend getting an overedge, overcast or overlock foot for your sewing machine - in fact, you may already have one included with your machine. They can look a little different depending on which model you have - this one has a little brush but they don't all have this. The key feature of this type of foot is a little buffer or guide which you line up with the raw edges of the fabric - this makes it easier to get the zigzag landing in the right position.
If you don't have one of these, don't worry - just be sure to test out the placement of the zigzag by turning the handwheel towards you before you put your foot down on the pedal.
Here's how to zigzag finish your seams:

1) Stitch your seams as normal, then trim them down. Don't go crazy here, you need some width to accommodate the zigzags - leave at least 7mm (1/4in) or so.

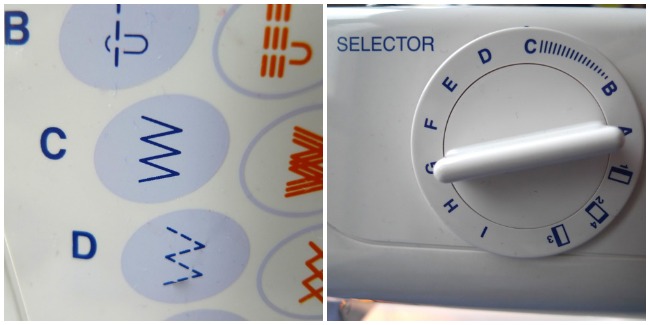
2) Set your machine to the zigzag stitch setting. The first image shows this on a digital machine, the second on a mechanical model. I usually set my zigzag to a regular 2.4-2.5mm length and 3-3.5mm wide.

3) Attach your overlock/overedge/overcast foot on your machine if you have one. Line up the raw edges of the fabric with the guide on the foot. On light- to medium-weight fabrics, I usually finish the seam allowances together as one; on heavier fabrics or where there is an opening in the seam (for a pocket, for example), I finish each seam allowance layer separately.
If you don't have this foot, make sure the presser foot you're using has a wide hole in the middle.
Slowly turn the hand wheel towards you to check the needle doesn't hit the foot - adjust the width of the zigzag if it does.

4) Stitch the seam allowances, keeping the edges lined up with the guide on the foot. The right-hand point of each zigzag should just reach the edge of your fabric.
Some sewing machines will happily backtack (reverse stitch) on the zigzag setting, in which case backtack at both ends of the seam. Other machines will knot the threads up when you try zigzag backtacking, in which case you can tie the loose threads in a double knot by hand. Alternatively you could backtack on the straight stitch setting at either end of the seam.

5) Press the seams either open or to one side (depending on whether you stitched them separately or as one).
Liked this post? You may also like Ten Tips for Pressing Your Sewing Projects Like a Pro.
