If you're thinking of making the Sonny jacket and have a few questions about how to get a great fit, you've come to the right place.
Sonny is an ultra-versatile jacket with a relaxed, boxy fit, making it simple to fit. Good stuff! However, as we are all wonderfully unique in shape and size, you might want to make a few changes to your pattern pieces to make it suit your body better. Here, I'm going to talk you through the most common fitting adjustments you might want to consider making to your Sonny jacket.
In this post we're going to cover:
Making a toile
Choosing your size
Lengthening or shortening pattern pieces
How to combine pattern sizes
Making a toile
A toile - or a "muslin"- is an initial mock-up of your garment in fabric you don't mind using for testing purposes. A toile is a great opportunity to test the fit of a sewing pattern or practice a technique, like inserting a collar, before you cut into your nice fabric.
The Sonny jacket is a relaxed fit, meaning you don't necessarily need to make a toile for fitting purposes. If you're planning on wearing your favourite chunky knit under your Sonny and want to check it will be comfortable, we recommend making a quick toile of the front and back bodice pieces and sleeves to check the fit. Pick a fabric with a similar weight and drape to the fabric you have in mind for your final project.
Ultra versatile, you can make it as a classic jacket that will never go out of style, or try the on-trend prairie collar for Ganni-esque vibes. Sonny can be made as a casual unlined jacket, but if you do want to line it, we have created a separate lining add-on PDF pattern for a polished inside finish.
One of the things we love the best about Sonny is how different it can look depending on which version you make and what fabric you use. You can go utility style with a classic pointed collar, or make a designer-style jacket with the on-trend frill prairie collar. Let's take a look at Sonny's details:
Boxy fit bodice with drop shoulders and princess seams creating gentle shaping at the bust
Choice of pointed collar or oversized frill collar
Separate yokes, forward shoulder seams and front panels
Optional chest pockets and flaps
Easy-to-sew straight sleeves
Choice of hip-length or cropped hemlines
Mock flat felled seams create a durable finish
The Sonny lining add-on pattern includes bodice and sleeve lining pattern pieces to compliment all versions of the Sonny jacket, as well as a hanging loop so you can display your gorgeous creation with pride.
Both the Sonny jacket and lining are availablein sizes UK 6-34 / US 2-30 / EUR 34-62. The full size range is included in each pattern. Sizes UK 6-16 and 18-34 are created and graded for a different set of proportions, so you will notice there is more shaping on the larger pattern sizes to account for a fuller bust.
The Sonny jacket pattern is available either printed or PDF,and the lining add-on is available as a PDF download only.
Order the Sonny jacket printed sewing pattern and we'll send you a beautiful package in the post, with a full-colour instruction booklet. Made in the UK, our patterns are printed on durable paper which you can use again and again without it tearing or scrunching up.
The Sonny lining add-on pattern and Sonny jacket are available as an instant PDF download. You'll get an email straight after purchase with a PDF to either print and assemble at home on A4 or Letter size paper or send to a copyshop or pattern printer to print full scale on A0. Need further help? Read our guide to using PDFs.
Whichever format you choose, the pattern will be accompanied by our award-winning instructions with step-by-step colour photos to guide you through the project. The pattern pieces themselves are clearly labelled so you can see which seam is which and how they go together.
Sonny works best with medium- to heavy-weight fabrics that hold their shape. Think denim, twill, corduroy, jacquard or wool.
If you're making the prairie collar version with collar frill, make sure the fabric is light enough to gather - ideally you will be gathering up two layers of frill fabric at once, but if the fabric is struggling you could sew gather stitches on each layer separately. Another option is to use a different fabric for the collar frill, allowing you to experiment with different textures and patterns.
If you're lining your jacket using the Sonny add-on pattern, use slippery lining fabrics such as cupro (Bemberg), viscose (rayon), acetate or polyester lining. Alternatively, you can line the sleeves in lining fabric and use a cotton lawn, viscose or teddy/sherpa fleece for the bodice lining.
We know some makers are planning to make Sonny as a blouse instead of a jacket - we are excited to see it! If you want to try this, use something like a cotton lawn or even a more drapey viscose, lengthen the pattern, and add an elastic channel to the ends of the sleeves.
TIPS & TUTORIALS
We have labelled Sonny as suitable for "confident beginners". While making a jacket may seem daunting, it's actually just a series of relatively simple steps. The trickiest bit is sewing buttonholes, but we have lots of tips for that! You will be supported all the way with our clear instructions, and if there are any techniques you aren't sure about, you'll find lots of extra help on a dedicated space on the blog.
If you're yet to line any outerwear on your sewing journey, the Sonny lining add-on is the perfect place to start. We did a lot of research and development to hone our instructions and you'll be amazed at the final result!
We are looking forward to seeing your Sonny jackets - both in-progress shots and finished makes. Don't forget to tag us on Instagram @TillyButtons using the hashtag #SewingSonny so we can swoon over what you're making. Happy sewing!
There’s a whole world of amazing sewing tools out there that have been designed to make your crafting easier. To celebrate Disability Pride Month, we’ve commissioned Samantha Waude from @PurpleSewingCloud – who you may recognise as a Tilly and the Buttons model from Make It Simple and Agnes – to share her top five accessible sewing tools.
Whether you consider yourself to have disabilities or not, you will want to get yourself some of these! Over to Sam…
“Hi, I’m Samantha, I’m feel very excited to be invited by Tilly to write this guest blog post about my top five sewing tools.
As a sewist with disabilities, my sewing tools are very important to me. Over the years I’ve curated a collection that works best for my needs and disabilities - without them I wouldn’t be able to sew and create a beautiful wardrobe of clothes that make me smile.
I’ve chosen my top five tools that I use every time I sew and are essential to me. These tools will work for everybody too, not just for people with disabilities - so keep reading or watch my video!
Have I ever told you how much I love embroidery? I find the process itself so soothing, and the perfect way to unwind after a long day. And the result is such a pretty way of embellishing both ready-to-wear and me-made clothing to make them truly special.
Ever since I first designed the Marnie blouse sewing pattern, I’ve had the idea in my head for a version with a flower-embroidered yoke – earlier this summer I turned this dream into a reality.
If you’d like to create a similar effect, I’m going to show you how to embroider flowers on your clothing. This tutorial is simple enough for embroidery beginners, and will teach you a few different stitches along the way – lazy daisy stitch for the petals, French knots for the centres, fishbone stitch for the leaves and back stitch for the stems.
Confession: I’m not the world’s neatest or most patient hand stitcher, but I adore the result regardless. So, even if you’re not the most confident embroiderer, I’d still encourage you to give it a go!
[In the intro I accidentally said "satin stitch" but I meant "fishbone stitch" - oops!]
Do you often feel as though you need a bit more room in the stomach area in your trousers or shorts? If you're nodding your head in agreement, you may benefit from doing a full tummy adjustment to your me-made garments.
A full tummy adjustment adds width and length to the stomach area on a pair of shorts or trousers (or pants if you're one of our North American friends). It's a handy adjustment to do if you need a little bit more room across the tummy, but the rest of the trousers fit well and feel comfortable.
But how do you know if you need a full tummy adjustment? If you often get drag lines across the stomach, a tight front crotch or if the side seams are pulled forward in line with the tummy area, this can indicate that you could benefit from a bit more room across the front. Even a small full tummy adjustment can make all the difference to how your shorts and trousers fit, and is a great adjustment to keep up your sleeve, or should we say down your leg (sorry).
We've made a video which explains how to do a full tummy adjustment from start to finish. If you prefer to learn via diagrams and text, then keep on reading.
For this tutorial you’ll need your front leg pattern piece, a pen or pencil, a ruler, some scissors, some tape, and a bit of paper.
So, once you’ve got those handy, let’s get started.
If you're sewing up an Esti co-ord or two this summer, you're in the right place for a healthy dose of fabric and high-street inspiration for your makes!
Ideal for all your favourite spring/summer fabrics, Esti is designed for light- to medium-weight woven fabrics. Try linen or chambray for a more structured silhouette, or viscose (rayon) or Tencel (lyocell) for a drapier look.
First, let's have a peek at the lovely Esti samples...
Thinking of making the Esti top and trousers or shorts and want some extra tips on how to get a great fit for your unique body shape? Then keep on reading as this post is for you.
Esti is a simple to sew and incredibly versatile top-and-trouser or top-and-shorts co-ord that you can wear all year round!
Since we're all different shapes, we sometimes need to make adjustments to sewing patterns to get a fit that we're happy with. Here, I'm going to talk you through the most common fitting adjustments you might want to consider making to your Esti Co-ord.
In this post we're going to cover:
Making a toile
Choosing your size
Full bust and small bust adjustments
Lengthening or shortening pattern pieces
How to combine pattern sizes
How to adjust the neckline
Full tummy adjustment
Lengthening or shortening the crotch
Making a toile
A toile - or a "muslin"- is an initial mock-up of your garment in fabric you don't mind using for testing purposes - pick something with similar weight and drape to the fabric you have in mind for your final project. Making a toile is a great opportunity to test the fit of a sewing pattern or practise a technique on sacrificial fabric before you cut into the nice fabric you have lovingly chosen and purchased for your project.
Esti includes all 15 sizes in our range. Pattern sizes 1-6 (UK 6-16) and 7-15 (UK 18-34) have been drafted, fitted and graded separately to create a better fit. For this reason, you may notice the proportions change in the measurements chart and the shaping is slightly different on the pattern pieces – differences for sizes 7-15 include room for a larger bust (10cm/4in difference between high bust and full bust, as opposed to 5cm/2in difference on sizes 1-6), more room at the waist, plus a longer front crotch curve.
To find your size, using a flexible tape measure, measure the circumference of your:
Bust - take the measurement at the fullest point i.e. around your nipples
Waist - where you bend at the side
Hips - the fullest part - it helps to turn to the side and look in a mirror to see where this is
Check the tape measure is sitting level with the floor - it can help to turn to the side and look in a mirror to check.
Our Esti top-and-trouser co-ord sewing pattern makes an instant outfit, staple separates for layering, or even a chic faux jumpsuit. It's an easy sewing project that's great for beginners, and a speedy, satisfying make for more experienced stitchers.
Esti is a two-piece set comprising a strappy top and trousers or shorts, which you can make to be worn together or separately.
The top has:
Chic square neckline
Straps wide enough to cover a bra
Diagonal bust darts for shaping
Two lengths - finishing at the waist or high hip
Finished with an easy-to-sew facing on the inside
The bottoms have:
Wide, slightly flared legs
Choice of three hem lengths - shorts, cropped or full length trousers
Elasticated waist all the way around, finished with topstitching
Optional large patch pockets on the bum
If you know the Safiya trousers from my book Make It Simple, you may be wondering how the trousers compare to those. The Esti trousers have wider, more flared legs (Safiya legs are straighter), a higher rise at the back, the waistline is elasticated all the way around (Safiya has a flat front) and finished with topstitching, they come in three lengths (Safiya trousers are cropped), plus they're available in 15 sizes from UK 6-34 as a separate pattern to the book.
Do you ever wish your me-mades fit better across the bust? Do you find that excess fabric seems to pool around your bust, or that it's too tight? Ever think that the bust darts point in the wrong place on your garments? If you're finding yourself nodding enthusiastically in agreement to any of these statements, then you probably need to do a bust adjustment to your bodice pattern pieces.
It's Nikki here, Product Manager and fitting geek at Tilly and the Buttons, and I'm going to to talk you through how to do a full bust adjustment, a small bust adjustment and how to move the dart on a bust darted bodice.
Now, before we go any further I'd like to give you a little positive pattern pep talk. There are a few diagrams in this post, but whilst they might look quite daunting, they are relatively simple if you follow them step by step :)
How do I know if I need a bust adjustment?
There's a technical and a not-so-technical answer here! The answer depends on your own unique shape and the fit of the garment - you may not need to do a bust adjustment to a loose top or dress, but might have to do one on something more fitted. If you find that things are generally either too tight or too loose in the bust area, then I'd recommend making a quick toile of the bodice, or wearable toile of the whole garment to test the fit around the bust and take it from there. I'm going to briefly cover how you would work out how much to add or subtract from your bust in the adjustment, but do remember this is just a rough framework, and you might not need to do it at all.
Measure your high bust (your upper chest, just under your armpits). If you're making one of our patterns that comes in sizes UK 6-24, or which comes in sizes UK 6-34 and you're making size 6-16, add 5cm (2in). If you're making one of our patterns that is in sizes 16-34, or which comes in sizes 6-34 and you're making size 18-34, add 10cm (4in). Choose the pattern size with that bust measurement – this is the size you’ll do your bust adjustment on.
Now measure your full bust (fullest part, around the nipples) and compare it to the bust measurement on the pattern size you just selected.
If your full bust is 5cm (2in) smaller than the pattern, you’ll be subtracting 5cm (2in) from the pattern; if it’s 7.5cm (3in) bigger, you’ll be adding 7.5cm (3in) and so on. If you need to make the bust bigger, you'll need to do a full bust adjustment (FBA) and if you need to make it smaller, you'll need to do a small bust adjustment (SBA).
Since the front bodice pattern represents one half of the top, as the fabric is cut on the fold - or one boob - you'll be adding or subtracting half of that difference. So, if you want to do a 5cm (2in) full bust adjustment, you'll need to add 2.5cm (1in) to the pattern piece.
There are a few ways in which you can do a bust adjustment, but the method I'm going to show you today is the "slash and spread" method. It sounds a bit aggressive but this just means that you do the adjustment by cutting into your pattern piece and either spread it apart to create more space at the bust, or overlap it to make it smaller.
To do a bust adjustment you will need:
a ruler (or pattern master if you have one)
glue stick and/or sticky tape
pencil
paper scissors
extra paper
As you'll be merrily snipping into your pattern piece with wild abandon for these adjustments, I thoroughly suggest tracing off the front bodice pattern piece so you can keep the original one intact in case you need to make any further adjustments. Make sure you trace all the notches, the dart and 'lengthen or shorten here' lines onto the new pattern piece.
Got your scissors and ruler at the ready? Ok, let's go. And remember, you've got this!
Knowing which side of your fabric is the “right side” is an essential part of any sewing project.
The “right side” of the fabric that is meant to be visible from the outside of your garment for everyone to see, while the “wrong side” is the side that will be hidden on the inside.
Sewing patterns will usually tell you to sew with right sides together, so the seams end up hidden on the inside of the garment. Exceptions include when you’re sewing French seams, in which case you start with the wrong sides together, or when you’re attaching a piece such as a patch pocket to a garment, when you’ll place the wrong side against the right side.
So it’s important to know which side is which! Some fabrics can be a lot easier to tell which is the right side than others. Others can be more tricky, but with these five simple tips, you should be able to identify yours in no time.
1) See if the right side looks different
The first and most obvious way to check which side is which is to look for any visual differences between the two sides. If your fabric has a print on only one side, then that side is most likely the right side. If your fabric has a print on both sides, the right side may appear brighter than the wrong side.
In the case of solid fabrics, you can hold the fabric up to a light source to check for any differences in tone or sheen between the two sides. Choose which one you prefer and make sure to keep your fabric the same when up when cutting your fabric to keep it consistent.
Have you ever tried sewing with a scallop edge stitch? If you're looking to add a charming, decorative touch to your sewing projects, it’s a beautiful option. Sewing a scallop stitch on your sewing machine is not only simple, but also a fun and creative way to add unique detailing to garments, accessories, and home decor items.
What is a scallop stitch?
The scallop stitch is a decorative stitch on your sewing machine which creates a wavy effect. You can use it on its own to sew one or more pretty rows of stitching or, as I will be demonstrating here, along the edge of a hem, cutting away the fabric below to leave little scallops along the edge.
What do I need to sew a scallop stitch?
You will need a sewing machine that has the scallop stitch as an option, so check your manual to see if includes it. I’m using the Janome DKS100 Special Edition.
Depending on your fabric, you may also need some kind of stabiliser, such as spray starch, interfacing or embroidery stabiliser – I’ll talk about that a bit more below.
What garment projects could I sew the scallop stitch on?
You can also sew scallops in the middle of a piece, like I have here on the front yoke of the Marnie blouse, in which case there’s no need to trim off the excess fabric.
Cotton is a popular fabric choice among sewists and crafters, and for good reason! With its breathability and wide availability in a huge range of prints and styles, it's no surprise that cotton has had a bit of a renaissance in recent years.
In particular, finer cottons like lawn, voile, Swiss dot and seersucker have become increasingly popular. They are relatively easy to cut, sew and press, yet lightweight, so provide a lovely balance of structure and drape.
Cotton is one of the easiest fabrics to work with, but still has its quirks. But with the following tips, you'll be well on your way to sewing some gorgeous cotton clothes…
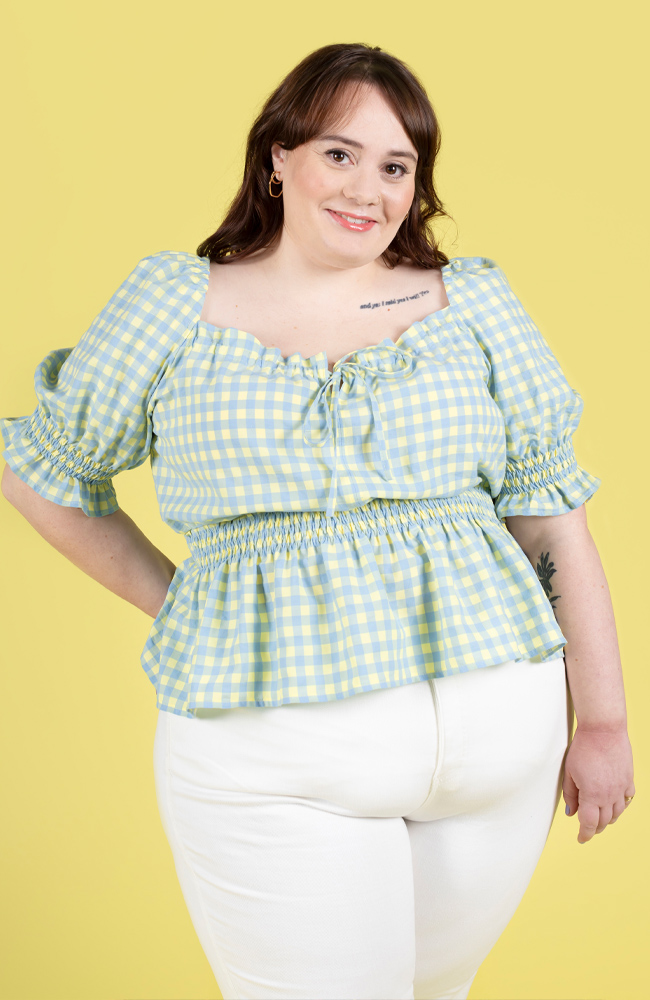
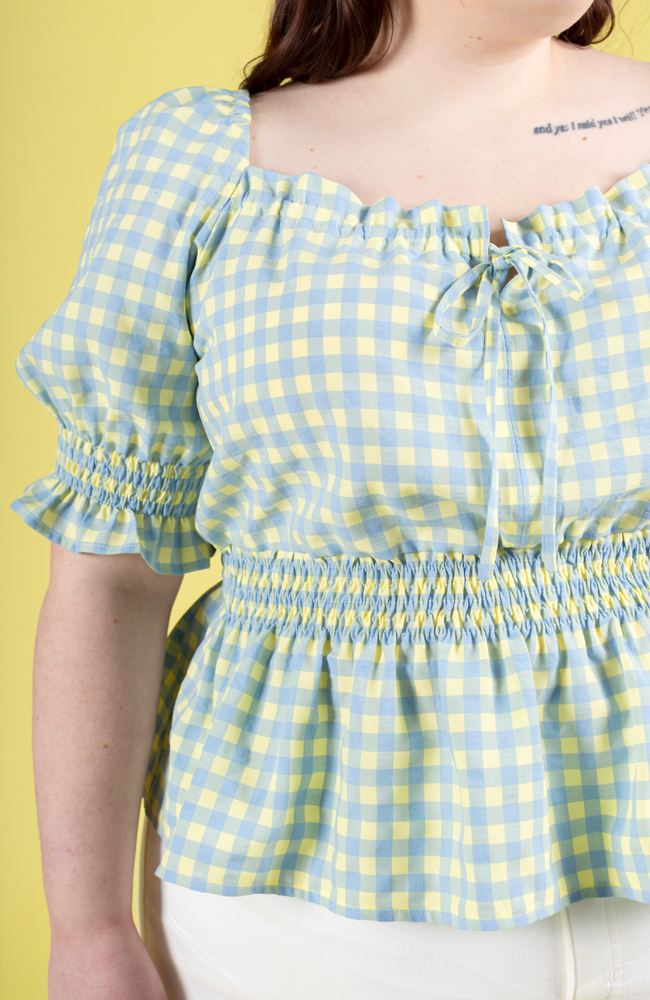
Fancy trying your hand at shirring? This lovely sewing technique creates a pretty gathered texture on garments, with the bonus of an adjustable elasticated fit.
Shirred styles are all the rage on the high street at the moment, and creating this effect is not only fun and fulfilling, but it’s easier than you may think. You just need to know a few simple tips and tricks – I’ve outlined the method in this post, accompanied by a free video tutorial, all brought to you thanks to the support of Janome UK.
I’m demonstrating on our Mabel blouse and dress sewing pattern, which has a shirred waistline and sleeve cuffs. You can use the same technique for sewing shirring on other patterns too.
What is shirring?
Shirring is a technique where you sew rows of stitching using elasticated thread (shirring elastic) in the bobbin. The shirring elastic, which ends up on the underside of the project, gathers the fabric up to make it smaller – usually around half its original width – creating a pretty surface texture and an adjustable, stretchy fit.
Shirring can be added to various places of a garment to create shaping as well as decorative detail. It’s most commonly used on the bust, waist or sleeve cuffs.
Crushing on the Mabel dress and blouse pattern but not sure how to get a great fit? In this blog post we're going to talk you through the most common fitting adjustments you might (or might not!) want to make.
Mabel is a dream sewing pattern. Not only does it look sensational (OK, we might be a little biased), it's relatively easy to fit too. The blousey bodice, elasticated shirred waist, and wide skirt offer comfort and ease in the bust, waist and hip areas, so don't require close fitting. The areas that might need tweaking, depending on your body, are the elastic length in the shoulders and neckline, and we'll explain how you can do this below.
In this post we're going to cover:
Making a toile
Choosing your size
Do I need a full bust adjustment (FBA)?
Lengthening or shortening pattern pieces
How to combine sizes
How to adjust the neckline and shoulders
How to adjust the sleeve shirring
Checking the hem balance
Making a toile
A toile - or a "muslin"- is an initial mock up of your garment in fabric you don't mind using for testing purposes - pick something similar weight and drape to the fabric you have in mind for your final project. Making a toile is a great opportunity to test the fit of a sewing pattern, or practise a technique on sacrificial fabric before you cut into the nice fabric you have lovingly chosen and purchased for your project.
For Mabel, we recommend you make a toile to check the lengths of the elastic around the shoulders and neckline. Or how about making a "wearable toile" - this is a practice garment in fabric that you don't mind ditching if the fit isn't quite right, but you like enough to wear just in case it fits you well first time. You'll want to check the fit of the bodice, sleeves and peplum, so the top version is perfect for a wearable toile.
Mabel includes all 15 sizes in our range. Pattern sizes 1-6 (UK 6-16) and 7-15 (UK 18-34) have been drafted, fitted and graded separately to create a better fit. For this reason, you may notice the proportions change in the measurements chart and the shaping is slightly different on the pattern pieces – sizes 7-15 include room for a larger bust (10cm/4in difference between high bust and full bust, as opposed to 5cm/2in difference on sizes 1-6) and a bit more room at the waist.
To find your size, using a flexible tape measure, measure the circumference of your:
Bust - take the measurement at the fullest point i.e. around your nipples
Waist - where you bend at the side
Hips - the fullest part - it helps to turn to the side and look in a mirror to see where this is
Check the tape measure is sitting level with the floor - it can help to turn to the side and look in a mirror to check.
In the mood for Mabel? You're in the right place! It's time for your dose of Mabel blouse and dress sewing inspiration.
The Mabel sewing pattern is ideal for many fabrics you may well already have in your stash. We recommend lightweight woven fabrics that gather easily. Cotton-based materials such as lawn, poplin, voile and seersucker will give a casual daytime vibe, or you could go with something like a viscose (rayon) or crêpe for a softer silhouette and silkier look for the office or a party.
If you're new to shirring, make your life easier with a fabric with directional lines like ginghams and checks. We love this combo so much, we made our Mabel blouse sample out of gingham too!