Have you ever tried sewing with a scallop edge stitch? If you're looking to add a charming, decorative touch to your sewing projects, it’s a beautiful option. Sewing a scallop stitch on your sewing machine is not only simple, but also a fun and creative way to add unique detailing to garments, accessories, and home decor items.


What is a scallop stitch?
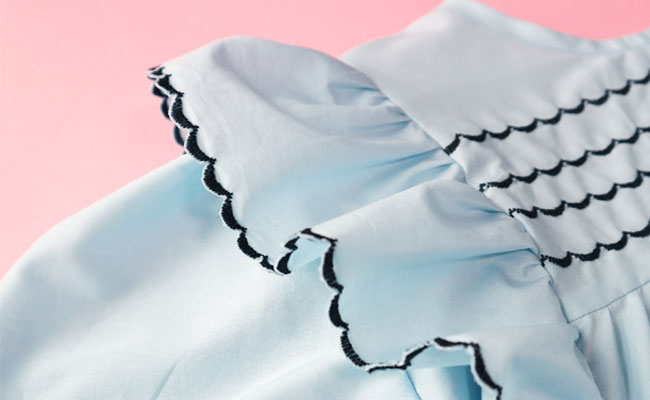
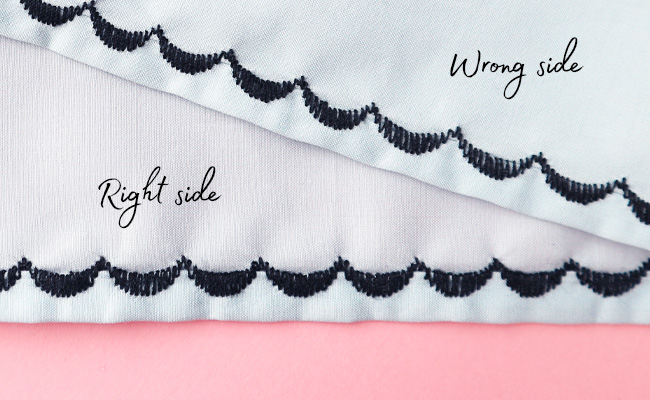
The scallop stitch is a decorative stitch on your sewing machine which creates a wavy effect. You can use it on its own to sew one or more pretty rows of stitching or, as I will be demonstrating here, along the edge of a hem, cutting away the fabric below to leave little scallops along the edge.
What do I need to sew a scallop stitch?
You will need a sewing machine that has the scallop stitch as an option, so check your manual to see if includes it. I’m using the Janome DKS100 Special Edition.
Depending on your fabric, you may also need some kind of stabiliser, such as spray starch, interfacing or embroidery stabiliser – I’ll talk about that a bit more below.
What garment projects could I sew the scallop stitch on?
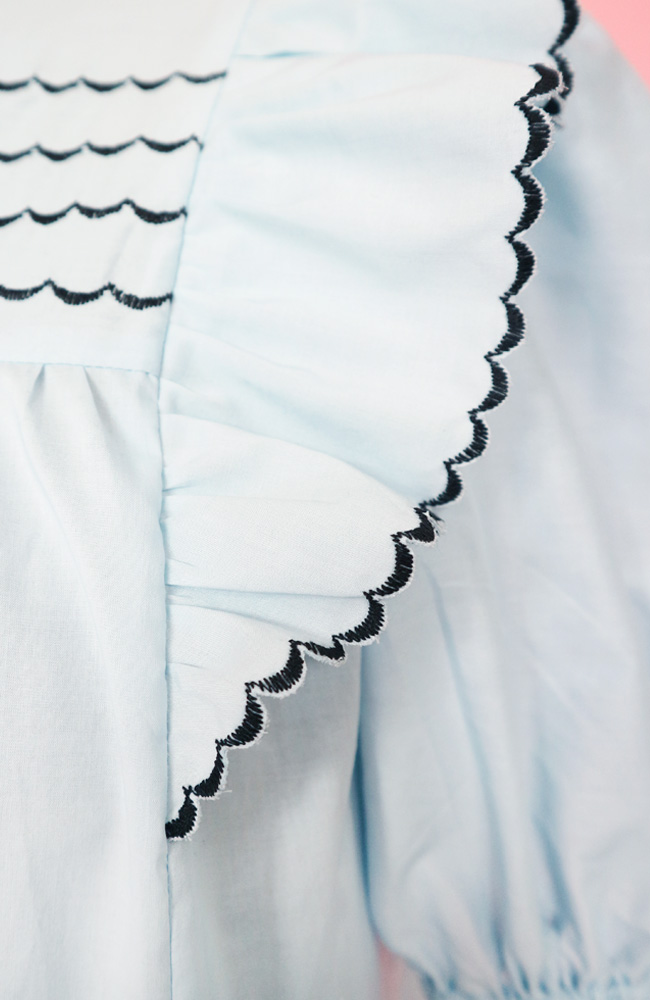
In this tutorial, I'm sewing a scallop edge stitch on the hems of the shoulder ruffles on our Marnie blouse sewing pattern. You could also try this on the Lyra shirt dress collar, the hem of a Mabel dress or the flounce sleeve hems of an Indigo smock.
You can also sew scallops in the middle of a piece, like I have here on the front yoke of the Marnie blouse, in which case there’s no need to trim off the excess fabric.

Preparing your fabric to sew a scallop edge stitch
Depending on your fabric, you may need to stabilise it to make sewing and trimming the scallops a little easier.
If your fabric is on the lightweight side, you may find sewing with two layers is better than one so your fabric doesn't bunch or get sucked into the machine.
You could also try using spray starch on your fabric pattern pieces where you'll be sewing the scallops.
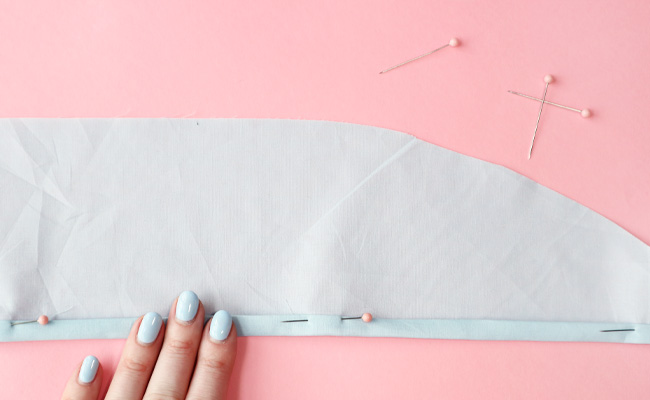
Or cut a 1cm (3/8in) wide strip of iron-on interfacing or tear-away embroidery stabiliser (in a similar weight to your fabric) and apply it to the edge of your pattern piece.
For the cotton poplin I’m using for my Marnie blouse ruffles, I found the best method in this instance was to hem the edge of the ruffles as normal – i.e. press them under by 5mm (1/4in), then press under another 5mm (1/4in). The double layer of fabric creates a sturdy edge for the scallops to adorn.
As with most techniques, it’s always worth experimenting with different finishes on a scrap of fabric to see what suits your material best, before tackling your real project.
Scallop stitch settings
Turn on your sewing machine and select the scallop stitch from the stitch selection panel. This stitch is typically represented by a series of U-shapes, sewn with zigzag stitches.
Attach the recommended stitch foot to your sewing machine (see your manual) – on my Janome DKS100, I’m using the default machine foot A, a multi-purpose foot which is used for general sewing.
You may wish to adjust the length and width of your scallops – again, do test it out on a scrap first. For this tutorial, I’m sticking to the default settings as they suited perfectly (don't you just love it when that happens!).

Sewing scallops
Place your fabric under the foot about 1cm (3/8in) away from the edge, right side up.
Lower the presser foot and, without back tacking, begin sewing. Sew slowly (warning: this does take a while, but it's worth it!) and make sure to carefully guide your fabric, not pulling it through as you don't want to distort your scallops. Continue sewing until you reach the end of your fabric.


Finishing off
Once you've sewn your line of scallops, it's time to trim off the excess fabric. With a sharp pair of scissors, slowly trim around your scallops being careful not to cut through any of the stitches. If you think your fabric may be prone to fraying, you could apply Fray Check to the very edge for extra stabilisation.

It's really that simple! Now you can add this adorable scallop stitch to your me-mades.
If you liked this post, check out Sew Piping to a Collar & Colour Blocking Tips!
