30 April 2015

How to Sew One-Step Buttonholes

How to sew one-step buttonholes


Ready to sew some buttonholes? Some people find buttonholes scary, but once you know how to do it I think they’re much simpler than sewing a zip closure. I’m going to walk you through how to sew one-step automatic buttonholes in this post, and offer some troubleshooting tips to help you have a stress-free button stitching experience.

Read up on making four-step buttonholes if your sewing machines makes this type instead. Your manual will tell you which kind you can sew on your machine.

Sewing machines do vary, so have a quick read through the buttonhole instructions in your manual too in case your machine works differently to mine. And no matter how many times you’ve sewn buttonholes before, it’s always a good idea to test a sample on a double scrap of interfaced fabric before attacking your real garment :)

Right, let’s do this!


How to sew one-step buttonholes

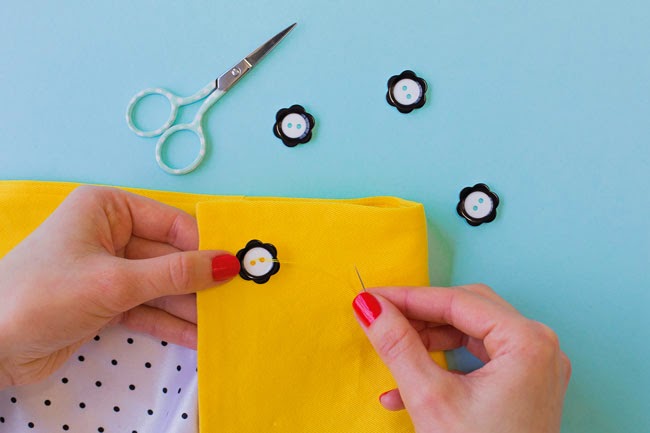
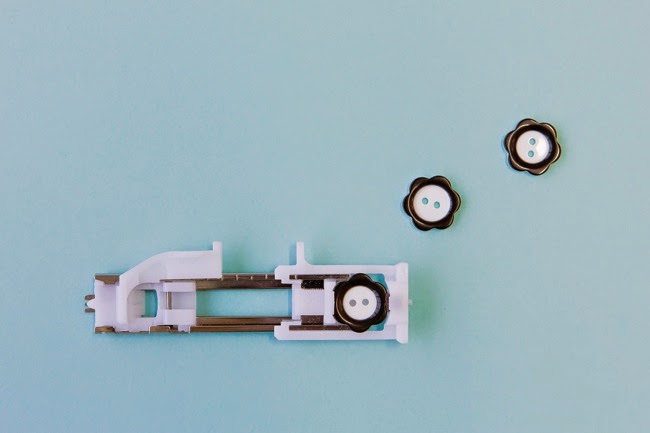
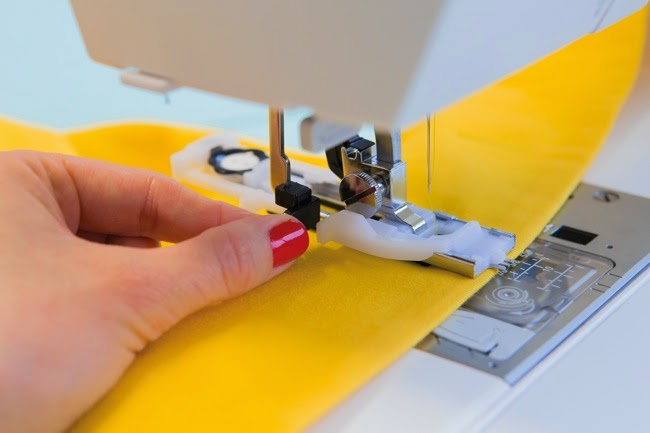
Your machine should come with a buttonhole foot that looks something like this. Place one of the buttons you’re using for your project into the holder at the back of the buttonhole foot. Push the holder closed so it’s gripping the button tightly, making sure the button is lying flat. This will tell your machine the size of your buttons and thus how long to make each buttonhole.

If your buttons are rounded or particularly thick, leave a little extra space as your buttonhole will need to be bigger (check exactly how much space you need by sewing a test buttonhole).

What if you're sewing a buttonhole that won't actually have a button? For example, if you're making a drawstring hole on a hoodie or pair of pyjama bottoms. You can either find a button that's the right size and use that as a stand in for the hole size, or measure the opening in the gauge so it's the correct size.

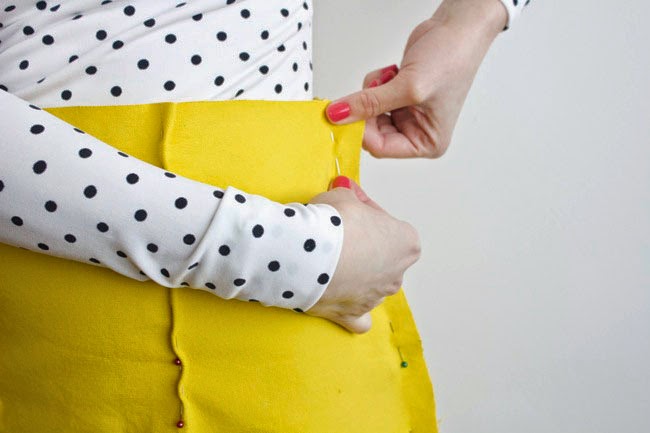
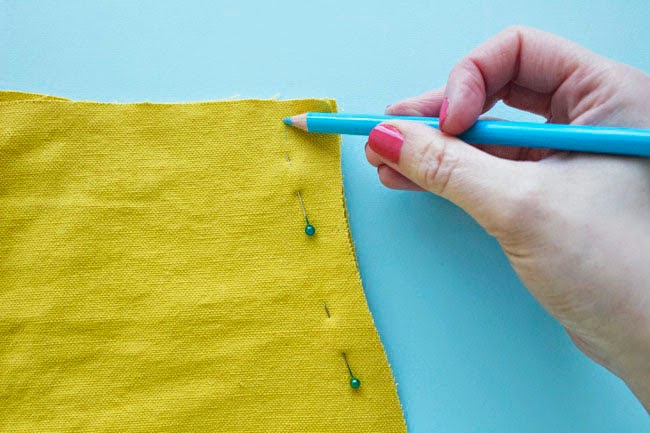
Mark the buttonholes on the right opening of the garment in chalk pencil or washable pen.

And before you tackle your real garment, sew a test buttonhole on a mock up of the area of your garment that you're going to sew the buttonholes on - usually two layers of fabric, one of which is interfaced.
How to sew one-step buttonholes

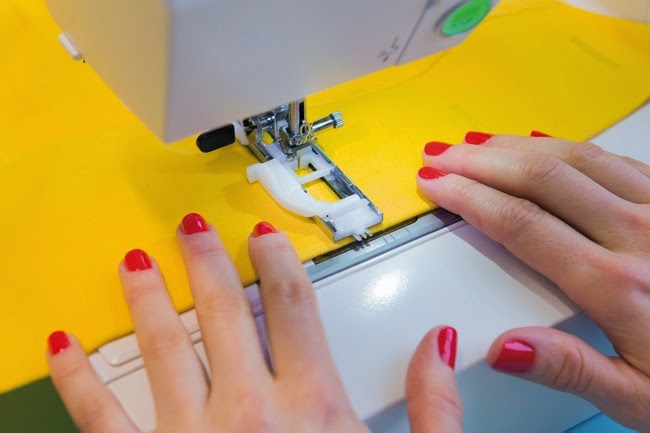
Attach the buttonhole foot to your sewing machine, with the button holder at the back. Position the fabric underneath the foot so the needle is just above the bottom end of the buttonhole marking. Pull the needle thread through the buttonhole foot and to the left – you can hold onto this thread for the first few seconds of sewing so it doesn’t get caught in the stitching. Once it’s in position, lower your presser foot. This bit is super important for one-step buttonholes: there’s a little lever to the left of the needle – pull this down as far as it will go.
How to sew one-step buttonholes

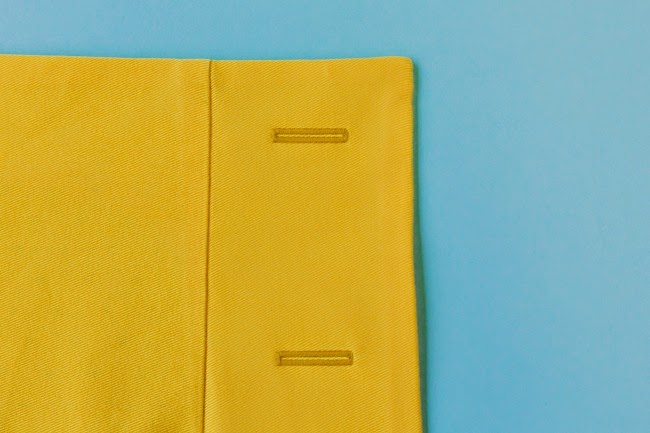
Turn your machine on and select the automatic buttonhole stitch (check your manual if you’re not sure which one this is). Start sewing, and the machine will automatically sew all four sides of the buttonhole and stop stitching when it’s done. Hurrah! Once your machine comes to a stop, you can move on to the next buttonhole.
How to sew one-step buttonholes

Occasionally automatic buttonholes like to go crazy and do their own thing, such as sewing much longer sides than you actually need. Troubleshooting tips:

1. Check that the button is lying flat and wedged tightly in the holder on the foot;

2. Check that the lever to the left of the needle is pulled down all the way;

3. Take care that nothing is going to get in the way of the foot or lever;

4. Make sure you keep sewing until the end of each buttonhole sequence (when the machine stops stitching by itself) before starting the next one;

5. To be extra certain the machine knows you’re starting a new buttonhole, between each buttonhole you could reset the stitch type to another one and then back to the automatic buttonhole stitch. Or turn the machine off and on again ;)

How to sew one-step buttonholes

Before opening up the buttonhole, it's a good idea to use a product like Fray Check to seal the threads and avoid excessive fraying.

Once it's dry, open up each buttonhole by inserting a seam ripper into one end and carefully tearing to the middle. Then insert the seam ripper into the other end of the buttonhole and tear towards the middle until the whole thing is open. If you are worried about accidentally ripping through the side of the buttonhole, you could insert a pin into either end as a buffer. Trim the frays and you’re done!

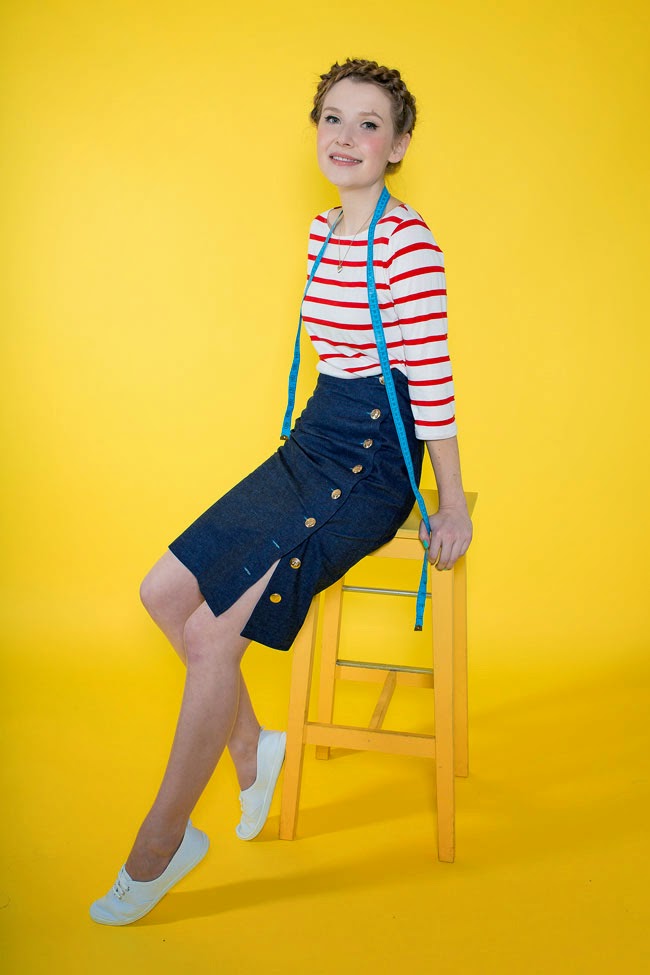
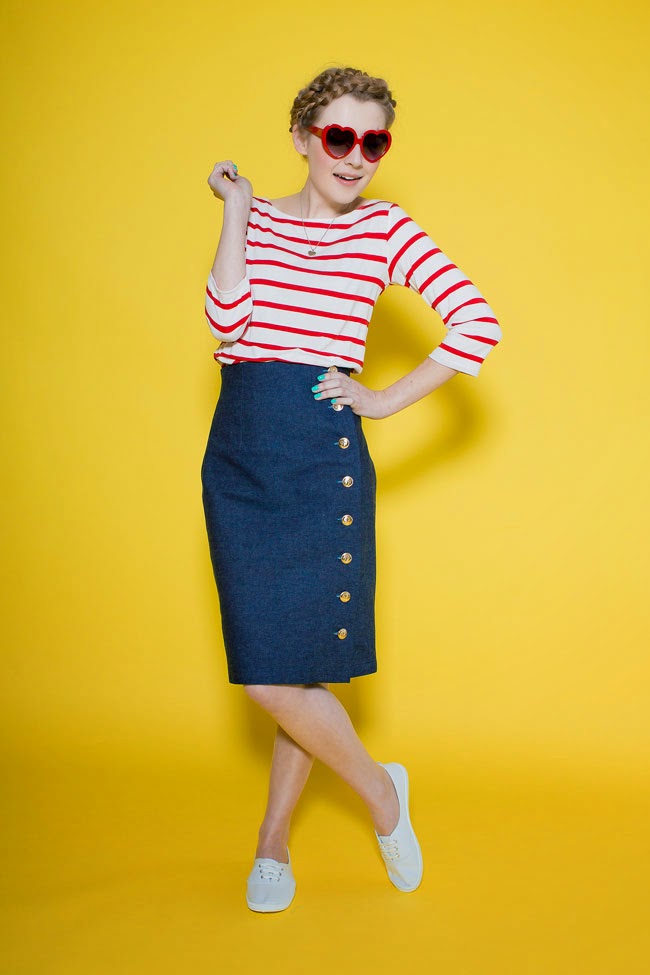
Now you can sew lovely buttonholes on your Arielle skirt, Rosa shirt or dressMathilde blouse or Mimi blouse. Enjoy!
PS. If you’d like to watch a video lesson on making buttonholes, check out my online workshop, Sew Your Own Shirt or Shirt Dress.

28 April 2015

How to Finish a Facing with Bias Binding

How to Finish a Facing with Bias Binding

Today I’m going to show you how to finish a facing with bias binding. If you’re making the Arielle skirt (which I'm demonstrating here) or the Sonny jacket and leaving it unlined, bias binding will give you a pretty finish on the inside of the garment - it's a lovely alternative to finishing with zigzag stitch or an overlocker.

How to Finish a Facing with Bias Binding

You can make your own bias binding out of leftover fabric,  or you can buy it ready-made. It's up to you to decide how wide you want your binding to be - just bear in mind that, whether you buy it or make it with a bias binding tool, the finished binding will end up half the width when attached to the facing.

How to Finish a Facing with Bias Binding
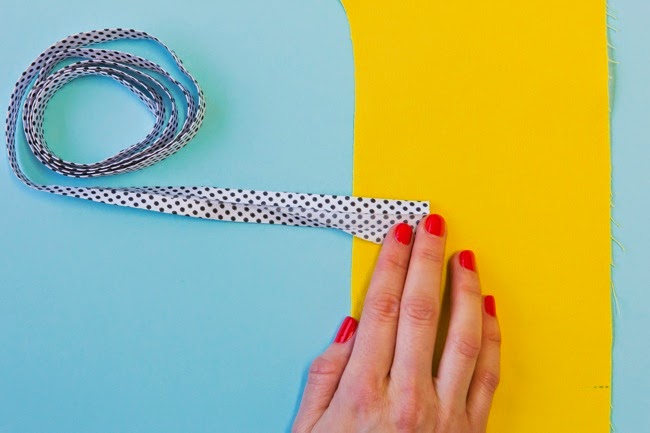
Start by unfolding one side of the binding and align the raw edge with one of the inside edges of the facing, right sides together. Pin it in place. As it's cut on the bias - in other words, at a 45 degree angle to the straight grain of fabric - it should naturally stretch a little, which will help it get around curves. You can leave a little bias binding overhang at each end of the facing.

How to Finish a Facing with Bias Binding

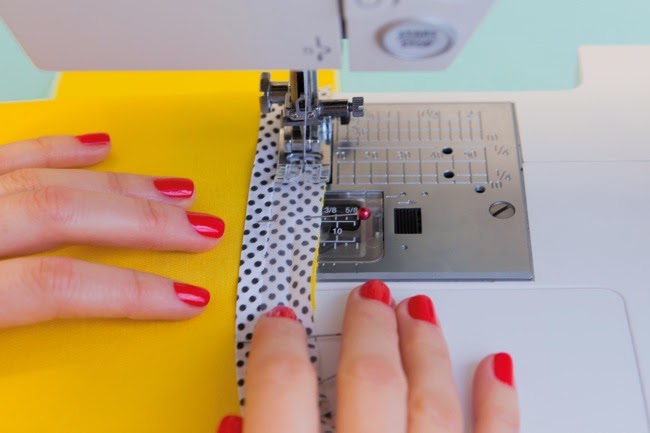
Stitch the binding to the facing along the channel of the fold line nearest the edge of the facing.

How to Finish a Facing with Bias Binding

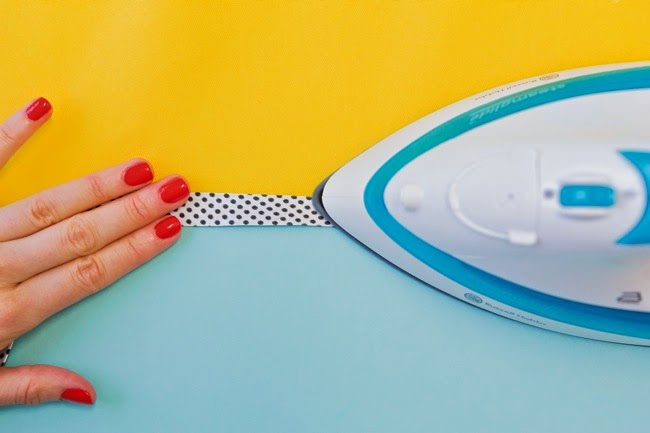
From the right side, press the binding away from the facing and towards the seam allowances. Now fold the binding over to the wrong side of the facing and press in place, ensuring that the raw edge of the fabric is covered by the folded edge of the binding – you may need to trim down the seam allowance on the facing a little first, depending on how wide your bias binding is, and how accurately you sewed it!

How to Finish a Facing with Bias Binding

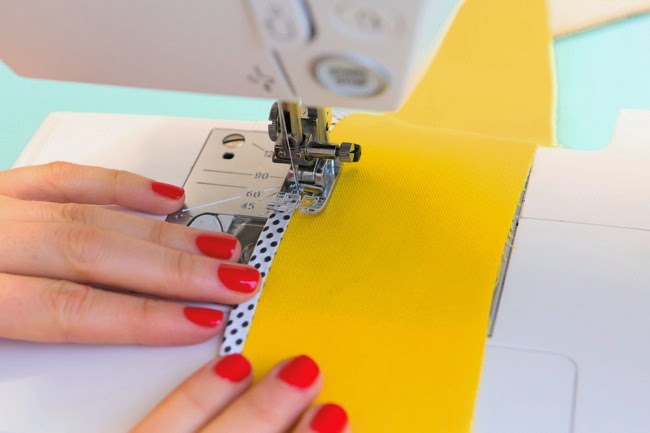
From the right side of the facing, edgestitch the binding close to the seam line, through all layers. Pause every so often with the needle down to check that the other side of the binding is getting caught in the stitching.

How to Finish a Facing with Bias Binding

Give it a final press, and you’re done!

P.S. If you liked this, you might also be interested in How to Understitch like a Pro.

*****
Author: Tilly Walnes

23 April 2015

Attaching the Lining to the Arielle Skirt

Arielle sewing pattern - Attaching the lining

For the most part, the Arielle sewing pattern is simple to construct. The fiddliest part is attaching the lining to the facing. This is because it has curved inside corners - we opted for curved corners over right angle corners as they would have been even more fiddly! Don’t worry though - I’m going to walk you through it in detail in this post. If you’re a beginner, or the idea of sewing the lining fills you with dread, you can skip it! Simply finish the inside edge of the facing with zigzag stitch, an overlocker or bias binding. Easy peasy! I’ll show you how to attach bias binding in the next post.
Still here? Wanna attach the lining? Good stuff, let’s do this!

Arielle sewing pattern - Attaching the lining

Stitch the pleats, side seams and hem on the lining pieces following the instructions that accompany the pattern. A bit of pattern geekery in case you’re interested – the pleats on the lining create volume in the same way that the darts on the main skirt pieces do, but with more ease for movement. The front lining also has volume created by a shaped seam at the curved corner – a pleat would have been awkward to sew at this corner. This all adds up to a lovely 3D shape over your lovely lady curves.

Okay, so you’ve sewn the lining and are ready to attach it to the facing. The reason this is a little fiddly is because the raw edges of the inner curve of the facing and the outer curve of the lining are different lengths. That’s because they have seam allowances – what you’re really joining are the stitching lines 15mm (5/8in) inside the raw edges, which do match up. We're going to do a few things to make it easier to join these curves together...

Arielle sewing pattern - Attaching the lining

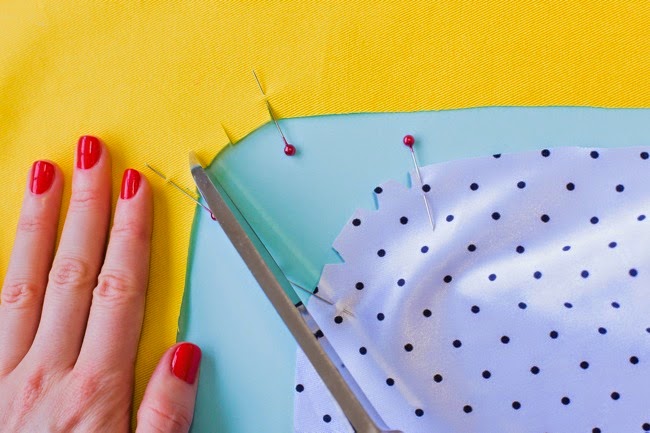
First, snip the notches (marked on the pattern) so they are just shy of 15mm (5/8in). This is so we don't lose them in the next step...

Arielle sewing pattern - Attaching the lining

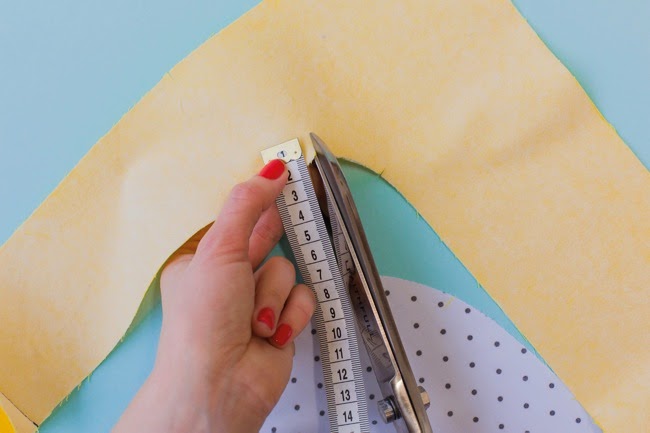
Trim the seam allowances down by 5mm (1/4in), all the way round the inner edge of the facing and the top and side edges of the lining.

Arielle sewing pattern - Attaching the lining

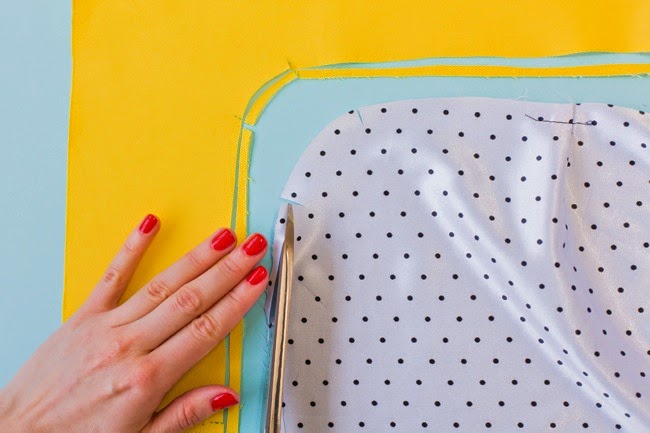
Now we’re going to clip and notch the curves to help the seam allowances open out and fit together. Again, take care not to lose your original notches – you could mark them with pins first so you remember which ones they are. Clip short snips into the inside curves of the facing, and cut triangular shaped notches into the outside curves of the lining, being careful not to make them longer than 10mm (3/8in) so they don’t go over the stitching line.

Arielle sewing pattern - Attaching the lining

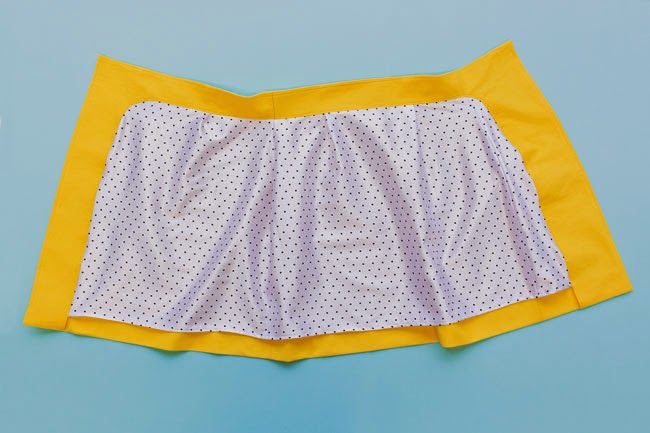
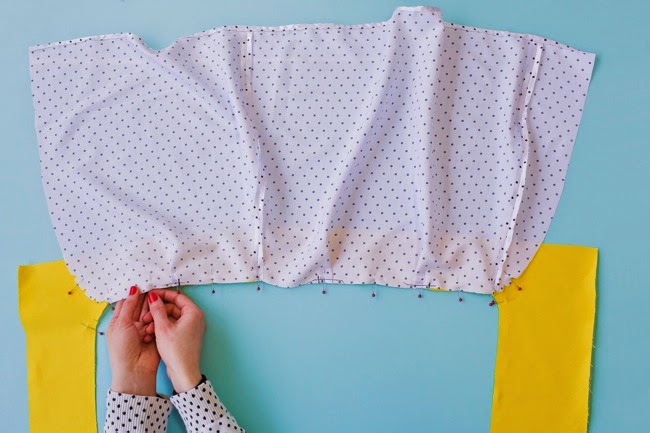
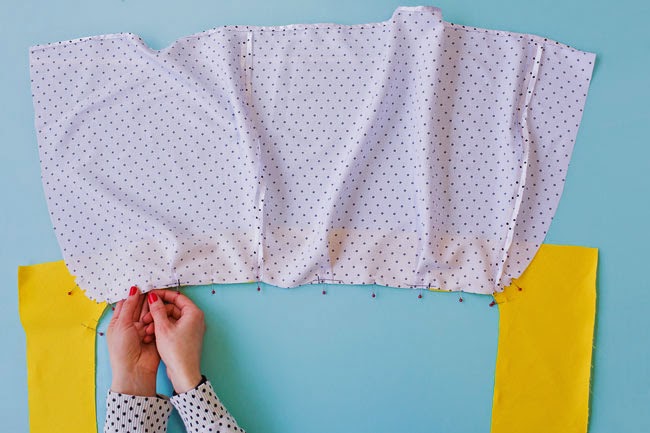
With the facing right side up, flip the lining on top of it, wrong side up. Pin the top edge of the lining to the lower inside edge of the facing, right sides together, matching up the side seams and notches.

Arielle sewing pattern - Attaching the lining

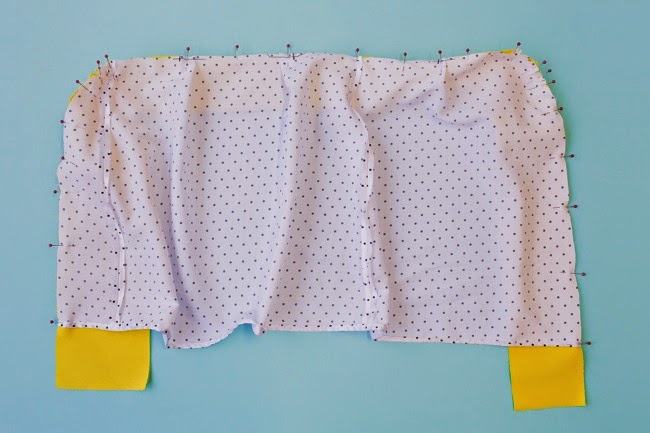
Now pin one side of the lining to one inside edge of the facing, right sides together, matching the lining hem with the “end of lining” notch near the bottom of the facing. The fabric won’t lie flat at the curved corners because of the seam allowance thing I explained earlier. Just remember that you're aiming to match up the stitching lines, which are now 10mm / 3/8in inside the raw edges, rather than the raw edges themselves – ease the curves together carefully, and use plenty of pins to hold them together. The clips and notches that you snipped earlier should open up the seam allowances, which will help. Pin together the other side of the lining and facing in the same way.

Arielle sewing pattern - Attaching the lining

Here’s one I prepared earlier!

Arielle sewing pattern - Attaching the lining

Okay, so we’re going to be good and baste (tack) the curves together before stitching them for real to make sure they go together nicely. Set your machine to a longer stitch length – I'd go for 3mm rather than 4mm as slightly shorter basting will navigate the tight curves more neatly. Baste just the curved corners together, using a 10mm (3/8in) seam allowance – usually it’s a good idea to baste inside the stitching line so the real stitches don’t end up on top of the basting, but in this case it’s important to baste on the real stitching line so the curves go together accurately.

If the curves look dodgy, you can quickly unpick the basting and try again. If they look good, great! Let’s sew them together for real. Reset the stitch length to 2-2.5mm and, using a 10mm (3/8in) seam allowance, stitch the whole of the pinned seams together, from one “end of lining” notch to the other.

Arielle sewing pattern - Attaching the lining

Trim the seam allowances and press them towards the facing – including the part of the facing below the lining. Now you can understitch the seam allowances to the facing so they don’t flip back towards the lining and create a bulky look. To understitch, simply sew a line through the facing and seam allowances close to the seam line. Your stitching will be visible from the right side of the facing, so use a matching colour. If you sew with the facing… erm… facing up and to the left of the needle, shift your needle 2mm to the left (many machines have a stitch option for this), and line up the seam line with the central groove of the presser foot. As you sew, keep the seam line aligned with the middle of the foot and you should end up with lovely neat stitching exactly parallel to the edge of the facing.

Arielle sewing pattern - Attaching the lining

The understitching should end up looking something like this from the wrong side...

Arielle sewing pattern - Attaching the lining

... and this from the right side.

Arielle sewing pattern - Attaching the lining

And that’s it! You can now follow the rest of the steps in the instructions to sew the rest of your skirt. I hope this helps – let me know if you have any questions about this part. In the next post, I’ll show you how to finish the facing with bias tape instead, if you don’t fancy adding the lining.

I can’t wait to see your finished Arielle skirts! Don’t forget to send us a pic

21 April 2015

Fitting the Arielle Skirt

Arielle sewing pattern - How to fit the skirt

Got your Arielle sewing pattern? Chosen your fabric? Let’s talk about how to sew a skirt that fits you.

The good news is that Arielle is an easy style to fit – the skirt has only three main pieces, and is shaped with darts that are simple to adjust. The skirt is designed without a separate waistband to give a sexy, streamlined shape. Some of our curvier pattern testers said they were pleasantly surprised at how flattering the skirt is on their waist and booty (that booty booty!).

Arielle sewing pattern - How to fit the skirt

Taking your measurements
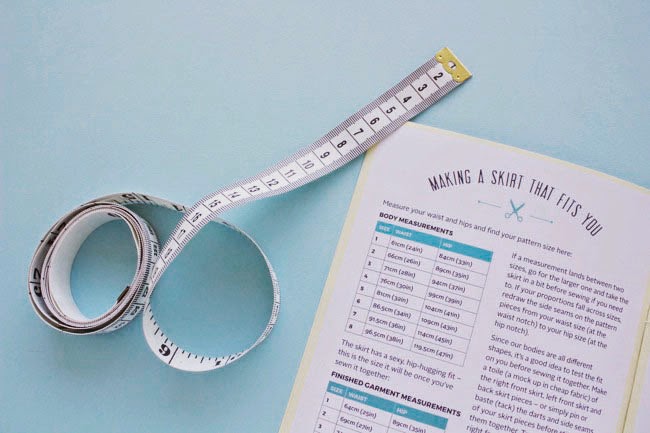
The first step to a great-fitting skirt is to take accurate measurements. Wrap a flexible tape measure around your natural waist and then around the widest part of your hips, breathing normally (no cheating!) and keeping the tape measure level to the floor. Compare these measurements to the Body Measurements chart in the pattern instructions to pick out your pattern size. If a measurement lands between two sizes, go for the larger one – you can always take the skirt in later at the pinning stage.

Arielle sewing pattern - How to fit the skirt

Grading between sizes
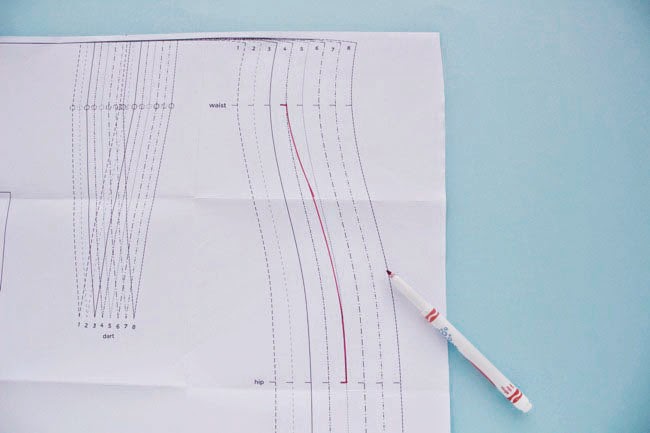
If your waist is a different pattern size to your hips, you can redraw the side seams on the pattern pieces from your waist size (marked on the pattern by the waist notch) to your hip size (marked by the hip notch). On the back skirt piece, redraw the side seam between your waist and hip size – in this example you can see I’ve drawn between a size 4 waist and size 5 hip.

Arielle sewing pattern - How to fit the skirt

Now lay the right front skirt piece over the back skirt piece, matching both pieces at the original side seam lines of your waist size. Trace your new side seam onto the right front skirt piece. Repeat on the left front skirt piece. (Don't worry that your new lines on the right front and left front pieces don't touch your hip size line - the size lines on the left front and right front skirt pieces are nested differently to make the button and overlap lines clear to see. As long as you've traced the line from the back skirt, you should be sorted.)

For the darts, simply go with the darts in your waist size.

For the facings, simply pick the same size as your waist – you don’t need to change the facings to match your hips, as they really only cover your waist and the front opening of the skirt.

Arielle sewing pattern - How to fit the skirt

If you're making the lining, you will need to alter the lining pieces to match the skirt. Lay the back lining piece over the back skirt, matching up the hip notches. Trace your new skirt side seam onto the back lining. Then trace this line from the back lining onto the left front and right front lining side seams. For the outer edge of the left front and right front lining (marked on the pattern), choose the same size as your waist. The outer edges of the lining will match up with the inner edges of the facing, so again they should be unaffected.

Arielle sewing pattern - How to fit the skirt

Lengthening or shortening
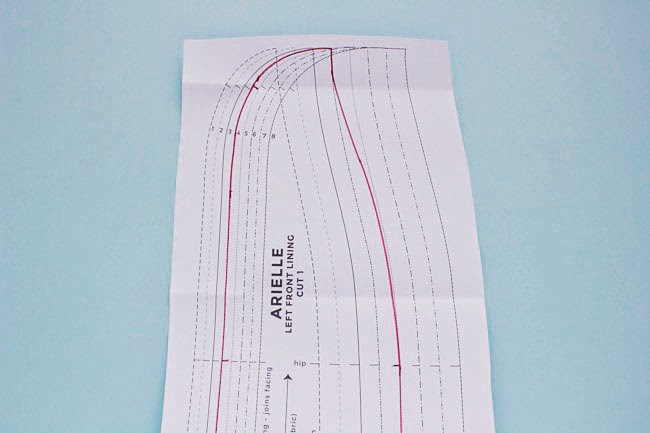
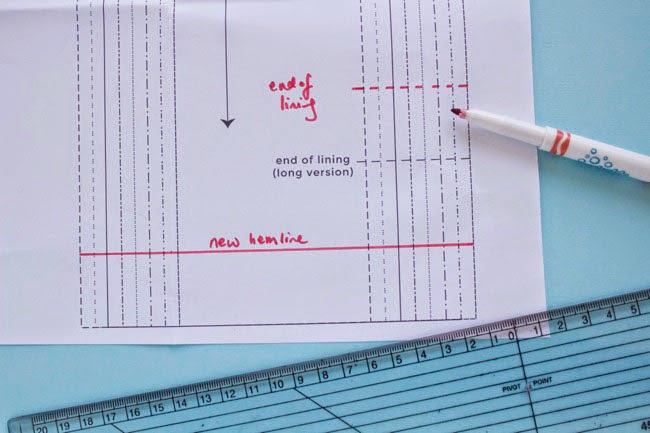
The long version of the skirt is 62.5cm (24½in) from (high) waist to hem; the short version 45.5cm (18in). Since the lower part of the skirt is straight, you can easily redraw the hemline without the “lengthen/shorten” lines that you might see on other patterns. If you want to make the skirt longer or shorter, redraw the hemline at the level you want it on the three skirt pieces.

Lengthen or shorten the front facing pieces - and the lining if you’re making it – by the same amount you lengthened or shortened the skirt. If you’re making the lining, you’ll also need to raise or lower the “end of lining” notches on the front facings by the same amount.

Toiling, pinning or baste fitting
T&TB patterns are dressmaking templates designed for average UK body proportions - yet not many of us are “average”! Taking accurate measurements and making any changes you need to the pattern are a good start to sewing a garment to fit your body, yet since we’re all different shapes, you might need to make some other changes to how the fabric fits your curves. (This is one of the reasons why asking someone else how a pattern fits them is unlikely to be helpful when it comes to fitting yourself, even if you have the same bust, waist and hip measurements.)

Arielle sewing pattern - How to fit the skirt

It’s generally a good idea to make a toile (or “muslin”) – a mock up of a garment in cheap fabric – so you can tweak the shape before cutting into your nice fabric. Choose fabric that is similar in weight and body or drape to the fabric that you’re going to use on the “real” garment – read more about making a toile. For the Arielle skirt, since it’s relatively simple to fit, you can probably get away with doing a pin fitting or baste fitting on the main skirt pieces cut in your real fabric.

Arielle sewing pattern - How to fit the skirt

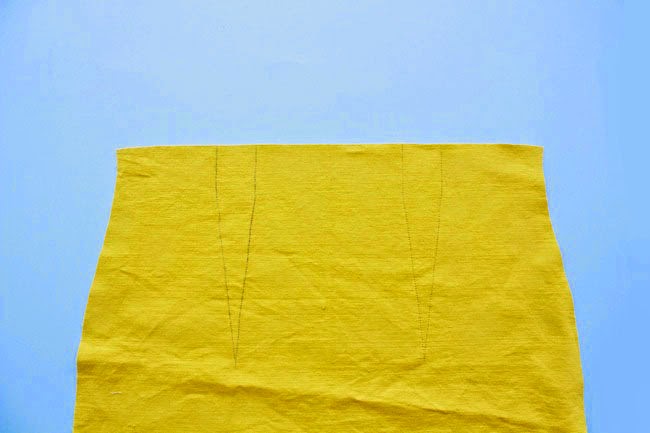
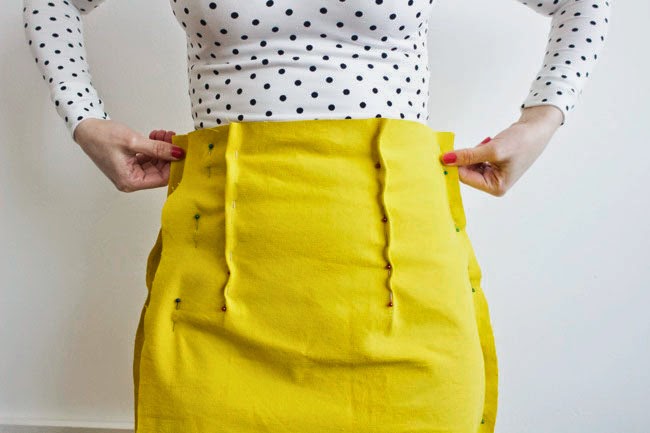
Cut out the right front skirt, left front skirt and back skirt, and pin or baste (tack) the darts and side seams (see the pattern instructions). Try the toile or skirt on inside out, pinning the right front skirt over the left front skirt along the button lines (marked on the pattern). If you’re planning on wearing the skirt with a t-shirt or sweater tucked in, put that on too.

Arielle sewing pattern - How to fit the skirt

Do the side seams feel too loose or too tight at the waist or hips? Do the darts look like they’re in the right place? How does the skirt feel to wear? Can you walk comfortably? Can you sit down comfortably? Adjust the pins or the baste stitching on the darts and the side seams to a fit that feels good for you. For example, if you have a small lower back and curvaceous booty, you may need to take the top of the darts in; or if you are finding it hard to walk, you could let the side seams out at the bottom of the skirt.

Arielle sewing pattern - How to fit the skirt

Once you’re happy with how it’s fitting you, draw your new darts and stitching lines onto the wrong side of the skirt or toile in chalk pencil or washable pen - or simply follow the pin lines when stitching it together. Transfer any changes back to the pattern pieces so you’ve got them for next time you make it. You’ll also need to make the same adjustments to the facing and lining. For example, if you took each side seam in by 1cm at the waist, redraw the facing side seams 1cm in at the waist too.

Arielle sewing pattern

And that's it! In the next post I'll walk you through attaching the lining to the facing...

16 April 2015

Fabric Shopping for the Arielle Sewing Pattern

Arielle skirt sewing pattern - Fabric ideas


Hello everybody, it’s Vanessa here. Thanks for all the love for our new sewing pattern, the Arielle skirt. We’re so glad that you’re excited about it as we are! Today I want to share some thoughts on designing and choosing fabric for your skirt.

First, a note about the design. When Tilly first developed the sewing pattern, she was inspired by - and I quote - "Edwardian skirts and sexy sailors". Bien sur! ;) Crazy inspiration sources aside, the side-button skirt is a classic style that looks decidedly modern - take a look at our Arielle board for some Pinspiration.

One of the beautiful things about Arielle is her versatility - you can make the skirt for any season, from a wide range of fabrics. We recommend medium-weight woven fabrics that hold the shape of the skirt, but not so thick that they risk making the darts chunky. The kinds of fabric types you might pick include denim, sateen, gabardine, brocade, suiting, pincord, lighter weight canvas or wools. Medium-weight cottons – the kinds that are often used to make quilts and other homewares – would work too, but avoid lighter weight, drapey cottons such as lawn and voile. Arielle is a close-fitting skirt so if you find a denim, cotton or sateen with a touch of stretch (but still woven, not knit fabric) then you’re onto a winner! Fortunately all these kinds of fabrics are usually a pleasure to handle. They do what they’re told, press beautifully and don’t fray like mad. Nothing daunting :)

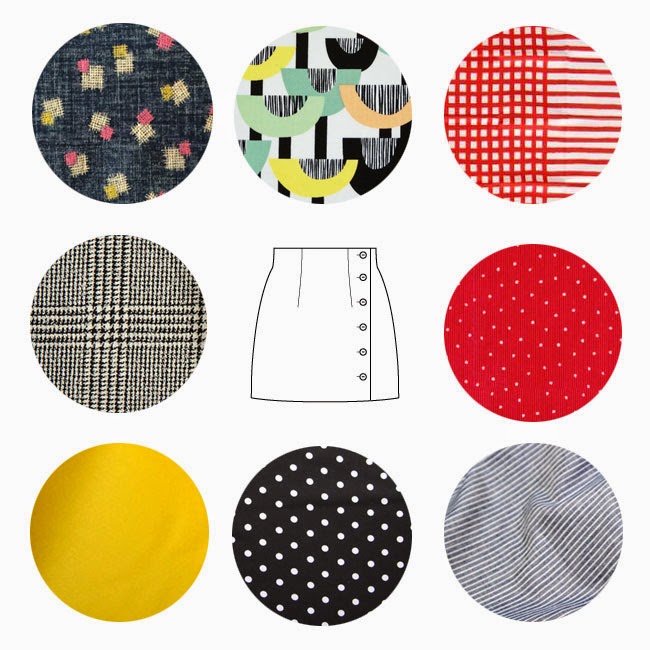
I’ve had lots of fun window shopping on the internet for suggestions. Here are a few lovely things that I’ve found. Please bear in mind that we haven’t seen or handled these fabrics in person, so we recommend you order a sample to get a feel for the material before purchasing. Okay, on to my picks!

Arielle skirt sewing pattern - Fabric ideas

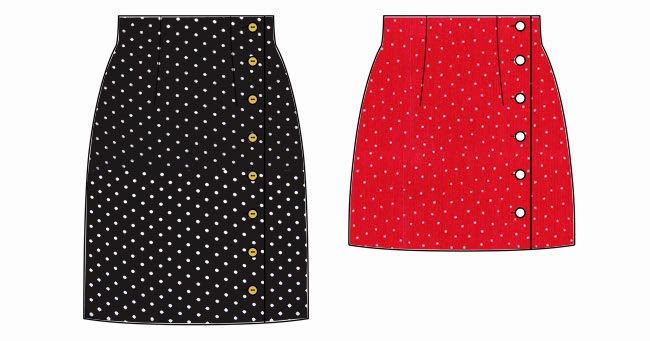
Love spots as much as we do? Indulge in your pixelated passions with either of these beautiful fabrics – a lovely medium weight stretch cotton and a delicious pincord.

Arielle skirt sewing pattern - Fabric ideas

Medium weight cotton or lighter weight cotton canvas are also great choices, particularly for those who like a bold pattern as they take dye very well. We’re swooning over the idea of wearing this print with a black turtleneck! This Kokka canvas is an interesting one too. Definitely check out Monaluna for canvas too, such as this Jacks canvas (there may also be llamas...).

Arielle skirt sewing pattern - Fabric ideas

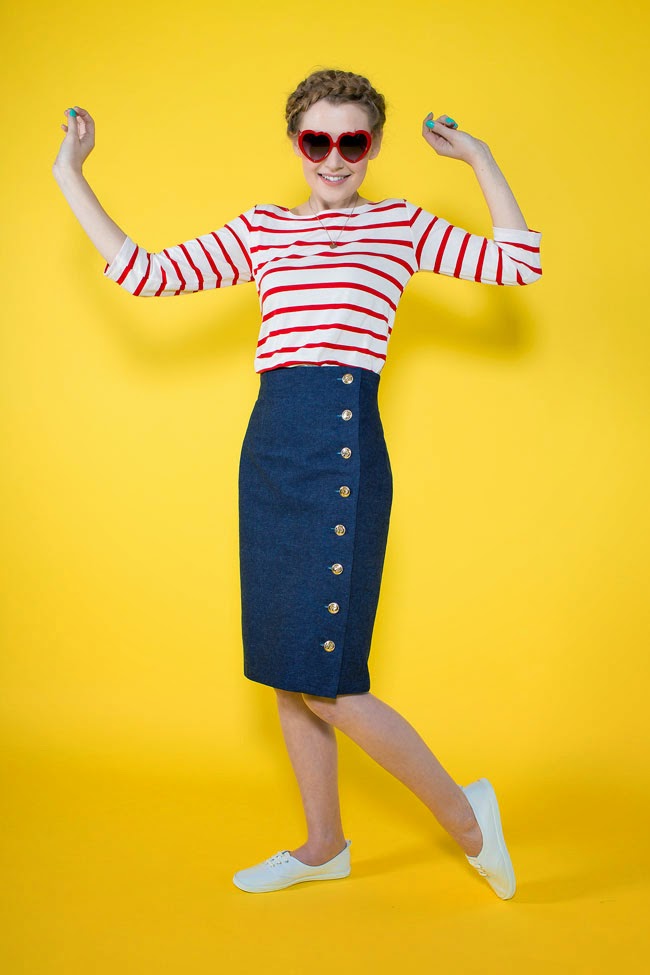
Take our fashion tip for Summer 2015 - the 1970s denim skirt is coming back, big time! We used a plain stretch denim for our pattern photos, or how about this beautiful Japanese cross-hatch denim? Add some bright brass buttons and you’ve got this chic revival nailed (we recommend anchor buttons, naturally). This striped chambray denim also looks really lovely.


Arielle skirt sewing pattern - Fabric ideas

While prints are tempting, never underestimate solid colour fabrics! We’ve found this great variety of stretch cotton in various shades. Or channel your inner Clueless and go for this yummy lightweight tweed wool.

Here’s the full list of supplies that you need, including how much fabric to get.

If you feel like making your skirt a bit more fancy, you can add the optional lining. Choose lining fabric and buttons that compliment, contrast or highlight your main fabric and I promise you will smile every time you see your skirt, inside or out. How about placing the buttonholes and buttons in pairs to make your skirt a bit different? Or stitching ribbon to the outside of the skirt like this one? Going the extra mile with these little touches is part of what makes homemade clothes such a pleasure, both to make and to wear. Take a look at the Arielle Pinterest board for some more ideas.

We are so excited to see what you come up with and hope you enjoy making the Arielle sewing pattern as much as we have. You can order your pattern here. Don’t forget to send us a picture of your finished skirt! What fabric are you thinking of making it in?

14 April 2015

Introducing the Arielle sewing pattern!

Arielle skirt - easy sewing patternArielle skirt - easy sewing pattern

Meet our new sewing pattern – the Arielle skirt!


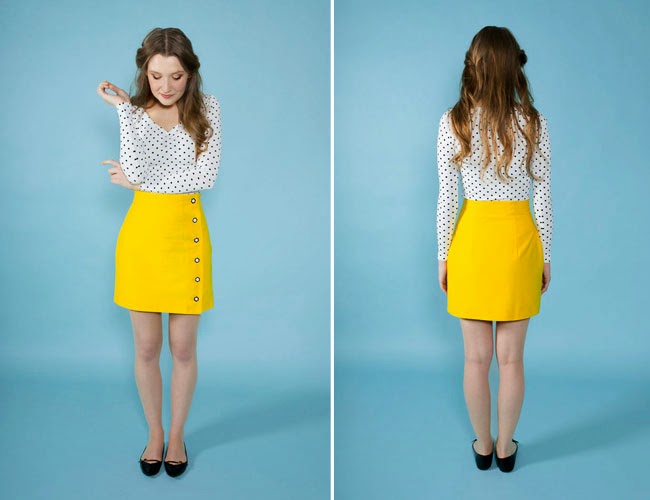
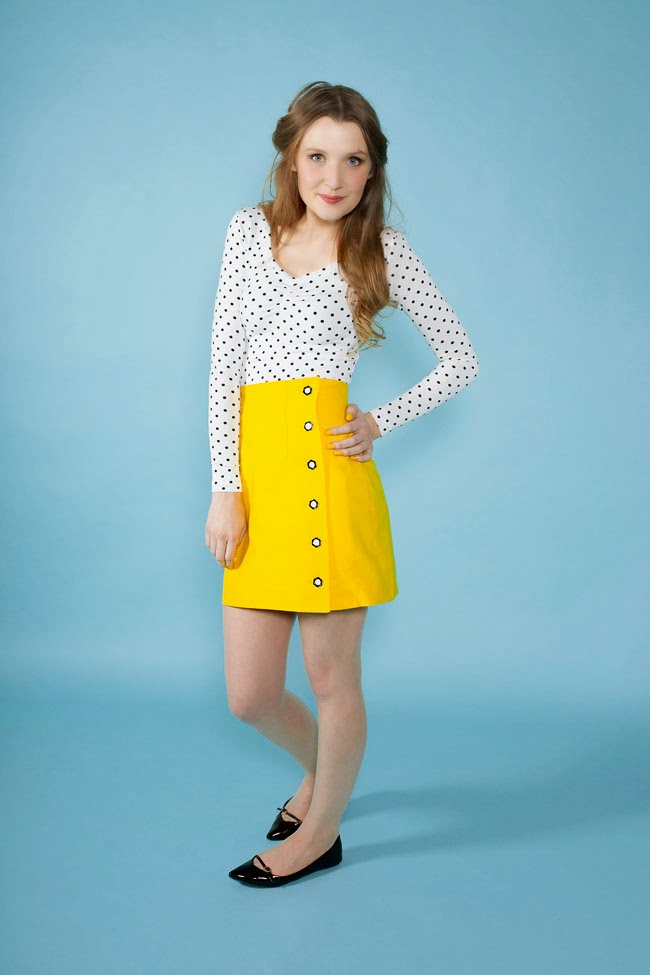
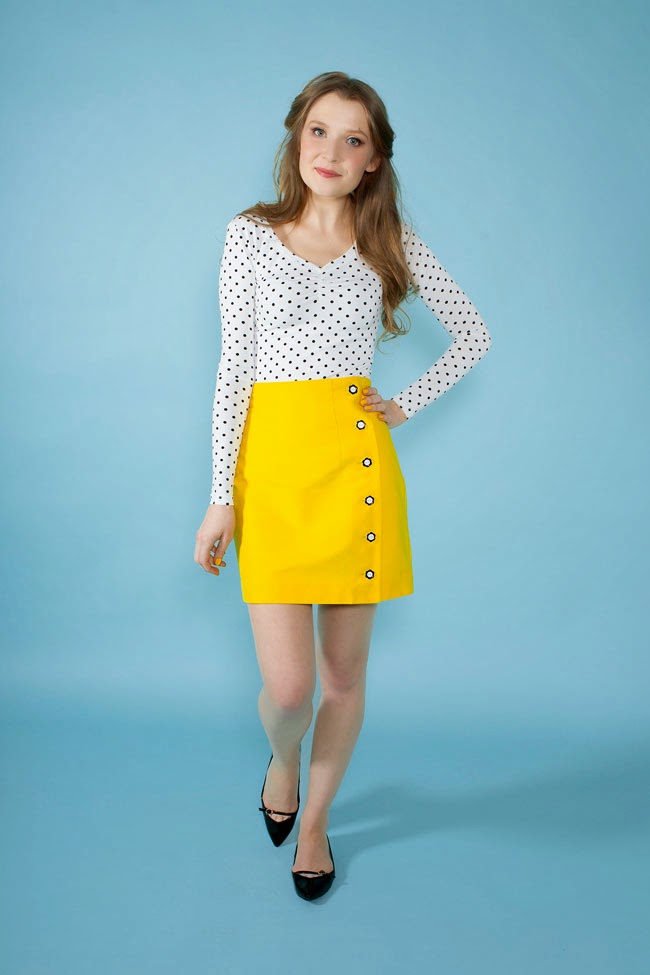
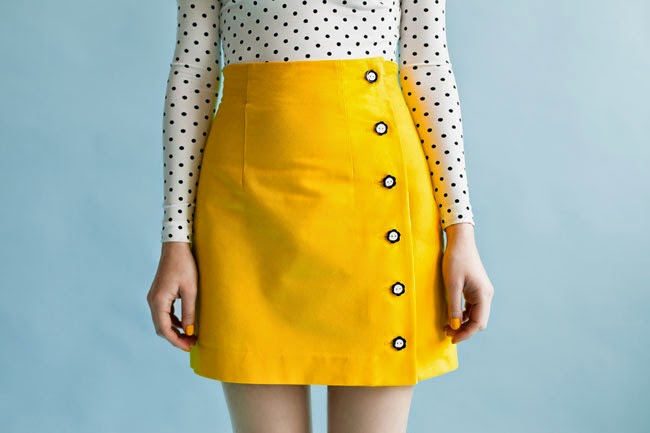
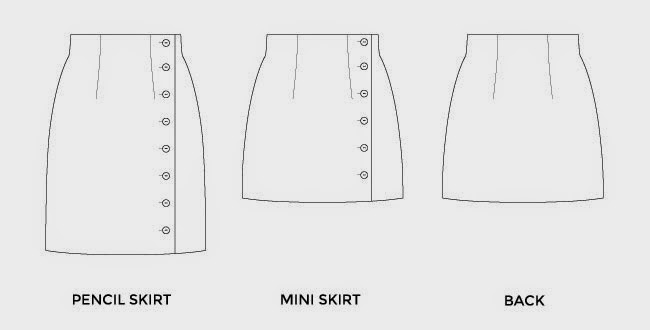
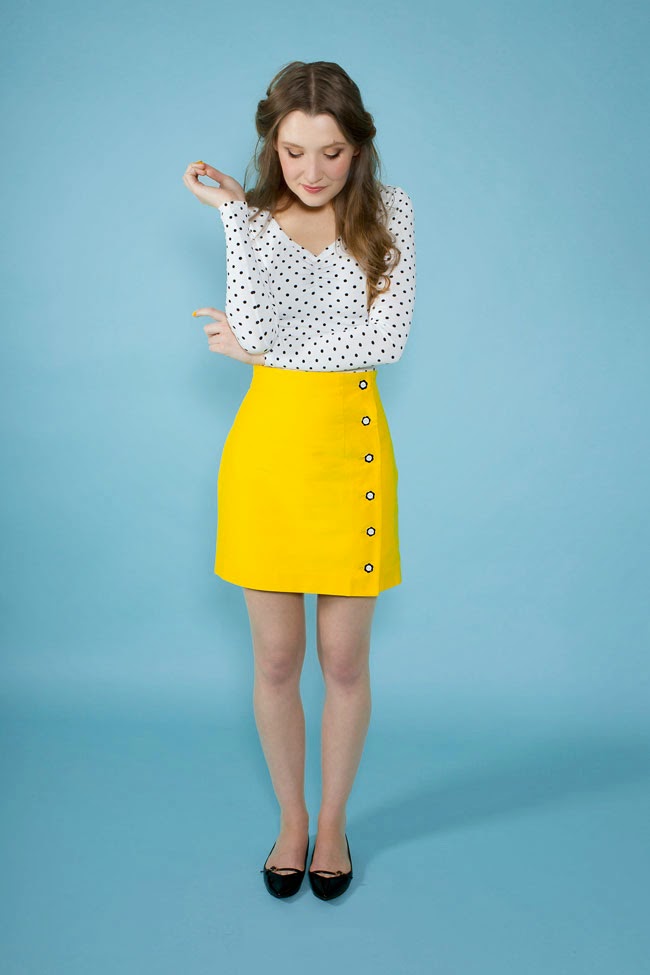
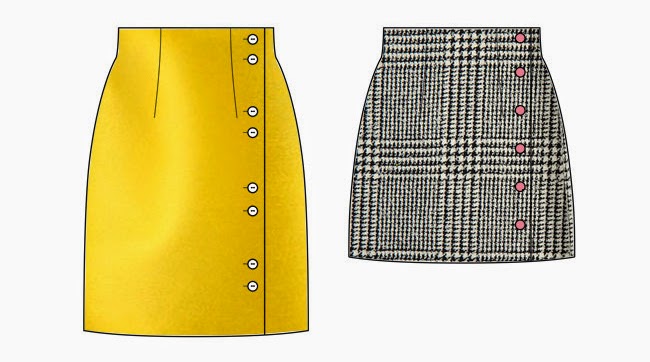
Arielle [“ah-ree-ehl”] is an asymmetric pencil or mini skirt with an adorable button opening to one side. Long darts and a high waistline create a flattering, figure-hugging shape. Choose from modern mini or sultry knee length, finished either with a speedy facing or optional luxury lining.


Arielle skirt - easy sewing pattern

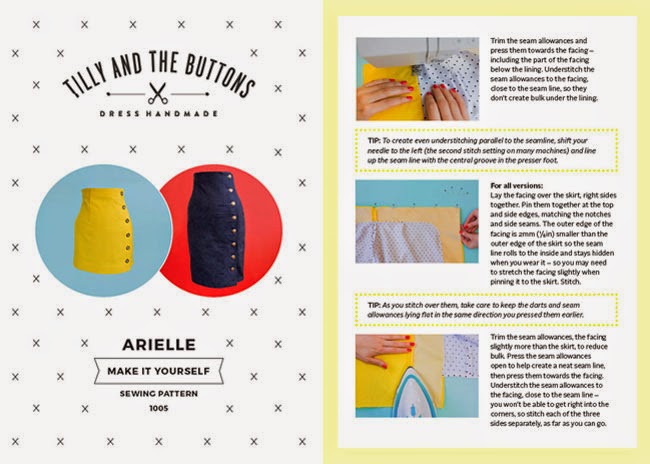
The easy-to-use sewing pattern will take you through the steps to making the Arielle skirt, with jargon-busting instructions, clearly labelled pieces so you can see which bits go together, and photos showing you how to sew each part.

Order the printed version and we’ll send you a beautiful pattern in the post. We ship around the world, or from next week you can order the pattern from one of our lovely stockists. You can also order a digital pattern which you’ll receive by email instantly to download, print and assemble at home.

The pattern comes in eight different sizes – take a look at our sizing chart. It’s easy to tailor the skirt to fit your unique shape, or to lengthen or shorten the hemline to your preference – I’ll show you how in an upcoming blog post :)

Arielle skirt - easy sewing pattern

How easy is the skirt to make?


If you’re a confident beginner, the unlined version is an easy peasy make with straightforward construction – stitching darts, sewing side seams, attaching a facing, and hemming. The most challenging part is sewing the buttonholes – fear not, I’ve got a blog post lined up which will show you that making buttonholes isn’t half as scary as it may sound!

If you’re a more experienced stitcher or if you fancy taking your sewing prowess up a notch, you may want to add the lining. The reason the lined version is a little more advanced is firstly because slippery fabric can be harder to work with; and secondly because the process of attaching the lining to the curved facing is a little fiddly. We’ve got your back though - the pattern instructions include tips on sewing the lining, and I’ve got a blog post lined up to take you through that step in more detail.

Arielle skirt - easy sewing pattern

Some of you may recognise the skirt from an earlier incarnation called “Marielle” which I designed for Sewing World magazine in early 2013. Since then, we’ve had countless emails asking for the pattern, so we tweaked the design, changed it to T&TB sizing, and added the mini skirt variation and lining variation. Oh and changed the name – we’ve already got various pattern names beginning with M (Mathilde, Miette, Mimi) so I dropped the first letter and it magically became named after Arielle Gamble, the lovely and talented lady who designs our pattern envelopes and booklets (she also designed Love at First Stitch!).

Arielle skirt - easy sewing pattern

We've got blog posts lined up on steps that you might have questions about - choosing fabric, fitting the skirt, attaching the lining, finishing the facing with bias tape, how to sew buttonholes, and button sewing tips. If you need extra help, there are also lots of tips on cutting fabric, basic construction, finishing seams and the like both in my book and in the Learn to Sew section of this site (see the menu bar), or if there's anything else you're struggling with, let us know. Watch this space over the next few weeks for the blog posts, and revisit them at any time on the Arielle page.

Speaking of instructions, if you don't usually read pattern instructions, promise me you’ll read the ‘Cutting Your Fabric’ section – or at least the notes on the pattern pieces themselves about laying the pattern pieces face up on the wrong side of the fabric. This way the right front and left front pieces will end up the correct way round so the skirt will button up right over left (as womenswear traditionally does). :)

Wait - there's more!


Have you seen our new DIY Dressmaker bag? Laura designed this beauty. It’s strong and spacious, with an easy-to-carry landscape format (I love landscape format bags) and webbing straps that won’t cut into your shoulders – perfect for fabric shopping! The bag is made from a sustainable crop in a Fair Trade registered factory in India and screen printed in the UK using water-based ink.

Arielle skirt - easy sewing pattern

Well, we’re sitting here with envelopes, stamps and a Destiny’s Child soundtrack at the ready to pack and ship your order!

Order your Arielle sewing pattern and DIY Dressmaker bag

[Photography: Fanni Williams / Hair and make up: Elbie van Eeden / Model: Stephanie Lewis / Pattern graphic design: Arielle Gamble / Special thanks to all the lovely pattern testers for your discerning eyes and invaluable feedback!]