Fancy trying your hand at shirring? This lovely sewing technique creates a pretty gathered texture on garments, with the bonus of an adjustable elasticated fit.
Shirred styles are all the rage on the high street at the moment, and creating this effect is not only fun and fulfilling, but it’s easier than you may think. You just need to know a few simple tips and tricks – I’ve outlined the method in this post, accompanied by a free video tutorial, all brought to you thanks to the support of Janome UK.
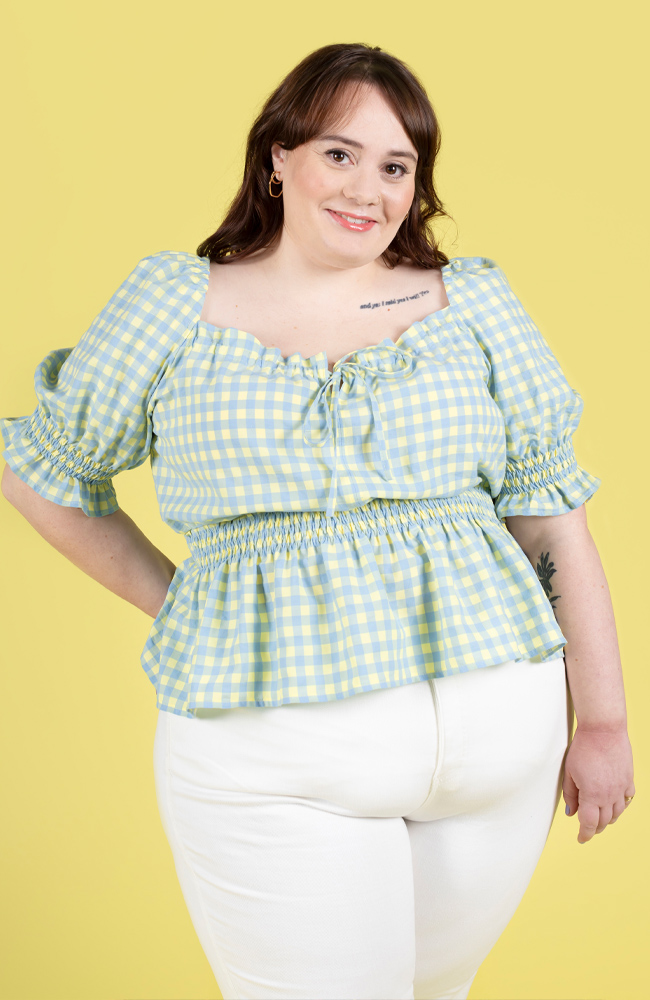
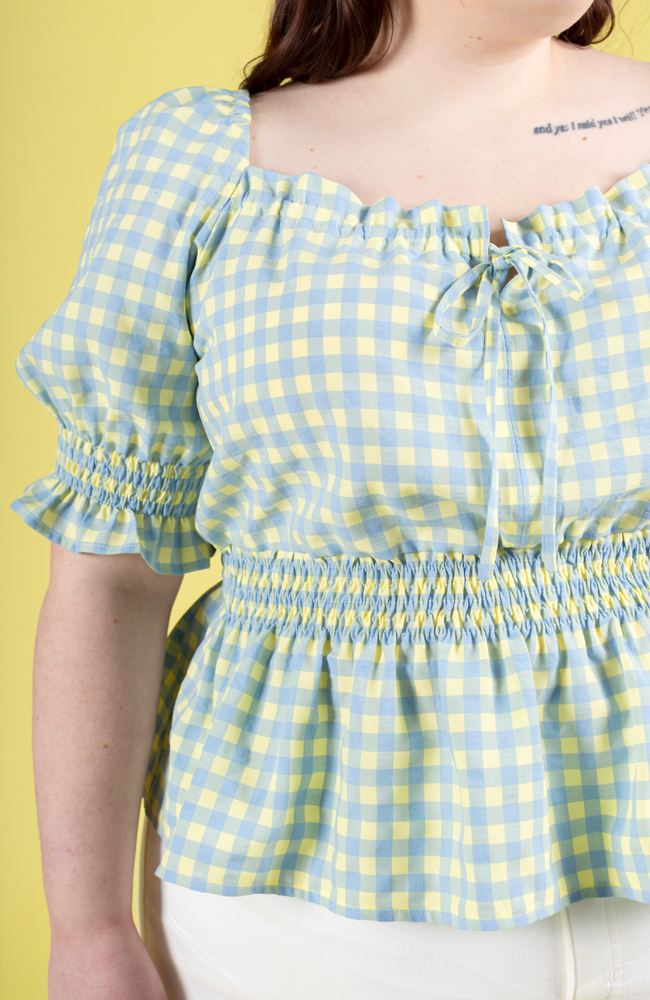
I’m demonstrating on our Mabel blouse and dress sewing pattern, which has a shirred waistline and sleeve cuffs. You can use the same technique for sewing shirring on other patterns too.
What is shirring?
Shirring is a technique where you sew rows of stitching using elasticated thread (shirring elastic) in the bobbin. The shirring elastic, which ends up on the underside of the project, gathers the fabric up to make it smaller – usually around half its original width – creating a pretty surface texture and an adjustable, stretchy fit.

What do I need for shirring?
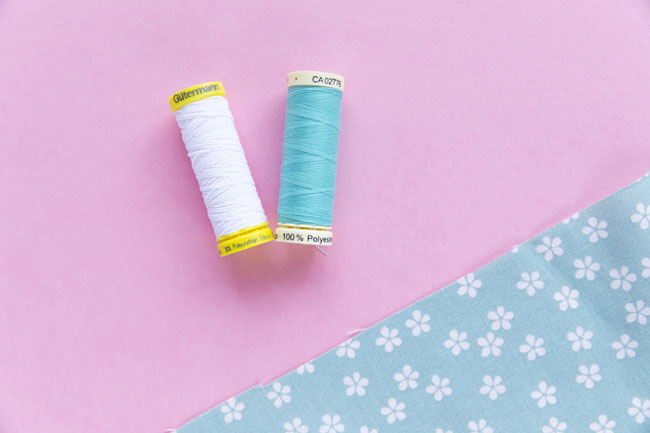
The only extra thing you really need, aside from your regular sewing kit, is shirring elastic to go in the bobbin case. One or two spools should be enough for a small amount of shirring, such as on the Mabel sewing pattern, but you will probably need a few more if you’re shirring a whole bodice, for example. You’ll be using regular all purpose polyester thread for your spool/needle.
Consider what colour shirring elastic you want to use. It will end up on the inside of the garment, so shouldn’t show in most cases, but if your fabric is light in colour or see-through, it may be slightly visible. It’s most commonly available in black and white, but you can find it in other colours too.
The regular thread will show on the outside side of your finished garment, so go for a colour that matches your fabric or a contrast colour if you want to make a feature of it.


Which fabrics can I shirr?
Lightweight fabrics that gather easily work best – try soft cotton lawn, voile, poplin, viscose (rayon) or Tencel (lyocell). Avoid anything too thick or structured, as the narrow elastic could struggle to gather it up effectively enough. You may find it harder to keep the rows even if your fabric is slippery.

What do I use as a guideline?
On the Mabel sewing pattern, you can use the top edge of the skirt or the hem of the sleeve as a guideline for your first row of shirring – we tell you in the instructions how far to sew from this edge, depending on which piece you’re shirring. You can then use the edge of your presser foot as a guide to how far away from this edge and subsequent rows to keep your stitching.
If you prefer, you can draw guidelines onto your fabric first in chalk pencil, washable pen, or something like a Frixion pen which should come out when you iron it. Please do test your marker out on a scrap of your garment fabric first though to check it does come out!

Or try a special foot such as a border guide foot, which has extra guides to help you keep your rows of shirring even.
TIP: Gingham or horizontal stripey fabric creates natural guidelines that make it easier to sew neat rows of shirring!

How do you go about shirring?
First, grab a scrap of the fabric you plan to use for your garment. It’s important to practise shirring on a test swatch before you tackle your real project, even if you’ve sewn shirring before, as the fabric you use, the settings on your sewing machine, and the tension you use when winding the shirring elastic onto the bobbin will all have an impact on the finished result.
Wind the shirring elastic onto the bobbin by hand – wind it on with enough tension that it’s not falling off the bobbin, but don’t pull too tight or stretch the elastic. (One person’s idea of tension vs. not stretching may be different to another person’s, and the tension in your machine will also affect the finished result, which is part of the reason it’s important to do a test run!)
Make sure you don’t overfill the bobbin. If there’s a long tail of elastic coming up through the hole in the top of the bobbin, trim this down so it doesn’t get picked up by the needle.

Thread the needle/spool of your sewing machine using regular all purpose polyester thread.
Load the shirring elastic into the bobbin case as normal. If your sewing machine has a needle up/down button, it’s a good idea to avoid using this to pick up the shirring elastic in case it stretches it out – instead, turn the handwheel towards you while holding the end of the needle thread. Pull out a tail of both spool elastic and bobbin thread towards the back of your machine – this will help keep the shirring elastic loaded on the bobbin case hook so it won’t unthread while you’re sewing.
Set the machine to a long straight stitch – try 4 or 5. The length is something you can adjust during your testing if you need to, as different fabrics will work better with different stitch lengths – the longer the stitch, the more it will shirr, or gather up the fabric between the stitches.
Place your fabric right side up on your machine, so the elastic will end up on the inside of the garment. You’ll be sewing your first row of shirring along your top guideline if you drew one, or at an even distance from the top edge of the fabric. Assuming the seam allowance of the pattern you’re sewing is 15mm (5/8in), start sewing 5mm (1/4in) from the raw edge (side seam or sleeve underarm seam) so the ends of the shirring (and first couple of back tack stitches) end up hidden within the seam allowance.

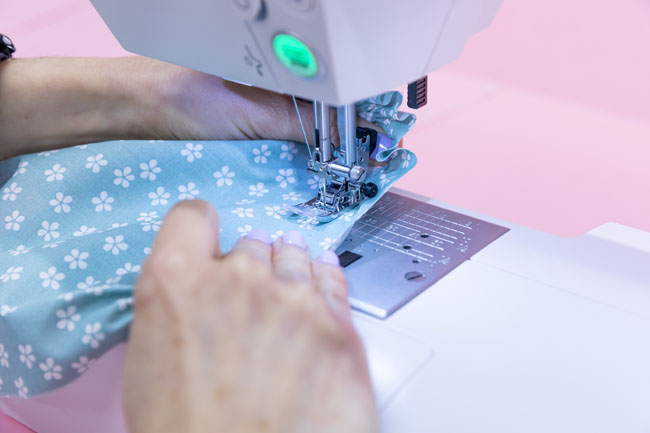
Sew two stitches, then back tack (reverse stitch) two stitches to secure the elastic in place so it doesn’t come undone – this is very important! If your machine or fabric doesn’t respond well to back-tacking shirring elastic, you can shorten your stitch length to 1.5-2 at the beginning and end of each row of stitching to help secure your threads instead.
Sew the first row of shirring, taking your time to keep the line straight, either using the guideline or the edge of the fabric as a guide. You should see the fabric start to gather up behind the presser foot. As you sew more rows, the fabric will gather up more, so be patient!
When you reach the end of the row, back tack two stitches (don’t forget this step!), then sew forward again off the end of the fabric. If your sewing machine has an automatic thread cutter, avoid using this as it can over-stretch the elastic. Instead, free the project the old-school way by raising the needle and presser foot, gently pulling the project through - pulling from the bobbin, not pulling the elastic you've just sewn tighter - and cutting the threads. I like to leave a short length of shirring elastic at each end until I’ve sewn across the seam when joining the pieces later, to ensure the elastic doesn’t come out.
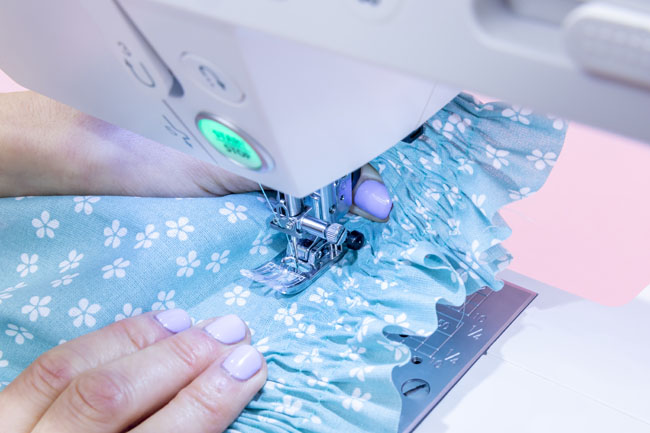

To sew the next row of shirring, check you have a few cm (a couple of inches) of both thread and elastic coming out towards the back of the machine again. Using the edge of the presser foot as a guide, sew the second row of shirring – on the Mabel pattern, the rows should be 10mm (just under 3/8in) apart (on my machine, the edge of the presser foot is 8mm from the needle, so I line it up 2mm away from the first row). You will need to stretch the shirred fabric out flat as you sew, holding it from both the front and back.
Again, remember to back tack at the start and end, and avoid using the needle up/down button and the automatic thread cutter if your machine has them.
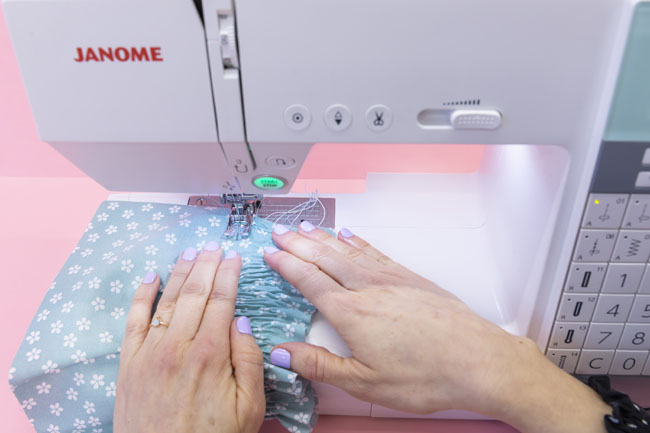
If you’re sewing a test swatch, five rows of shirring is a good number. Or, if you’ve moved onto your real garment, sew the number of rows specified in the pattern instructions. Take your time, and check the fabric is gathering up as you go – if it’s not, see ‘troubleshooting’ below. If you haven't marked your shirring guidelines on the fabric, to keep the rows even keep your eye on both the edge of the presser foot and seam allowance guide for as long as the fabric isn't covering it.
Shirring uses up a lot of elastic, so you’ll probably need to reload the bobbin at some point. If your bobbin runs out of elastic mid-row, you can unpick a few of the top stitches, leaving a short tail of shirring elastic on the underside, reload the bobbin and start stitching on top of the last few stitches to lock them in place. Then you can tie the tails of elastic together by hand on the underside to make them extra secure. Don’t worry if it looks a little messy – it won’t be noticeable once the fabric is all ruched up.
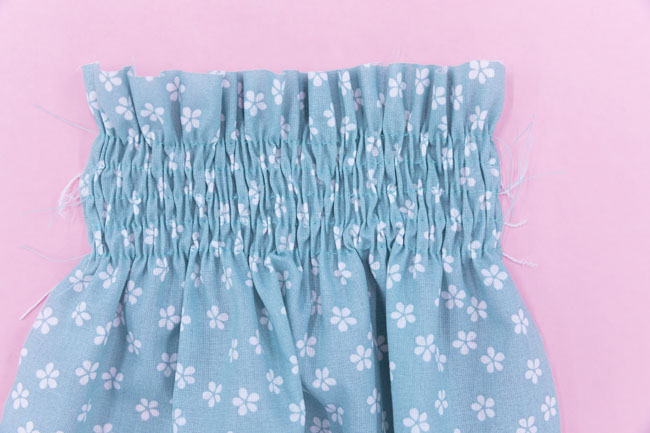
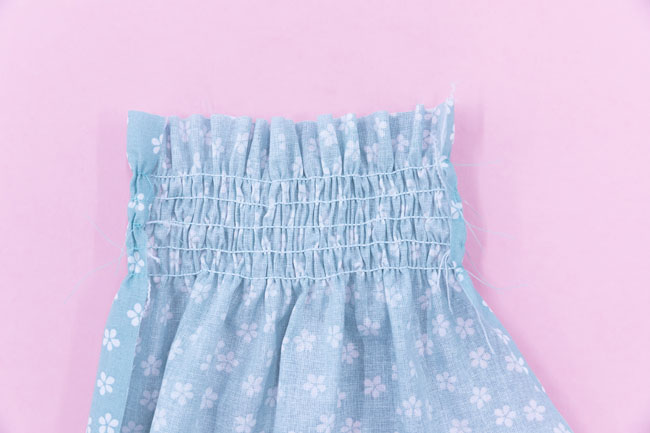
Gently redistribute the gathers if you need to so they’re even, then hover a steamy iron over them to help settle the folds.
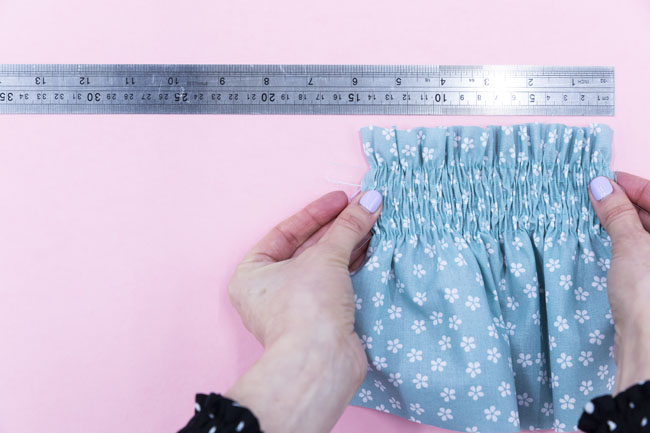
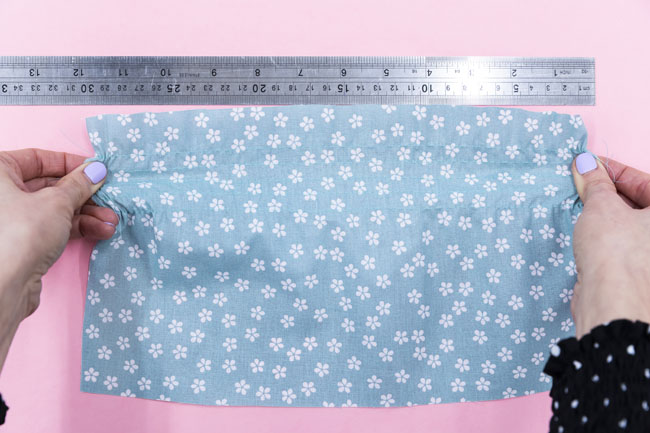
How do I know if my fabric is shirring enough?
Once you’ve sewn your test swatch, measure the shirred part of the fabric. Now stretch it out as far as it will go and measure it again. You’re aiming for the fabric when stretched (this second measurement) to be around 1.8-2 x the width of the shirred fabric when not stretched (the first measurement).
If it’s much more or less than this, you can sew another test swatch, trying a longer stitch length (4.5-5) for more gathering or shorter stitch length (3.5-4) for less gathering. You can also try winding the elastic onto the bobbin with slightly more or less tension, or adjusting the thread tension on your sewing machine slightly. If you find it's gathering the fabric up way more than expected, make sure you're not tightening the elastic when you pull the project out at the end of each row - pull the elastic from the bobbin, not from your project.

Troubleshooting shirring problems
The fabric isn’t gathering up
If your fabric isn’t gathering up, check you have set the machine to a long stitch length (4 to 5). Also check the bobbin is loaded correctly, with the shirring elastic caught on the bobbin case hook.
The elastic is coming loose from the fabric
If the elastic comes out, make sure you’re back tacking securely and avoid using the automatic thread cutter.
The machine is stuck or making funny noises
A certain amount of squeaking from the bobbin case can be expected when shirring as it works against the elastic. Your machine shouldn't get stuck or make a loud clunking sound though!
If it does, check the bobbin is loaded correctly, with the shirring elastic caught on the bobbin case hook.
If your shirring elastic is on the thicker side, you may need slightly looser tension in the bobbin case. Janome experts advise against loosening the bobbin case tension yourself, particularly if it’s the only one you have – instead, you can get a dedicated bobbin case pre-set to a lower tension (this one linked is for Janome DKS100 and similar top-loading machines with an automatic thread cutter). Alternatively, you could buy a spare standard bobbin case to adjust the tension yourself, and mark it with a blob of nail polish so you know which one it is – that way you keep the original factory settings on your main bobbin case.
The fabric is gathering up, but not by the right amount
Try sewing with a longer stitch length (4.5-5) for more gathering or a shorter stitch length (3.5-4) for less gathering.
You can also try winding the elastic onto the bobbin with slightly more or less tension, or adjusting the thread tension on your sewing machine slightly.
If you find it's gathering the fabric up way more than expected, make sure you're not tightening the elastic when you pull the project out at the end of each row - pull the elastic from the bobbin, not from your project.
And that's it!
I hope this post has inspired you to give shirring a try. It’s such a fun technique to try, and really satisfying once you get the hang of it!
If you try shirring the Mabel blouse or dress, do tag us on social media @TillyButtons and @JanomeUK using the hashtag #SewingMabel so we can see.
This tutorial has been brought to you thanks to our friends at Janome UK, who have been supporting creativity for over 100 years.

****
Author: Tilly Walnes
