Showing posts with label tutorial. Show all posts

18 September 2024

How to sew an invisible zip

How to sew an invisible zip

An invisible zip, sometimes called a concealed zipper, does what it says on the tin! Unlike normal zips, an invisible zip has teeth which are hidden on the underside of the garment, so that it blends seamlessly into your garment, giving a polished and professional-looking finish.

While it might seem intimidating at first, sewing an invisible zip is actually quite simple once you know the steps, and when you've mastered it you'll feel like a pro!

In this tutorial, I'll be demonstrating this fancy fastening on the Tilly and the Buttons Ramona skirt sewing pattern, where the zip is in the left side seam - but you can follow this method for a centred zip too, and apply it to lots of other sewing patterns.

A close up of a model wearing a floral pattern mini skirt with faux pocket flaps.

How do you sew an invisible zip?


Watch our step-by-step video tutorial on how to sew an invisible zip or, if you prefer to learn via photos and text, keep on reading.

Remember, we are demonstrating on the Ramona skirt sewing pattern - if you're using a different pattern, your garment might not look exactly like the one in the video and photos, but you'll still be able to use this technique.

5 April 2023

How to Sew Shirring

How to Sew Shirring

Fancy trying your hand at shirring? This lovely sewing technique creates a pretty gathered texture on garments, with the bonus of an adjustable elasticated fit. 

Shirred styles are all the rage on the high street at the moment, and creating this effect is not only fun and fulfilling, but it’s easier than you may think. You just need to know a few simple tips and tricks – I’ve outlined the method in this post, accompanied by a free video tutorial, all brought to you thanks to the support of Janome UK

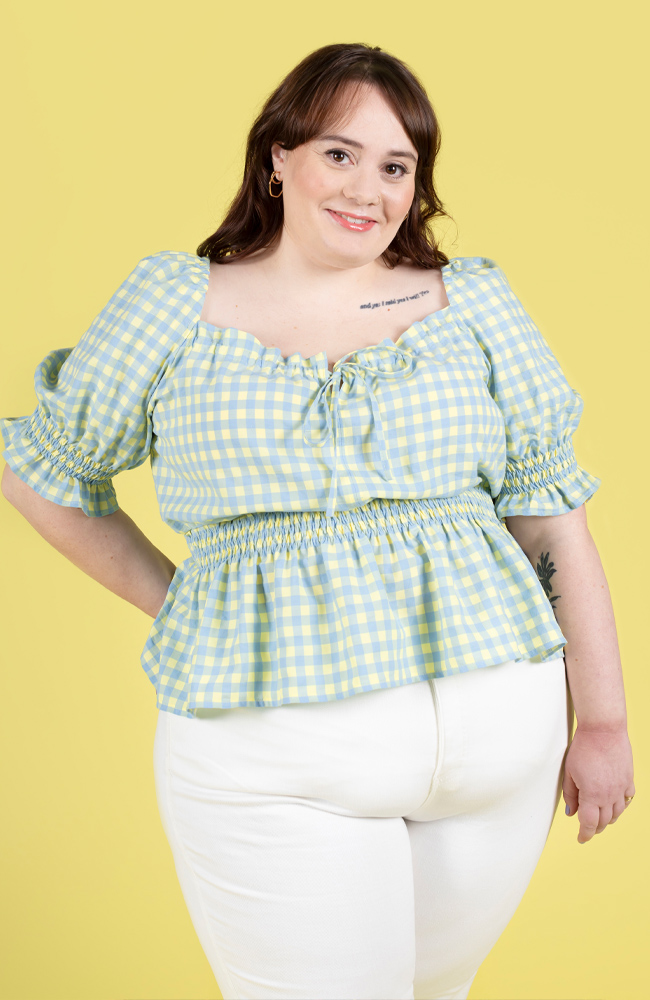
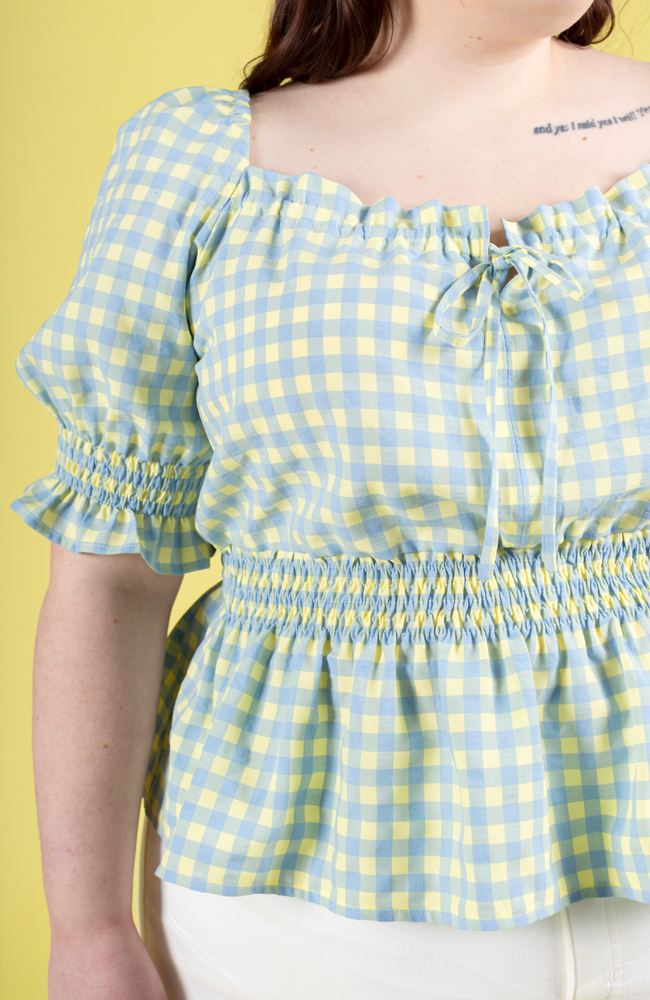
I’m demonstrating on our Mabel blouse and dress sewing pattern, which has a shirred waistline and sleeve cuffs. You can use the same technique for sewing shirring on other patterns too.


What is shirring?


Shirring is a technique where you sew rows of stitching using elasticated thread (shirring elastic) in the bobbin. The shirring elastic, which ends up on the underside of the project, gathers the fabric up to make it smaller – usually around half its original width – creating a pretty surface texture and an adjustable, stretchy fit.

Shirring can be added to various places of a garment to create shaping as well as decorative detail. It’s most commonly used on the bust, waist or sleeve cuffs.

28 April 2021

How To Sew On A Button (+ Video!)

How to sew on a buttons with video by Tilly and the Buttons

Hand sewing on a button is one of those pleasing sewing tasks that everyone should have in their dressmaking skill set. At one point or another almost everyone will need to sew on a button, right? Whether that's replacing a long lost button on a ready-to-wear garment, or adding a sprinkle of colourful buttons to your latest make, this tutorial will show you step by step (with a helpful video too!) how to sew on a button by hand.

But wait, if there's a button, there must be a buttonhole! Fear, not sewists, we've already got you covered when it comes to stitching up perfect, stress-free buttonholes. Check out THIS post for automatic one-step buttonholes and THIS post for four-step ones. We promise they aren't as scary as you might think, and can actually be a really satisfying part of sewing!

Let's get back to buttons...

In this tutorial, I'm sewing a colour pop of bright pink, heart-shaped buttons onto a floaty viscose Lyra shirt dress. The perfect pattern for nailing your buttonholes and buttons! You can also find buttons on our Indigo Add-on pattern for a cool button-up back dress, on our classic Rosa shirt, the simple Arielle skirt, our swishy Seren, and our trendy Alexa jumpsuit.


How to sew on a buttons with video by Tilly and the Buttons

31 March 2021

How to Make Thread Chain Belt Loops (with Video!)

How to Make Thread Chain Belt Loops (with video!) - Tilly and the Buttons

Thread chains make lovely simple belt loops for narrow, lightweight waist ties. You can add them to the side seams on our Lyra shirt dressSafiya dungarees, maternity Bettine dress, and more. You can also use the same technique to 
Once you get the hang of the technique, they come together in just a few minutes.

How to make thread chain belt loops - Tilly and the Buttons

Want to watch the steps in action? Check out our video tutorial...


How to make thread chain belt loops - Tilly and the Buttons

27 January 2021

The Fast Way to Thread Your Overlocker or Serger (with Video!)

The fast way to thread your overlocker or serger - Tilly and the Buttons

Let's face it, threading an overlocker or serger isn't the most fun you could be having while sat at your sewing table. 

The good news is that it's actually quite rare that you'd need to thread it from scratch

More often than not, you can get away with this easy, speedy method of changing the threads that I'm going to show you - a method which doesn't require you to navigate all those hooks and loopers. Hooray!

The fast way to thread your overlocker or serger - Tilly and the Buttons

You'll need to do this while the machine is already threaded up, before any of the cones run out of thread - so keep a beady eye on those cones. It's the perfect way of rethreading if you just want to change the colour, for example.

27 May 2020

How to Sew Narrow French Seams (with Video!)

How to Sew Narrow French Seams (with Video!) - Tilly and the Buttons

French seams are a rather fancy way of creating a lovely, neat finish on the inside of your handmade garments. What they do is enclose the unsightly raw edges of the fabric within a neatly stitched secret cavity, never to be seen again… or that’s how I like to think of them!

How to Sew Narrow French Seams (with Video!) - Tilly and the Buttons

I'm demonstrating on our Jaimie pyjamas sewing pattern. You can also sew French seams on blouses, dresses, underwear… you name it! Try them out on our Fifi boudoir set and Mathilde blouse too.

They work really nicely on light- to medium-weight fabric, but not so great on heavier fabrics where they'd create bulky seams. They’re particularly useful on sheer fabrics as they look less conspicuous than overlocked seams. The strength of the seam also makes them practical for clothing that’s going to go through the laundry a lot.

Just before lockdown kicked in, Jenny and I made you a video demonstrating how to sew French seams. The pattern I'm sewing is coming soon...


5 May 2020

How to Make a DIY Face Mask (with Video!)

DIY Face Mask Tutorial - with video! - Tilly and the Buttons

Want to make your own face mask or covering?

Update: The UK government currently recommends that adults wear face coverings when in enclosed public spaces, such as on public transport or at the supermarket. 

In anticipation of such an announcement, I made a video tutorial on how to sew your own reusable fabric face mask. I hope it is helpful.

This mask fastens with ties since elastic is in short supply at the time of making, plus it has a pocket for a disposable filter and optional nose wire for a closer fit. Please be sure to wash the mask at a high temperature between uses.

PLEASE NOTE: This is NOT designed to be a medical grade mask, it is for personal use, and is not intended to replace social distancing or hand washing. Advice about wearing masks and their possible effectiveness in helping to prevent the spread of Covid-19 is changing all the time and is different from country to country, so please check current guidelines where you are and make up your own mind.


DIY Face Mask Tutorial - with video! - Tilly and the Buttons

You will need:
  • 22cm x 40cm (8 1/2in x 16in) rectangle of fabric for the mask - preferably a tightly woven cotton - I’m using a quilting cotton bought from the Village Haberdashery
  • 4 strips of fabric for the ties – mine are 45cm x 4cm (18in x 1 1/2in)
  • Optional wire – I’m using a folded out paper clip, you could also use a pipe cleaner or a twisty sandwich bag tie.
  • Plus a sewing machine, thread, scissors, pins, tape measure or ruler and an iron.
This is designed to be a unisex adult face covering. If you'd like to make it for a child, you could either try making the main dimensions about 6cm (2 1/4in) smaller, or try this mask on the child to work out how much smaller to make it to fit their particular face. Please note that UK guidelines don't recommend face coverings for young children, and it would be a good idea to replace the ties with elastic if you can find it to avoid the ties getting trapped in something.

If you would like to attach elastic instead of ties, measure the area you would like the elastic to go around (your ears, or back of your head), then take off 10-15% for stretch.

DIY Face Mask Tutorial - with video! - Tilly and the Buttons

I made this video on my phone at home during lockdown, without my usual trusty filmmaker Jenny, so apologies for the shakey cam and tatty ironing board ;)

Stay safe!

18 March 2020

Seven Steps to Perfect Thread Tension (with video!)

Seven steps to perfect thread tension - Tilly and the Buttons

Thread tension giving you neck tension? Ever thrown a wobbly because of wobbled stitches?

When the thread tension is off on your sewing machine, it can really throw you. Stitches that are too tight, too loose, or uneven can be particularly disheartening for sewing newbies who aren’t yet comfortable with their sewing machine – but, let’s be honest, thread tension troubles can plague more experienced stitchers too. In fact, it’s surprisingly often that I hear someone saying the reason they don’t sew is that they can’t get the tension right on their machine.

Needle thread tension
Bobbin thread tension

What you’re aiming for is stitches that look evenly balanced on both sides of the fabric, with no loose loops, tight knots or thread bunching.

If the tension is too tight, the fabric can pucker and the bobbin thread may be visible on the top side of the fabric.

If the tension is too loose, you may see visible loops on the top side of the fabric and the spool thread might be visible on the underside.

The good news is that, more often than not, it’s a very simple fix to get your stitching back on track. And very often it doesn’t even involve adjusting the tension dials! So before you spend this month’s fabric budget on getting your machine serviced, work your way through the following steps, in the following order. And some of these steps may surprise you…

Plus there's a video at the end if you'd like to see these steps in action!

27 February 2020

How to Sew an All-in-One Facing

How to sew an all-in-one facing on a sleeveless garment - Tilly and the Buttons

If you’re making a piece of clothing that’s sleeveless, you may find that the pattern replaces separate neckline and armhole facings with an all-in-one facing. This creates a lovely neat finish on the inside of your garment. But it can be a little bit of a head-scratcher to sew if you haven’t attached one before. So I thought I’d show you step-by-step how to do it - with a video as well as step photos!

The tricky aspect is that, if you sewed the facing to the neckline and armholes right sides together in one go, you wouldn't be able to turn it right sides out again. So we’re going to get a bit clever and sew each armhole in two stages.

You may have heard of an alternative way of doing this called the “burrito method”, which involves rolling the dress up. It’s worth giving that method a go too, but personally I think this technique below is clearer to demonstrate – so here goes!

Olive pinafore sewing pattern - from Tilly and the Buttons: Make It Simple

This is an extract from my book Make It Simple, demonstrated on the Olive pinafore pattern from that book - beautifully modelled here by Phoebe.


16 January 2019

How to Sew a Plait Detail

How to sew a plait detail - Tilly and the Buttons

Did you see Tilly's Ness skirt with the plaited belt detail? If you fancy making your own, you're in luck! It's Serefina here, sewing pattern developer at TATB, and I'm going to take you step-by-step through how to sew this seventies-inspired detail.

How to sew a plait detail - Tilly and the Buttons

It's pretty straightforward to do once you know how, and will add a super cool detail to your me-mades. We attached the plait to the waistband on the Ness skirt. You could also stitch it around the pocket openings, or make it into extra fancy belt loops. Louise even has plans to make plaited braces for her next Ness skirt!

28 November 2018

How to Make a Christmas Confetti Sweater

How to Make a Christmas Confetti Sweater with Sew Jessalli and Tilly and the Buttons

Want a fun and festive way to decorate an old sweater or one you've made yourself?

You might have seen our Sew an Xmas Sweater Contest, where we are challenging you to stitch and embellish one of our patterns to win some fantastic prizes (closing Dec 9). Sophia Palmer, of Sew Jessalli, is a pro at embellishing and a wonderful judge in our contest, so we just had to ask her to share her skills with us.

Sophia creates and sells the most gorgeous personalised gifts (perfect for xmas pressies) and teaches sewing workshops from her studio in Dorset - we are particularly taken with the 'Revamp Your Sweater' workshop.

Over to the lovely Sophia to show us how she made this gorgeous Nora top with glittery baubles and machine embroidered felt stars...

How to Make a Christmas Confetti Sweater with Sew Jessalli and Tilly and the Buttons

23 November 2018

How to Make a Fairy Lights Xmas Sweater


Tis’ the season to be lit up like a Christmas Tree! Is this the cutest Christmas sweater ever or is this the cutest Christmas sweater ever? If you fancy making your own, Marnie from Happy Fabric has created a quick and easy tutorial for how to upcycle a top using vinyl sheets that you cut and press onto your garment. Enter your DIY into our Xmas Sweater Contest if you want a chance to win some amazing goodies!

You will need:

  • 1x A4 sheet HappyGlitter for the baubles in each of the following colours: red, orange, gold, kelly green, royal blue, lavender, egg plant.
    (Suited for cotton, polyester, poly/cotton blends, sublimated polyester.) 
  • 1x metre of HappyFlex in black for the wire and top of bauble.
    (Suited for cotton, polyester and poly/cotton blends.)
  • Iron
  • Greaseproof paper 
  • Ball point pen 
  • Scissors
  • Sweater, t-shirt or sweatshirt

Lay out your sweatshirt and plan out where you want the wire of the lights to go. For this one we will be creating a squiggly line going from the right shoulder down to the waist on the left. Once you have an idea, lay the black vinyl across the jumper facing down. With a pen begin to draw your squiggly line. Remember when you turn your vinyl over to be ironed it will be in the reverse. Once you are happy with line you have drawn, draw another line running alongside your first line about 5mm (1/4in) apart, then cut it out.

Xmas Sweater Christmas Lights Tutorial