30 September 2015

New Coco Pics!

Coco sewing pattern - Tilly and the Buttons

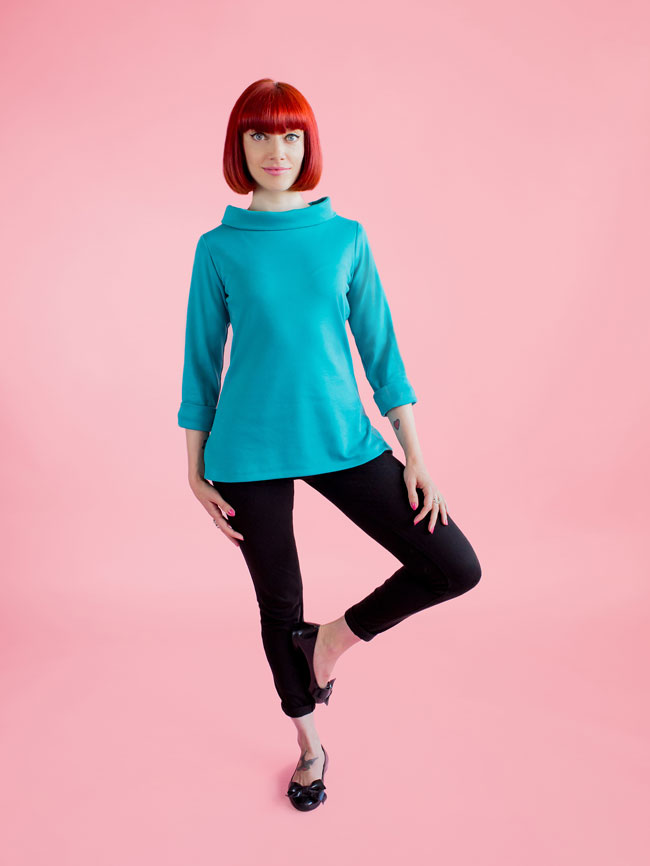
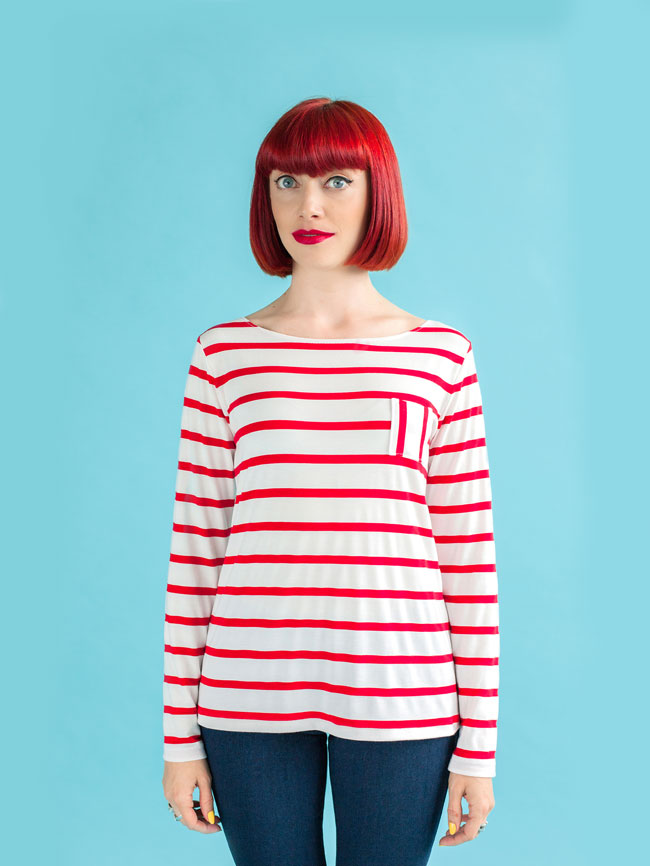
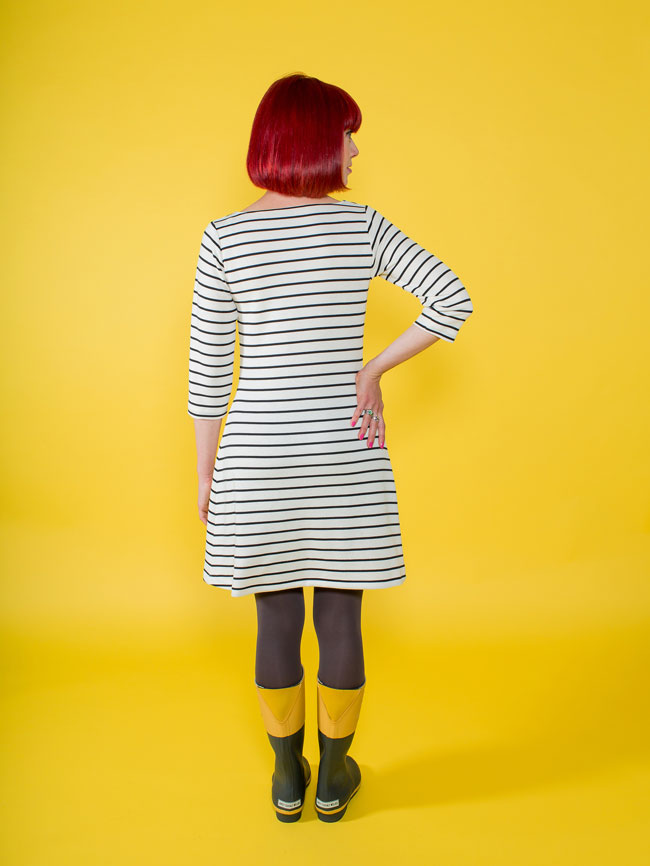
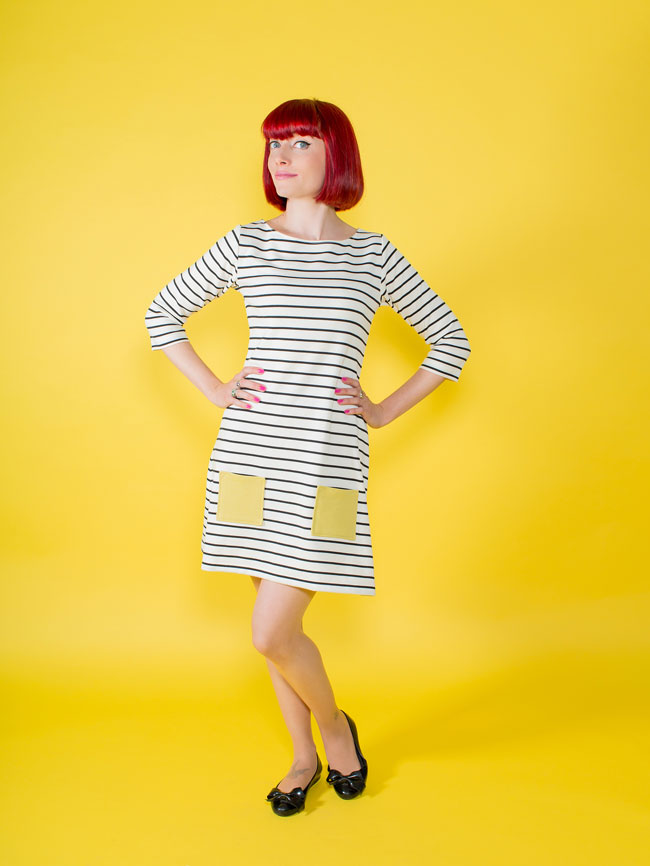
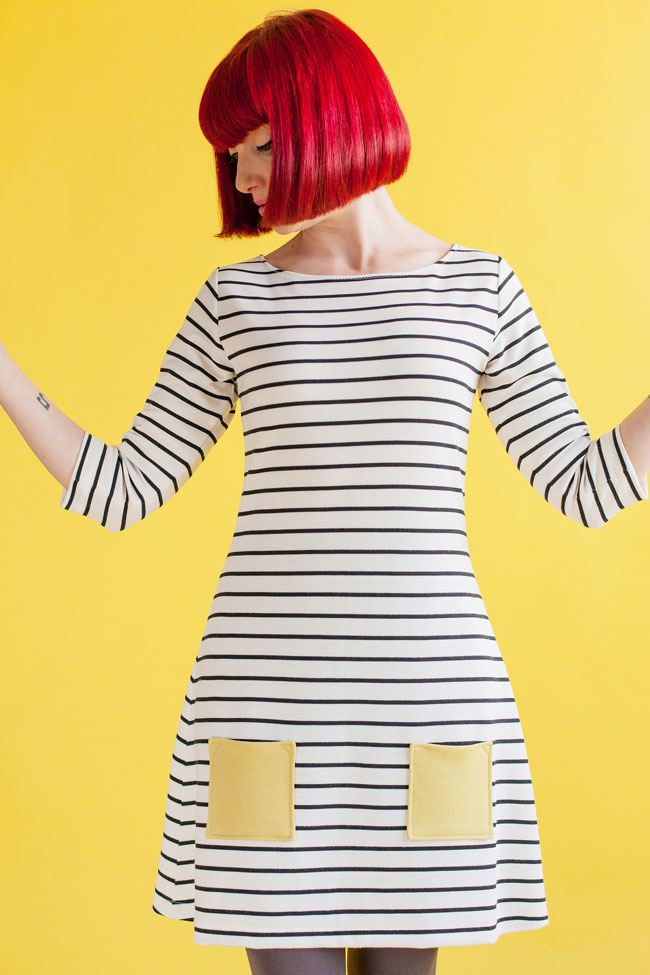
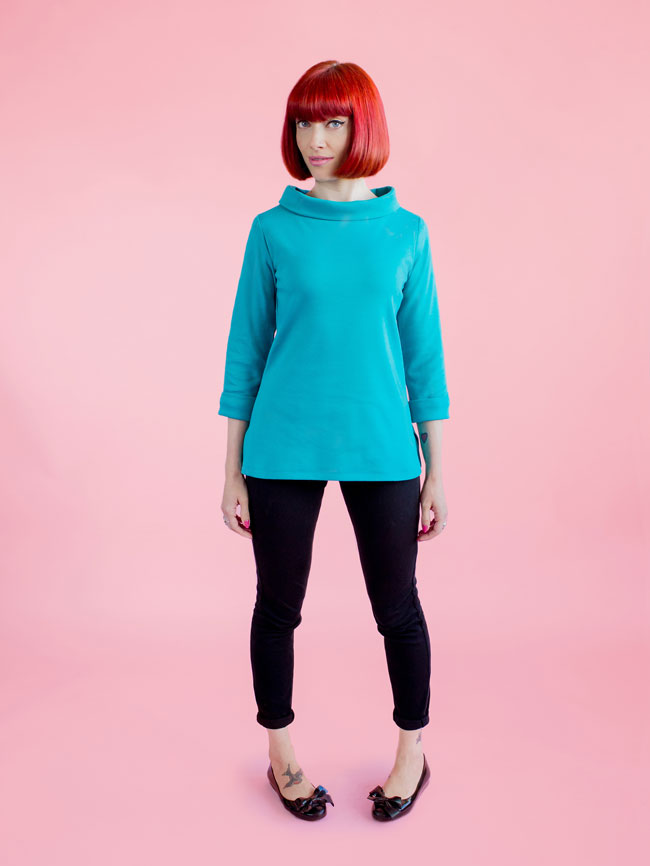
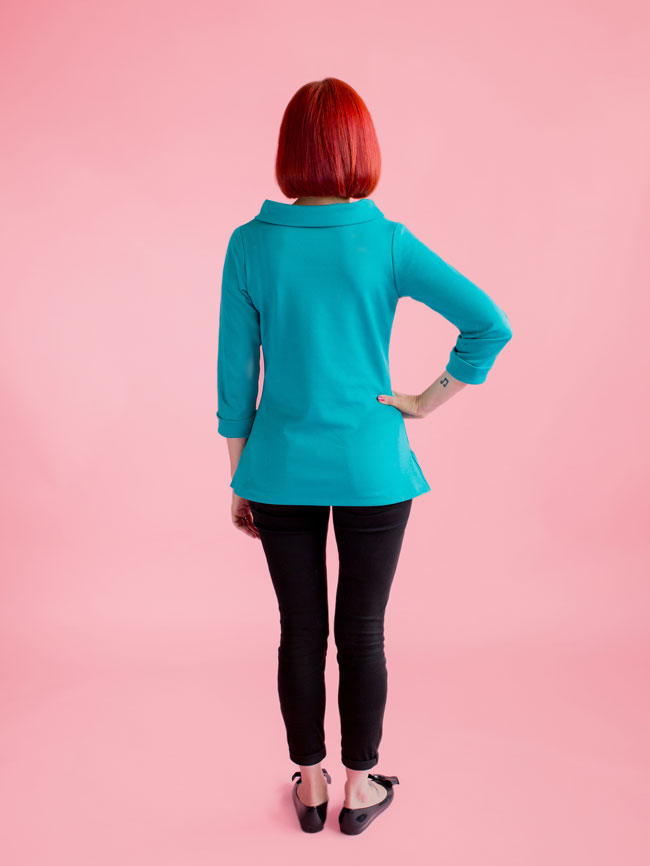
Fancy some DIY fashion eye candy? We have shiny new photos for the Coco sewing pattern!

The original Coco pics were taken 20 months ago when the business was just me working from home - they're very DIY style, taken of me and by me, in my kitchen, the camera on timer, a distinct lack of hair styling involved! This time around, we hired the services of photographer Fanni Williams and make up artist Elbie van Eeden, and my friend Amber Butchart was kind enough to model for us. It's very satisfying to be able to gradually improve the way we do things, bit by bit, as the business grows... The whole team did such a great job!

Coco sewing pattern - Tilly and the Buttons
Coco sewing pattern - Tilly and the ButtonsCoco sewing pattern - Tilly and the ButtonsCoco sewing pattern - Tilly and the Buttons
Coco sewing pattern - Tilly and the Buttons

You may recognise Amber as she's sometimes on the telly and in magazines commentating on fashion. Amber is a fashion historian, author, DJ and all round inspiring lady. Her latest book, Nautical Chic, is a veritable treat for sailor style fans! She also wrote a post on the history of the Breton top for this blog a little while back. The Queen of nautical chic was the perfect choice to model Coco :)

Coco sewing pattern - Tilly and the Buttons
Coco sewing pattern - Tilly and the ButtonsCoco sewing pattern - Tilly and the Buttons

PS. We also shot the photos for our next sewing pattern the same day as these - coming soon! Email list members get first peek and first dibs on new patterns - join up here.

23 September 2015

Love at First Stitch Lovers Meet Up!

Love at First Stitch - best book for beginner dressmakers

We’re just about recovering from an incredibly fun few days at the Handmade Fair. Thank you SO much to everyone who came to see us, whether you’ve been sewing our patterns for a while or are completely new to Tilly and the Buttons. We really enjoyed talking to you all, seeing your handmade clothes and hearing your words of encouragement. We really couldn’t do this without you!

If you missed the Handmade Fair, or if you came along and fancy yet more crafty goodness, then we have some good news! I (Tilly) will be popping up at the Knitting and Stitching Show at Alexandra Palace in London on Sunday 11 October 2015, 2.30 – 4.00pm, at GMC's stand D25 - for the Love at First Stitch Lovers Meet Up...

Love at First Stitch - best book for beginner dressmakers

GMC distributes our book for DIY dressmakers, Love at First Stitch. They asked me to do a book signing, but I thought it would be more fun to make it a meet up for crafty people who have made something from the book, to meet each other, make new craft friends and chat about sewing. A walking and talking version of our Pinterest board, if you will!


Megan dress - sewing pattern in Love at First Stitch

So come along and say hi, preferably wearing something you’ve made from Love at First Stitch so we can admire your creations - but it's not compulsory. Don’t worry if you’re coming on your own! I’ll be coming on my own too - I’m sure we’ll all have plenty to talk about! There may be some treats for the first bunch of people to arrive, oh and we won't judge if you're wearing Margot PJs to Ally Pally, hehe ;)

The details again:

Date: Sunday 11th October 2015
Time: 2.30 - 4.00pm
Location: Stand D25 / GMC stand, Knitting & Stitching Show, Alexandra Palace

You can get your tickets for the Knitting and Stitching Show here.

Looking forward to seeing you there!

16 September 2015

How to Make an Agnes Dress

How to make an Agnes dress - Tilly and the Buttons


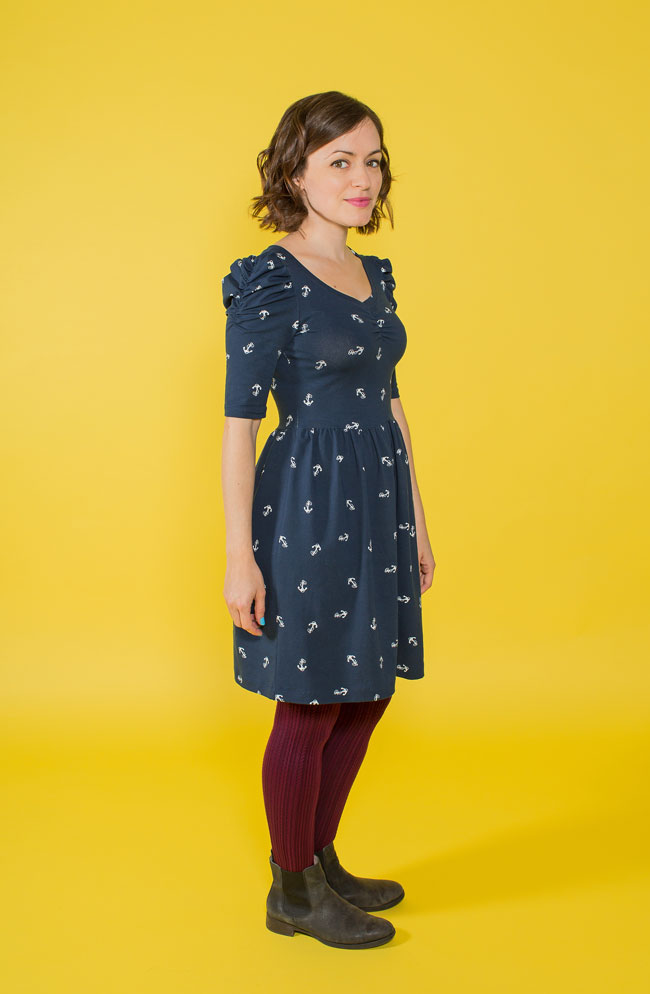
Fancy turning the Agnes top into a dress?

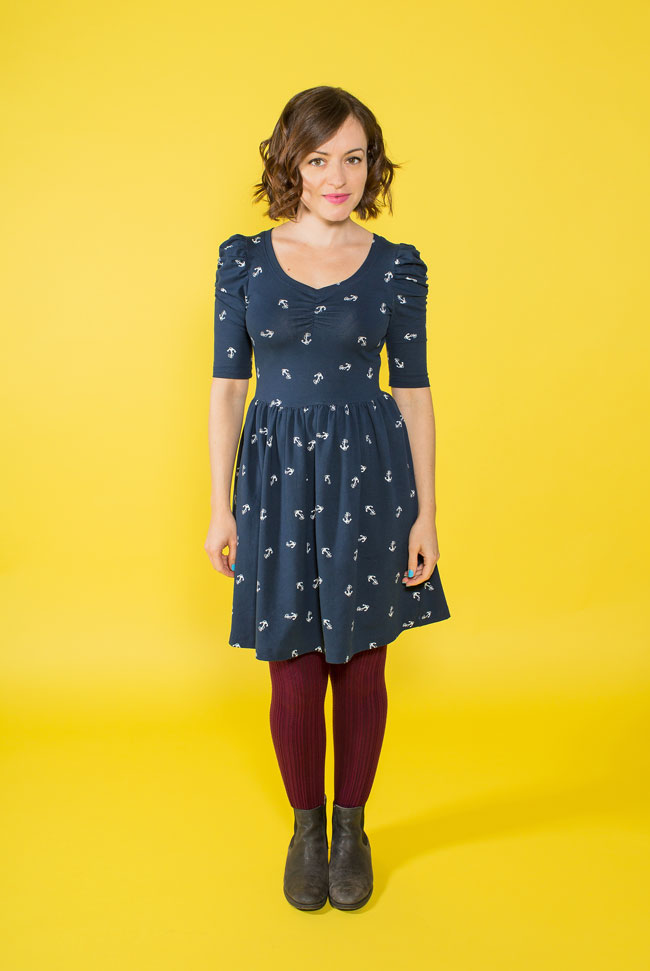
Today I’m going to show you a simple pattern hack – adding a gathered skirt to the Agnes sewing pattern. Essentially all you’re doing is gathering two rectangles up to fit your waist – easy peasy… and so very wearable!

You can choose where to position the waistline on this dress, depending on your style and what shapes you think suits you – on your natural waist, higher up for a smock style, or even a drop waist dress if you fancy.


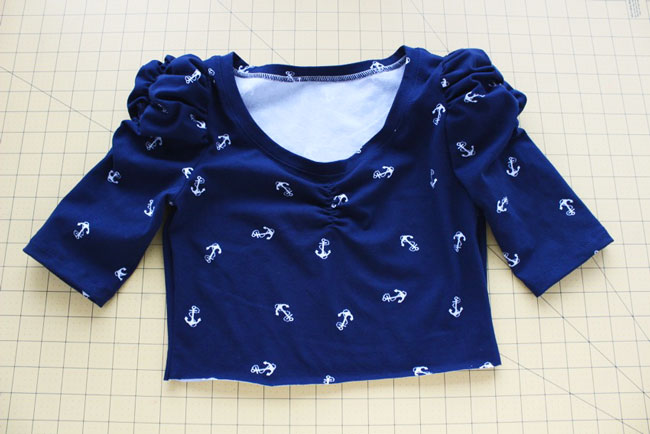
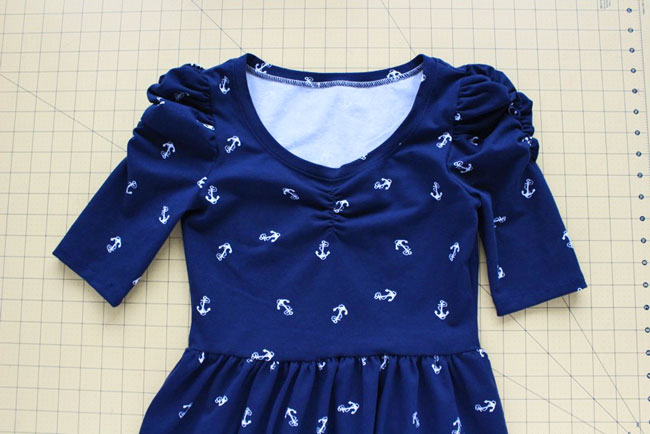
I’ve sewn the ruched sleeve and ruched sweetheart neckline version of the Agnes top - it’d also look lovely with the plain long sleeves and scoop neckline. This fabric is a jersey that’s printed on one side with anchors - I bought it from MyFabrics (at the time they had a pretty gorgeous red version too). It’s not the softest fabric in the world, and the white wrong side shows through a little when it’s stretched, but the print is pretty cute.

You’ll need a bit more fabric than you usually would for the Agnes top on its own. It’s hard to say exactly how much because it will depend on the size you decide to cut your pieces, so you might want to measure up first and then buy your fabric.

Okay, on with the tute!

How to make an Agnes dress - Tilly and the Buttons

1) Decide how far above or below the waist you want the skirt part of the dress to start.

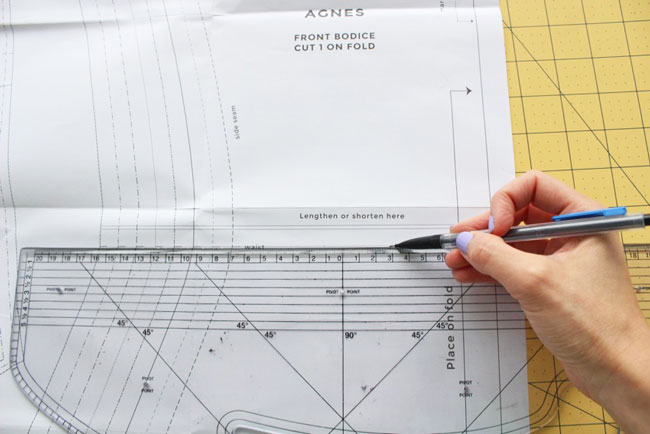
The waist is marked on the front bodice piece of the Agnes pattern with a notch – draw a horizontal line above or below waist where you want the skirt to join the top. Add in the seam allowance by drawing another line 15mm (5/8in) below this line – this will be your cutting line.

Bear in mind that if your fabric stretches lengthways as well as widthways, the weight of the skirt will pull the waistline down a little – in which case, you'll need to take a bit of extra length off the top for stretch.

If the side seam above the cutting line is at an angle, square it off so it’s at a right angle to the cutting line for at least 15mm (5/8in).

Repeat this step on the back bodice piece too.

How to make an Agnes dress - Tilly and the Buttons

2) Sew the Agnes top following the instructions that come with the pattern or our online video class - but don’t hem the bottom of it.

How to make an Agnes dress - Tilly and the Buttons

3) Now we’re going to cut two rectangles of fabric for the skirt. If you’ve made the Clemence skirt in my book, it's a similar process.

The length of each rectangle should be the length you want your skirt to be from where it joins the bodice to the hem + 15mm (5/8in) seam allowance + 20mm (3/4in) hem allowance.

Working out the width of each rectangle isn’t an exact science – it depends on how gathered you want the skirt to be. As a guide, try 1.5 x your hip measurement for the full width of the skirt, so half of that for each of the two rectangles. All I did was cut the 150cm wide piece of fabric I had in half, making the whole thing just over 1.5 x my hip measurement.

Cut two rectangles to this size, making sure the sides run parallel to the straight grain of the fabric so it isn’t twisted (similar to how you cut the top). Fold each piece in half widthways and snip a notch at the top of the fold to mark the centre. Fold the Agnes top in half too and snip notches at the bottom of each fold to mark the centre. These notches will help us join the pieces together and spread the gathers out evenly later.

Sew the rectangles together at the side seams. Press the seam allowances either open or towards the back.

How to make an Agnes dress - Tilly and the Buttons

4) We’re going to sew gather stitches to the top edge of the skirt to gather in the waistline.

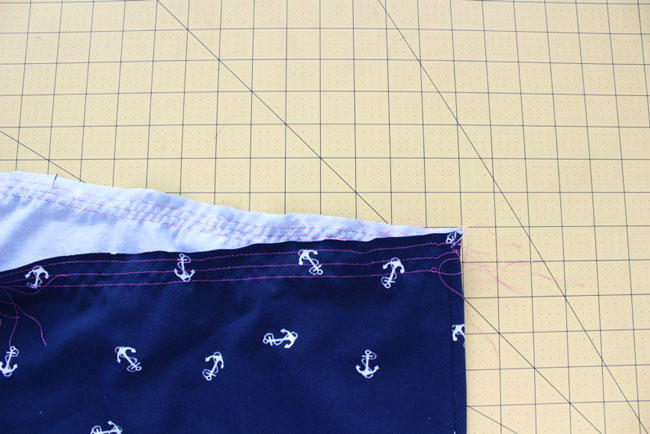
Thread your machine in a contrast colour thread and set it to a longer stitch length (4-5mm). Starting next to one of the side seams and about 5mm (1/4in) from the top edge of the skirt, sew three horizontal rows of stitching about 7mm (1/4in) apart, from the side seam to just before the first centre notch you come to. Sew another three rows from the centre notch to the side seam; another three from the side seam to the next notch; and a final three rows from the second notch to the side seam.

Chunking up (technical term) the gather stitches like this will make it less likely that the threads will snap when we gather up the fabric in the next step.

How to make an Agnes dress - Tilly and the Buttons

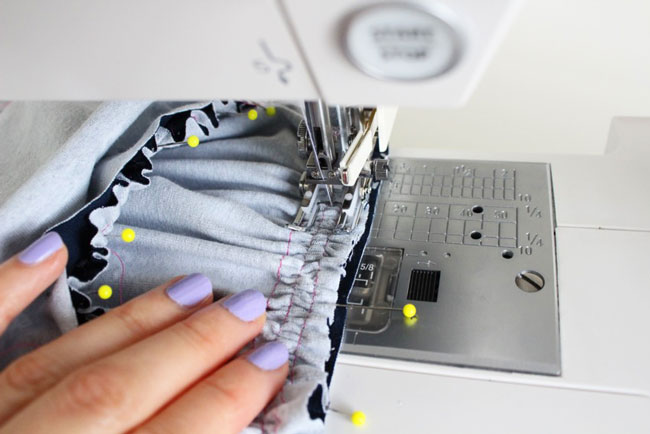
5) Flip the skirt over the top at the waist, bringing them right sides together. Pin them together at the side seams and at the centre notches.

Pull on the top three threads of one set of gather stitching until this part of the skirt fits the part of the top that it’s pinned to. (It’s safest to pull from both ends so the threads don’t come out!) Smooth out the gathers with your fingers so they’re evenly spread, and secure the skirt to the top with plenty of pins.

Do the same thing on each section of gather stitching.

How to make an Agnes dress - Tilly and the Buttons

6) Turn the skirt to the inside of the bodice so you can sew inside the waistline without the gathers getting squidged up on your sewing machine.

With the machine still set to a longer stitch length, tack (baste) the skirt to the top along the waistline. Take your time here to keep the gathers nice and even – you can pause with the needle down when you need to, raise the presser foot and readjust the gathers with your fingers.

If you’re happy that the gathers have gone in smoothly and evenly, rethread your machine in a matching colour, reset the stitch, then sew the waist seam for real.

How to make an Agnes dress - Tilly and the Buttons

7) Unpick the gather stitches and tacking (basting). Press the seam allowances down towards the skirt, taking care not to press out the fullness created by the gathers.

Hem the skirt following the instructions for hemming the top.

And you’re done!

How to make an Agnes dress - Tilly and the Buttons

If you make an Agnes top, don’t forget to send us a picture – we’d love to see :)

9 September 2015

Tools for Marking Sewing Lines and Seam Allowances

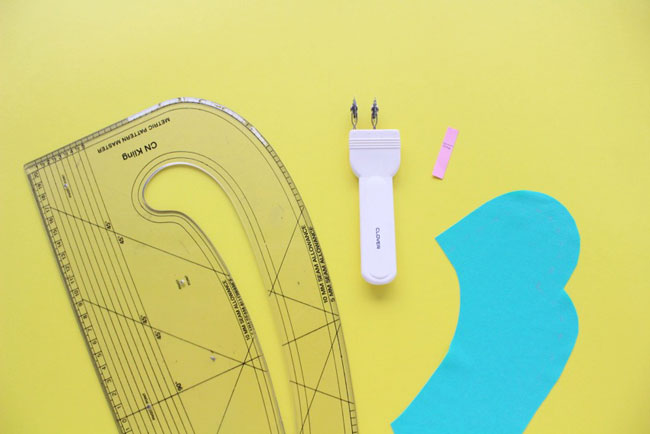
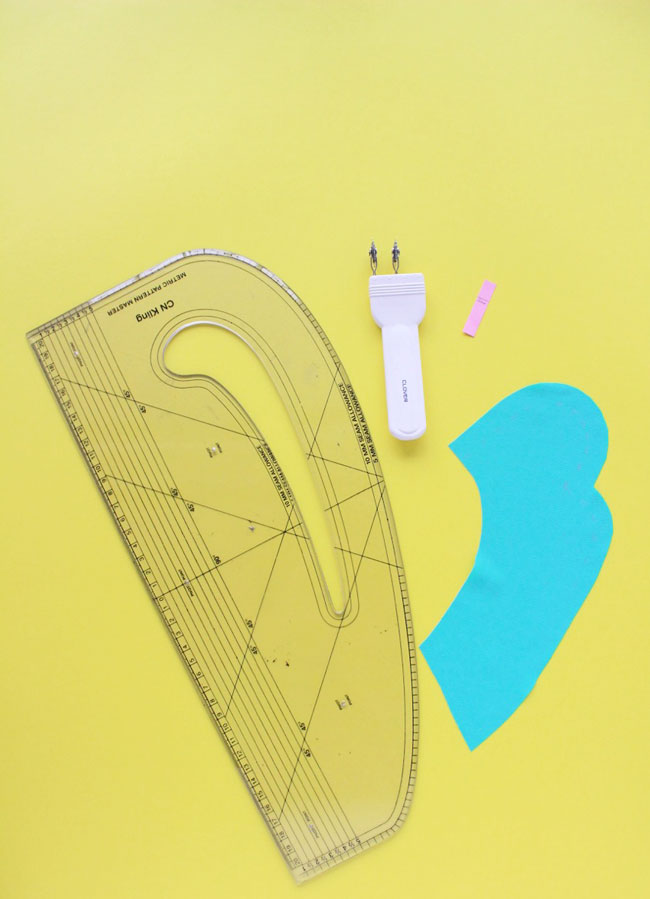
Tools for marking sewing lines and seam allowances - Tilly and the Buttons


Occasionally DIY dressmakers need to add a seam allowance or a seam stitching line to a sewing pattern or piece of fabric. Today I want to share three tools you can use to draw in the line evenly – at least one of them might surprise you!

But first, why would you need to do this?

If you’re hacking a sewing pattern - for example, adding a skirt to a top pattern - you'll need to add a seam allowance to any new seam lines that you draw in so you've got something to attach the new piece to.

If you’re creating your own pattern from scratch, or if you’re using a ready made pattern by a company that doesn’t include seam allowances, you’ll need to add in your own. (You don’t need to do this with Tilly and the Buttons patterns, they all include 15mm or 5/8in seam allowances.)

Or on the other hand, if you’re sewing a pattern that already has seam allowances, but you want to make extra sure that you’re sewing the seams accurately, at an even distance from the raw edge, then you may want to draw the stitching line onto the fabric. This would be helpful if you’re sewing a tricky curve, for example, and want to follow the seam line with your machine needle rather than keeping the raw edge lined up with the seam allowance guide.

Tools for marking sewing lines and seam allowances - Tilly and the Buttons

Okay, so that’s the why. Onto the tools!

Tools for marking sewing lines and seam allowances - pattern master

1) Pattern master

A pattern master (or pattern maker) is a type of ruler used in pattern cutting that has lots of useful lines on it. They come in both metric and imperial measurements.

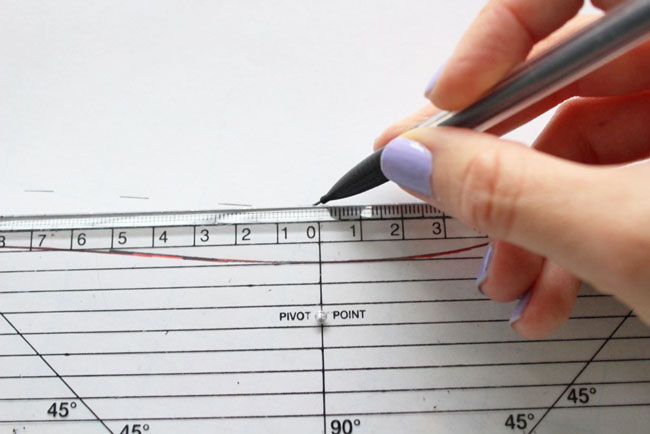
You can line it up at your chosen distance from existing lines and draw new parallel lines easily. It's straight forward for drawing straight lines. For curved lines, there is a curved edge but it doesn't usually have a wide enough seam allowance on it for home sewing patterns (usually 15mm or 5/8in), and the curve shape is limited. Instead, move the straight edge around the curve, drawing a parallel dot or small dash every cm of two, then join them up afterwards with a curved ruler or steady hand.

Little tip – make sure your pencil is sharp and that you’re pressing it right up against the edge of the ruler, otherwise you may end up with a wider seam allowance than you intended ;)

Tools for marking sewing lines and seam allowances - Tilly and the Buttons
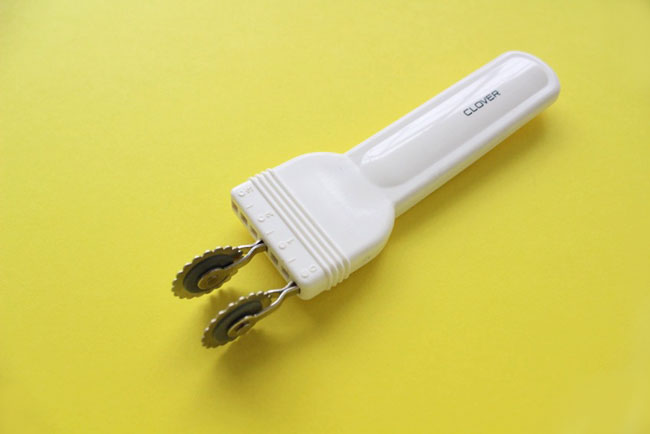
Tools for marking sewing lines and seam allowances - double tracing wheel

2) Adjustable double tracing wheel

A double tracing wheel has different holes to insert two adjustable tracing wheels into, letting you space them apart by the seam allowance measurement you want to use.

Roll it along with one of the wheels exactly on the original line, and the other one will mark in the seam allowance or seam line at an even distance. If you’re using it on paper, you can go over the indentations in pencil afterwards. If you’re using it on fabric, slip a sheet of dressmaker’s carbon underneath, carbon side against the fabric, to transfer the lines.

I don’t find these tools quite as accurate as other methods on straight lines as it's quite easy to wibble off the lines, but they’re very quick and easy to use on curves.

Tools for marking sewing lines and seam allowances - Tilly and the Buttons

3) A little strip of card

This is a trick I picked up on the bra-making course I took at Morley College (thanks, Carol!). It’s so simple, it seems silly to even type this out, but I hadn’t thought of it before so it’s worth sharing!

All you do is cut a slim little strip of card and mark the seam allowance on it. Line up the marking with the original line, and dot or dash in the new line along the edge of the card. You can join up the dots or dashes afterwards with a curved ruler or steady hand.

Again, I wouldn’t use this on straight lines, but it’s really handy on curves!

Tools for marking sewing lines and seam allowances - Tilly and the Buttons

So those are the three tools I use for adding seam allowances or stitching lines to sewing patterns - I hope you found it helpful. Do you use any different tools for the same purpose?

If you enjoyed this post, you might also like:
Tips for accurate sewing
Tips for tracing sewing patterns

This post contains affiliate links, meaning that if you choose to buy something via the links, we receive a small percentage of the sale as compensation. This doesn't cost you anything extra.

2 September 2015

Your Makes!

Hello, Laura here today with a round up of your recent makes. As usual it’s been great to see what everyone has been making with Tilly and the Buttons patterns. Here are a few of our faves from the past few weeks...

Clemence skirt - instructions to make your own in Love at First Stitch

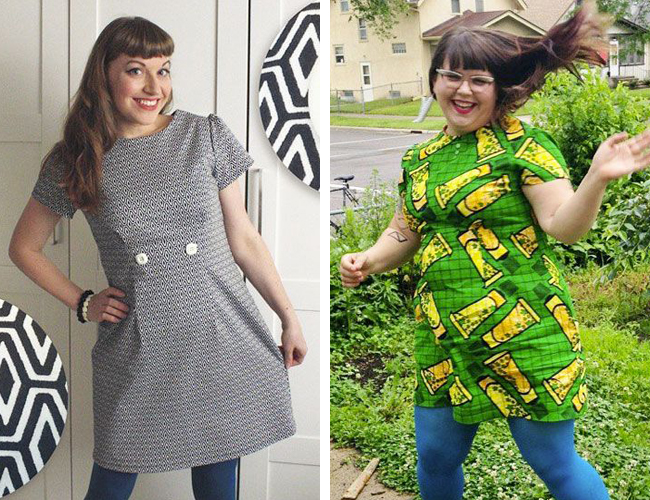
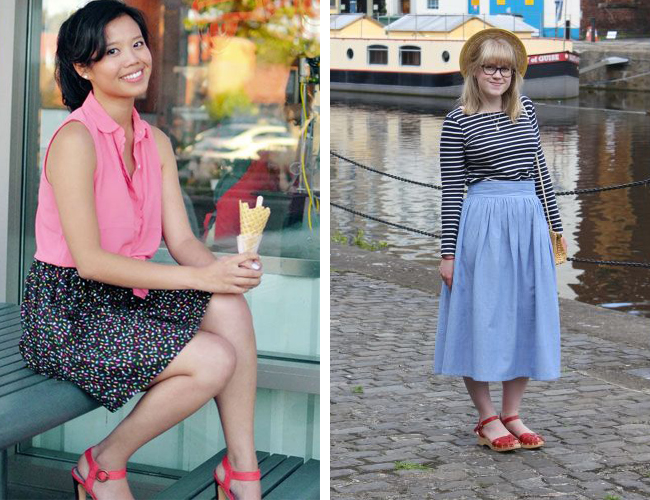
The Clemence skirt is really versatile as you draw the pattern yourself from simple rectangles! The instructions for the skirt are in Tilly's book, Love at First Stitch. Kidoan has made an above-the-knee version using a ice cream sprinkle printed fabric – yum! Rosie has chosen to make hers in a midi length which looks soooo stylish worn with a simple Breton top. We love!

Agnes top - sewing pattern from Tilly and the Buttons

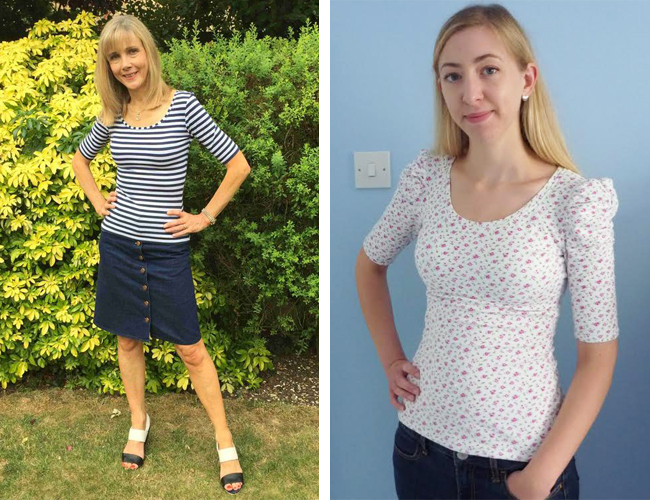
Our current pattern obsession is the Agnes jersey top - it’s super versatile and the long sleeved version is perfect now the weather is cooling down. Jennifer has made a gorgeous striped version that could be worn with anything. Clare made the ruched sleeve version following our Learn to Sew Jersey Tops online workshop, which you can take from home. She sent us some feedback:

“I absolutely loved the online course. It was so helpful to have the videos to support the instructions. I would definitely recommend this format to anyone new to sewing as it is so straightforward. Also, I don't know anyone else who sews so it was really lovely to be part of a social/interactive course.”

Agnes top - sewing pattern from Tilly and the Buttons

Ama also made her striped Agnes top using our Learn to Sew Jersey Tops online workshop. She said,

“Some people told me I would need an overlocker to sew jersey. So I when I came across the online workshop to sew jersey on a regular sewing machine I decided to give it a go. In the videos, Tilly explains all techniques in detail. (Thank you, Tilly!) And all questions in the forum are answered quickly. It was also nice to see everyone's shared results. The Agnes top pattern is so versatile: you just want to make more and more tops!” 

Selmin has definitely caught the jersey sewing bug making an amazing collection of Agnes tops – very impressive!

Bettine dress - sewing pattern from Tilly and the Buttons

The Bettine dress is still proving extremely popular. Veronica looks very happy to be wearing her fun and colourful version - love this! Kirsty has chosen a lovely floral print that we think will also look great with tights and a cardi in the Autumn.

Arielle sewing pattern - Tilly and the Buttons

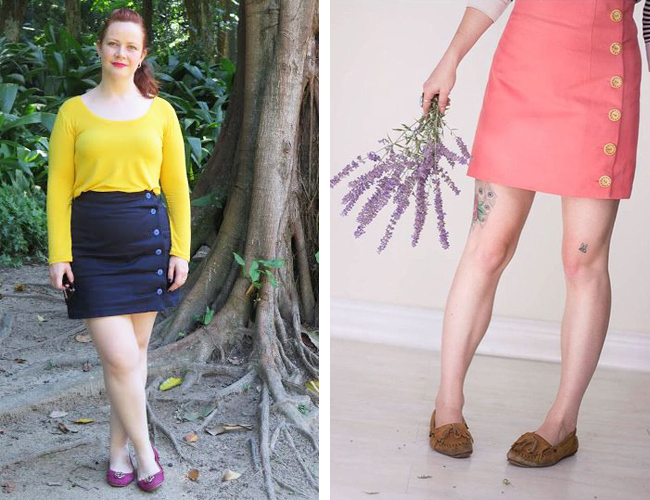
We're dreaming of Arielle skirts in many colours at the moment. Katia’s mini version in navy blue twill looks great worn with a bright yellow top. Arleen made this pink Arielle in canvas from Birch Fabrics - beauuutiful.

Fifi camisole and shorts set - sewing pattern from Tilly and the Buttons

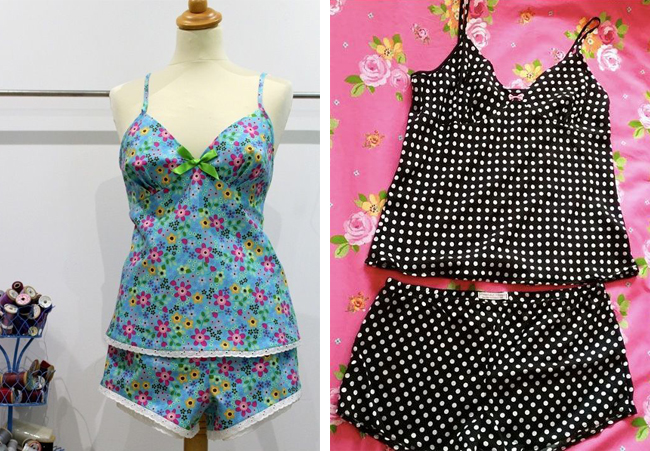
The Fifi camisole and shorts set is a great one for improving your sewing skills and learning some new techniques, such as sewing on the bias and creating a double-stitched narrow elasticated waistband. Ashley has added a special touch with some cream broderie anglaise trim while Claire has kept in classic using black and white polka dots. We love them both!

Megan dress - sewing pattern in Love at First Stitch

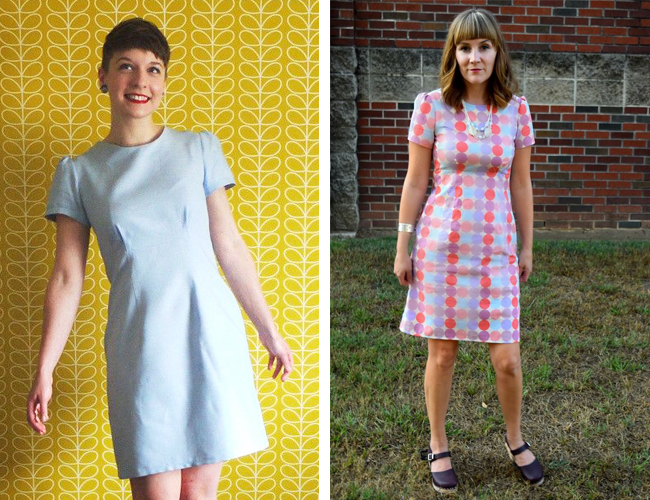
Rinkie has made a lovely Megan dress from Love at First Stitch in a pale baby blue – also we may have slight wallpaper envy! Annie looks great in her Megan dress made with a multi coloured, large polka dot print. You probably can't spot the empire waist seam as she's done a great job of pattern matching those spots.

Mimi sewing pattern - Love at First Stitch

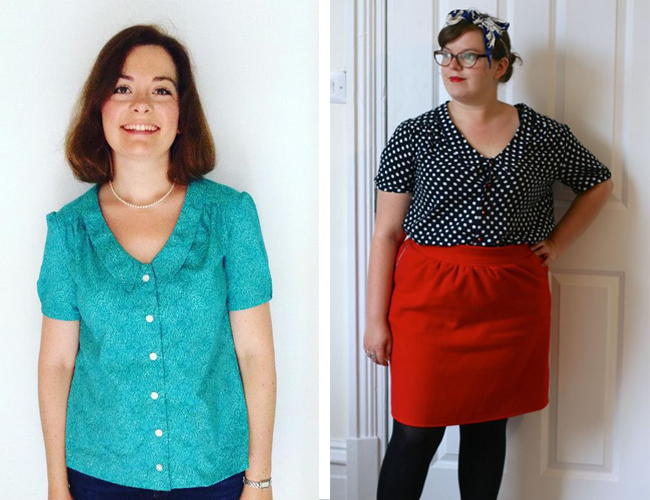
Julia looks very sophisticated in her Mimi blouse from Love at First Stitch made in a gorgeous teal colour. We love Bonnie’s retro styling of her Mimi blouse, worn with some fab cats eye glasses.

Lilou sewing pattern - Love at First Stitch

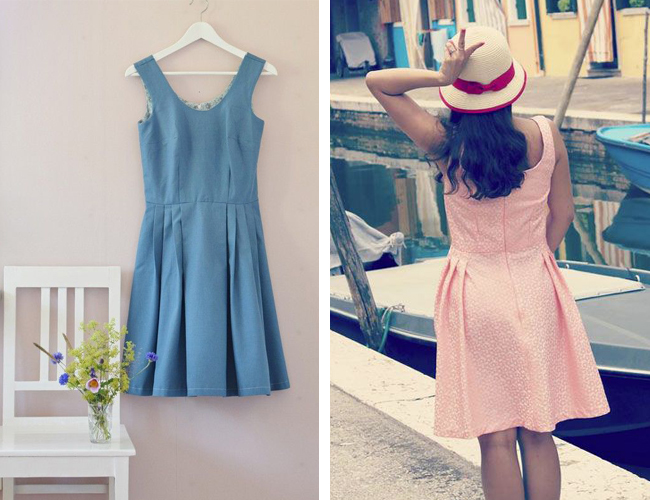
Kertstin has made a gorgeous Lilou dress from Love at First Stitch lined with a floral printed fabric. Cat is showing how lovely the Lilou looks from the back by wearing her adorable baby pink version - we love those pleats!

Coco sewing pattern - Tilly and the Buttons

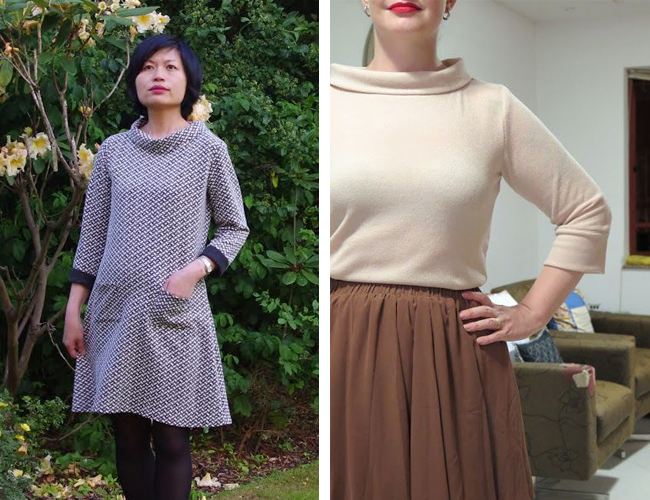
And last but never least, we're starting to dream of cosy Coco tops and dresses for the colder weather that's slowly creeping in. Anne looks so snuggly in her Coco dress with patch pockets and funnel neck. We love the way Katia has styled her funnel neck Coco top, tucked into a high-waisted skirt.

As usual it was sooo hard to choose which of your many wonderful makes to include in this month's round up post, so please go and check out all the other amazing creations in our Maker Galleries on Pinterest.

If you've sewn something with one of our patterns, send us your best photo for the Maker Gallery - you tweet us, email us or send us a link through this page. You can also tag us on Instagram but best send it to us another way as well as we don't catch all our Instagram notifications before they disappear from our feed.

We can’t wait to see what you've been making!