Showing posts with label jersey. Show all posts

3 February 2025

How to make jersey yarn

How to make your own jersey yarn

Making your own jersey yarn is so quick and easy! This is a great trick to know if you’re making a sewing pattern that features a drawstring – such as the waistband of the Cece joggers or sweat shorts, the hood of the Stella hoodie in my book Stretch, the Jaimie pyjama bottoms, Tabitha T shirt dress in my book Make It Simple... and more!

Plus size model wears colour block raglan sleeve sweatshirt and joggers

Read on for what you need to make your own jersey yarn and how to make it – with video tutorial.

3 February 2023

Fitting the Agnes sewing pattern

Fitting the Agnes Jersey Top - Tilly and the Buttons

Making the Agnes top and want some extra tips on fitting? This post will cover the most common fitting adjustments you may need when sewing Agnes.

Agnes is now available in printed and PDF formats sizes UK 6-34 / US 2-30 / EUR 34-62 / AUS 6-34. As it's designed to be made in stretchy jersey, it's relatively simple to fit. 

In this post we're going to cover:
  • Choosing your size
  • Lengthening or shortening the bodice or sleeve
  • Combining sizes or resizing the bust
  • Widening or narrowing the shoulder
  • Changing the neckline
  • Narrowing or widening the sleeve
However, don't think you have to make all of these adjustments - you may need one or two, or maybe none at all!

Model wearing a blue and withe striped Agnes top, with ruched sleeve details

1 February 2023

Reintroducing Agnes! Back in print in sizes UK 6-34

Tilly and the Buttons Agnes top sewing pattern

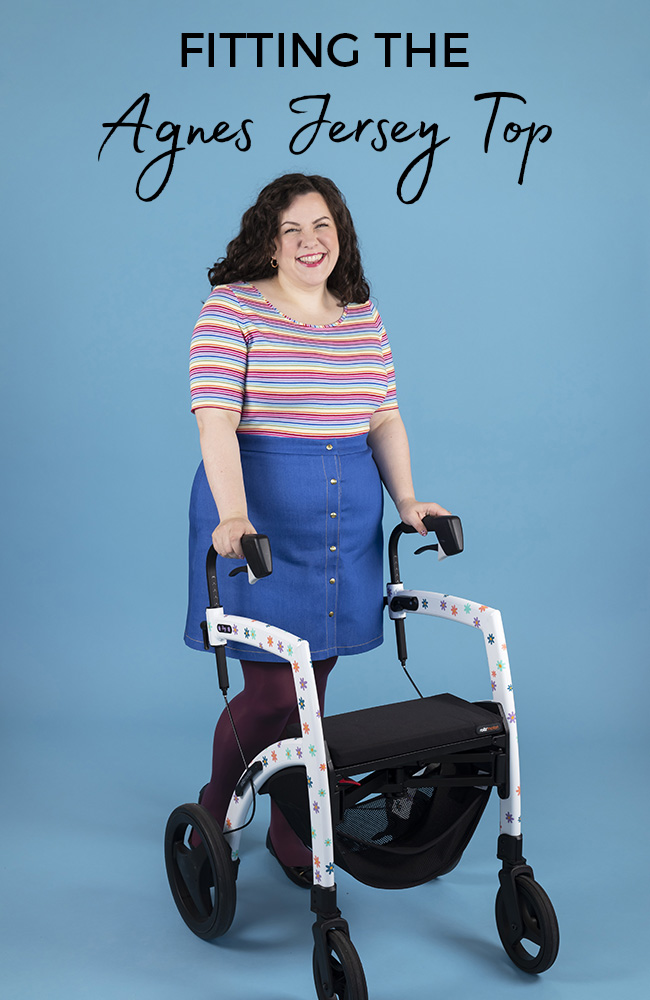
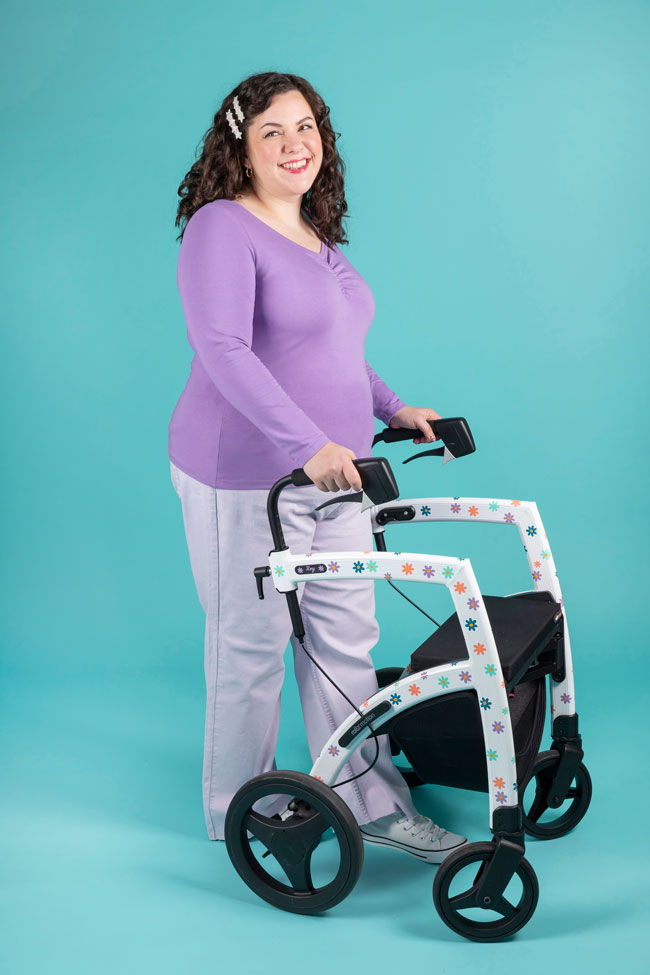
Exciting news, sewists! By popular demand, our Agnes jersey top sewing pattern is back in print, with our new-and-improved size range which includes 15 sizes, from UK 6 to 34 (US 2-30 / EUR 34-62 / AUS 6-34), and with the addition of sewist and disability advocate Samantha (@PurpleSewingCloud) modelling (yes, you may have previously spied her in Tilly's Make It Simple book too!).

Originally launched in 2015, we thought it was high time we brought this popular design back into print. Why? 

Because it's a wardrobe staple that you will wear again and again - whether layered or solo. 

Because THAT statement ruched sleeve option (swoon).

And because it's a perfect introduction to sewing with stretchy jersey fabrics. You don't even need an overlocker or serger - the instructions will take you step-by-step through sewing the whole thing on a regular sewing machine. And, if you fancy extra help, you can follow Tilly's video lessons in the accompanying online workshop, Learn to Sew Jersey Tops.

ORDER AGNES HERE


SIGN UP TO LEARN TO SEW JERSEY TOPS (includes pattern)

Model with sunglasses wears blue stripe jersey top with ruched sleevesModel with brunette curly hair holding mobility aid walker wears purple long sleeve jersey top with sweetheart necklineModel with curly brunette hair wears short sleeve rainbow stripe Agnes top

Tilly and the Buttons Agnes jersey top sewing pattern in sizes UK 6-34

THE PATTERN DESIGN

Irresistibly wearable all year round, Agnes is a versatile addition to your wardrobe that you'll want to sew again and again. But don't just take our word for it - check out the 5000+ makers who have tagged their gorgeous #SewingAgnes makes on Instagram. 

  • Close fitting silhouette
  • Choice of scoop neckline or ruched sweetheart neckline, both finished with a narrow neckband
  • Choice of sleeve lengths - full length or cropped above the elbow
  • Optional on-trend ruching at the shoulders
  • Can be sewn on a regular sewing machine - no overlocker or serger needed!

ORDER AGNES PATTERN

2 March 2022

Sewing Stories: Team Button's Rhi on Learning to Sew Knits

Tilly and the Buttons - Sewing Stories: Team Button's Rhi on Learning to Sew Knits

Hello! It's Rhi - the Marketing Manager at Tilly and the Buttons, here to talk about my experience of learning to sew knits. It’s fair to say that I have the least sewing experience of Team Buttons - I’m still on my sewing journey, having only started sewing in November 2020. 

Tilly and the Buttons - Sewing Stories: Team Button's Rhi on Learning to Sew Knits

My machine isn’t high end - a Singer Confidence 7463. I was so fearful of sewing with stretchy fabrics - having listened to the rumour that knit fabrics are difficult to handle, or that you need an overlocker. But *spoiler alert* this is a myth!

I hope my experience will help any other stretch sewing newbies out there and motivate you to tackle that project you've been avoiding... Here are the stretch sewing projects I started my knit sewing journey with:

17 November 2020

Black Friday Early Offer - 25% Off Online Workshops

Tilly and the Buttons Black Friday Online Workshop SaleLearn a new sewing skill with online video workshops


BLACK FRIDAY EARLY OFFER

Use code: GIMME25 for 25% off online workshops from Tuesday 17th November until Friday 20th November 2020 Midnight GMT. 

If you're getting into sewing or are looking to expand your skills, you might be looking for a fairy stitch-mother to show you the way! Enter Tilly - your sewing guru, who is here to guide you through techniques, tricks and head-scratching moments.

We have a range of online video workshops that cater to every skill level and can be taken at your own pace with 24/7 access. You can take the classes from the comfort of your own home (PJs are optional), and Tilly will be there to break things down every step of the way, with clear instructions. The courses are split into modules, making it easy to revisit useful sections in later projects.

Beginner friendly online sewing workshops
Make Friends with a Sewing Machine

9 November 2020

How to do a Full Bust Adjustment For Knit Fabrics

How to do Full Bust Adjustments on Knit Fabrics - Tilly and the Buttons

Garments made in jersey and other knit fabrics generally don't require many fit adjustments, thanks to the stretch in the fabric. Having said that, if you find that your me-mades feel tight across the bust, with excess fabric pooling above, you may benefit from doing a full bust adjustment. 

In this blog post I'm going to talk you through how to do a full bust adjustment on a dartless bodice sewing pattern designed for knit fabrics - such as our Billie sweatshirt, Agnes topCoco top and dress, Romy top and dress, Tabitha t-shirt and more. We've previously published tutorials on how to do bust adjustments on darted bodices and dartless bodices for woven fabrics - these both have step-by-step instructions and some nifty diagrams to show you exactly what to do, and you should deffo bookmark them to check them out at a later date if you haven't already! 

How to do Full Bust Adjustments on Knit Fabrics - Tilly and the Buttons


How do I know if I need a full bust adjustment? 

Generally speaking, knit garments are much more forgiving than woven garments when it comes to fitting. The stretchy fabric means we often don't need to worry if things are a little bit tight, and stretch garments are also often relatively casual in style and fit, meaning fitting is usually relatively simple overall. Because of this, you might not need to do a bust adjustment on these types of garments, even if you often do a full bust adjustment for woven garments - yay!

However, if your boobs are on the larger side and you usually find that even easy-fitting t-shirts and sweatshirts are either too tight in the bust area, or fit across the bust but have a lot of excess fabric pooling above, then you probably need to make a full bust adjustment. Luckily the adjustment I'm going to show you today is super easy and you'll be done in no time :)

Help! How much do I have to add to the bust? 

23 September 2020

How to Sew a Jersey Neckband (with Video!)

How to sew a jersey neckband (with video!) - Tilly and the Buttons

Sewing a jersey neckband is arguably the fiddliest part of making a T-shirt, sweatshirt, jersey top or dress. But once you get to grips with this technique, you’ll love the freedom of making stretchy clothes you can pull on over your head, without the need for zips or buttonholes.

In this post I'm going to show you how to successfully sew a jersey neckband. We also made a video so you can see the steps in action :)


I’m demonstrating on our Tabitha T-shirt and dress pattern, which you can find in my book Make It Simple. You can use the same technique to sew the jersey neckband on our Lotta dressAgnes topNora top and lots more sewing patterns.

How to sew a jersey neckband (with video!) - Tilly and the Buttons

I’m using a jersey ribbing for the neckband, which is extra stretchy so perfect for squeezing your head through a smaller neckline. If the neckline on your pattern is wider and the pattern doesn’t tell you to use ribbing, you should be able to use the same fabric as the rest of the garment.

Let's do this...

17 February 2020

Make It Simple: Say Hello to the Tabitha T-Shirt and Dress!

Tabitha T-shirt sewing pattern - Make It Simple - Tilly and the Buttons

A classic t-shirt is the kind of sewing pattern you'll return to again and again. It's speedy to make, easy to wear and oh-so versatile.

Over the next few days I'm taking you through the patterns in my new book Make It Simple (see the previous post for the Safiya trousers if you missed it). The second pattern is the Tabitha T-shirt, which you can also make as a drawstring dress. If you're familiar with my previous book Stretch!, I reckon this pattern is going to be the Freya of Make It Simple - in other words, the one that people will make over and over again :)

Tabitha T-shirt sewing pattern - Make It Simple - Tilly and the Buttons

Tabitha has a classic straight shape, not too tight, not too loose. Some of our testers said they had finally found the perfect shaped t-shirt. As you can see in the technical drawing above, you can make Tabitha in multiple versions - with a choice of three sleeve lengths, as a drawstring dress, as a ringer T... so many options!

Like the other patterns in the book, the Tabitha T-shirt comes in ten sizes, from UK 6-24 / US 2-20. The patterns are included in the back of the book ready to trace off, or there's a link in the book to where to download them, as either A4/Letter or A0 files, if you prefer to print them at home or at a copyshop.

19 October 2018

Inspiration and fabrics for making your Nora top

Inspiration and fabrics for making your Nora - by Tilly and the Buttons

If you haven’t already heard, there’s a new knit top in town that is destined to become one of your favourite things to make! Just like our popular Coco pattern, Nora is quick and easy to sew and will slot into your wardrobe like it’s always been there.

You can make Nora from a multitude of knit fabrics - from single jersey, to sweater knits, double knits, and stretch velvet – there are so many lovely options to choose from. The best part is the fabric can transform the shape, from being more structured, to floatier and fluid.

25 April 2018

Five Freyas for Louise

Me, myself + Freya - sewing pattern by Tilly and the Buttons
I have a confession to make… I am completely obsessed with making Freyas – anyone else with me?

It's Louise here, the sales and communications manager at Tilly and the Buttons. Last month we launched our latest book – Stretch! Make Yourself Comfortable Sewing with Knit Fabrics – and have been busy bees collectively getting our sew on so I thought I'd share my makes with you : )

Freya dresses - sewing pattern by Tilly and the Buttons

4 April 2018

Inspiration for Your Stretch Makes

Tilly and the Buttons dressmaking inspiration: Stretch - Make Yourself Comfortable Sewing with Knit Fabrics
It's Louise here, the sales and communications manager from team Buttons – a sewist with a passion for fashion! Last month we launched Tilly's latest book – Stretch! Make Yourself Comfortable Sewing with Knit Fabrics – and I have been pinning to my heart’s content to inspire our next Stretch! makes. I have so many ideas for fabric, styling and embellishments... it’s pretty much all we can talk about in the office at the mo! What are you planning to make? Please do share!

Tilly and the Buttons dressmaking inspiration: Stretch - Make Yourself Comfortable Sewing with Knit Fabrics
BIBI
The pencil skirt is a confirmed classic but there are plenty of ways to reinvent this oh so chic style. I have soooo much inspiration for making our Bibi I just don’t know where to start.

Make a statement with colour or print on Bibi – style it with a tucked in top or Frankie tee thrown on for effortless cool. You can have fun playing with length and try a midi or maxi – it’s perfect with a front or back slit. You may have guessed it but we love Bibi as a pinafore which can be casual or smart depending on the fabric used – Jenny made a gorgeous version in lilac, our current new favourite colour.

1 / 2 / 3 / 4 / 5

23 May 2016

Sale! 30% Off Learn to Sew Jersey Tops


Has Me Made May got you itching to sew more comfortable, everyday clothes? Do you fancy getting to grips with sewing stretchy jersey?

Good news! Our online video workshop, Learn to Sew Jersey Tops, is now on a shiny new website - and to celebrate, we're giving you 30% off this week!

16 September 2015

How to Make an Agnes Dress

How to make an Agnes dress - Tilly and the Buttons


Fancy turning the Agnes top into a dress?

Today I’m going to show you a simple pattern hack – adding a gathered skirt to the Agnes sewing pattern. Essentially all you’re doing is gathering two rectangles up to fit your waist – easy peasy… and so very wearable!

You can choose where to position the waistline on this dress, depending on your style and what shapes you think suits you – on your natural waist, higher up for a smock style, or even a drop waist dress if you fancy.


I’ve sewn the ruched sleeve and ruched sweetheart neckline version of the Agnes top - it’d also look lovely with the plain long sleeves and scoop neckline. This fabric is a jersey that’s printed on one side with anchors - I bought it from MyFabrics (at the time they had a pretty gorgeous red version too). It’s not the softest fabric in the world, and the white wrong side shows through a little when it’s stretched, but the print is pretty cute.

You’ll need a bit more fabric than you usually would for the Agnes top on its own. It’s hard to say exactly how much because it will depend on the size you decide to cut your pieces, so you might want to measure up first and then buy your fabric.

Okay, on with the tute!

How to make an Agnes dress - Tilly and the Buttons

1) Decide how far above or below the waist you want the skirt part of the dress to start.

The waist is marked on the front bodice piece of the Agnes pattern with a notch – draw a horizontal line above or below waist where you want the skirt to join the top. Add in the seam allowance by drawing another line 15mm (5/8in) below this line – this will be your cutting line.

Bear in mind that if your fabric stretches lengthways as well as widthways, the weight of the skirt will pull the waistline down a little – in which case, you'll need to take a bit of extra length off the top for stretch.

If the side seam above the cutting line is at an angle, square it off so it’s at a right angle to the cutting line for at least 15mm (5/8in).

Repeat this step on the back bodice piece too.

How to make an Agnes dress - Tilly and the Buttons

2) Sew the Agnes top following the instructions that come with the pattern or our online video class - but don’t hem the bottom of it.

How to make an Agnes dress - Tilly and the Buttons

3) Now we’re going to cut two rectangles of fabric for the skirt. If you’ve made the Clemence skirt in my book, it's a similar process.

The length of each rectangle should be the length you want your skirt to be from where it joins the bodice to the hem + 15mm (5/8in) seam allowance + 20mm (3/4in) hem allowance.

Working out the width of each rectangle isn’t an exact science – it depends on how gathered you want the skirt to be. As a guide, try 1.5 x your hip measurement for the full width of the skirt, so half of that for each of the two rectangles. All I did was cut the 150cm wide piece of fabric I had in half, making the whole thing just over 1.5 x my hip measurement.

Cut two rectangles to this size, making sure the sides run parallel to the straight grain of the fabric so it isn’t twisted (similar to how you cut the top). Fold each piece in half widthways and snip a notch at the top of the fold to mark the centre. Fold the Agnes top in half too and snip notches at the bottom of each fold to mark the centre. These notches will help us join the pieces together and spread the gathers out evenly later.

Sew the rectangles together at the side seams. Press the seam allowances either open or towards the back.

How to make an Agnes dress - Tilly and the Buttons

4) We’re going to sew gather stitches to the top edge of the skirt to gather in the waistline.

Thread your machine in a contrast colour thread and set it to a longer stitch length (4-5mm). Starting next to one of the side seams and about 5mm (1/4in) from the top edge of the skirt, sew three horizontal rows of stitching about 7mm (1/4in) apart, from the side seam to just before the first centre notch you come to. Sew another three rows from the centre notch to the side seam; another three from the side seam to the next notch; and a final three rows from the second notch to the side seam.

Chunking up (technical term) the gather stitches like this will make it less likely that the threads will snap when we gather up the fabric in the next step.

How to make an Agnes dress - Tilly and the Buttons

5) Flip the skirt over the top at the waist, bringing them right sides together. Pin them together at the side seams and at the centre notches.

Pull on the top three threads of one set of gather stitching until this part of the skirt fits the part of the top that it’s pinned to. (It’s safest to pull from both ends so the threads don’t come out!) Smooth out the gathers with your fingers so they’re evenly spread, and secure the skirt to the top with plenty of pins.

Do the same thing on each section of gather stitching.

How to make an Agnes dress - Tilly and the Buttons

6) Turn the skirt to the inside of the bodice so you can sew inside the waistline without the gathers getting squidged up on your sewing machine.

With the machine still set to a longer stitch length, tack (baste) the skirt to the top along the waistline. Take your time here to keep the gathers nice and even – you can pause with the needle down when you need to, raise the presser foot and readjust the gathers with your fingers.

If you’re happy that the gathers have gone in smoothly and evenly, rethread your machine in a matching colour, reset the stitch, then sew the waist seam for real.

How to make an Agnes dress - Tilly and the Buttons

7) Unpick the gather stitches and tacking (basting). Press the seam allowances down towards the skirt, taking care not to press out the fullness created by the gathers.

Hem the skirt following the instructions for hemming the top.

And you’re done!

How to make an Agnes dress - Tilly and the Buttons

If you make an Agnes top, don’t forget to send us a picture – we’d love to see :)

19 August 2015

Tips for Making a Jersey Bettine Dress

Jersey Bettine dress - sewing pattern from Tilly and the Buttons
As promised, here's my report on and tips for making the Bettine sewing pattern in jersey fabric.

Why would you make a Bettine dress in jersey?

First of all, there's the comfort factor. The Bettine dress is a relaxed fit dress designed with comfort in mind. Making it in jersey cranks the comfort factor up to eleven. This is literally the comfiest thing I've ever worn! A jersey Bettine is perfect for travelling in comfort and style, lounging around in comfort and style, going to the office in comfort and style... Can you tell I like it? ;)

Jersey Bettine dress - sewing pattern from Tilly and the Buttons

The second reason to make a Bettine dress in jersey is because it suits the design of the dress. Patterns designed for stretchy fabrics are usually drafted differently from patterns designed for woven fabrics. The stretch in jersey usually changes the amount of ease needed in the pattern, and how it hangs and fits on the body. However, as the Bettine pattern has a relaxed, drapey fit rather than close fit, and as the shaping is created by an elasticated waist channel rather than darts or princess seams, it can be cut out in jersey with no changes to the main pattern pieces. Hooray! I made my jersey Bettine dresses in exactly the same size as I usually would. (And if you do find that your usual size feels big in jersey, you could simply take it in a bit at the side seams.)

So what changes do you need to make for jersey?

Jersey Bettine dress - sewing pattern from Tilly and the Buttons

1) Avoid the pockets

First of all, I would avoid making the pocket version in jersey. I haven't actually tried it so feel free to prove me wrong, but my hunch is that the pockets would look a bit droopy in stretchy fabric. Better stick to the plain skirt version. It's quicker anyway!

Jersey Bettine dress - sewing pattern from Tilly and the Buttons

2) Finish the neckline with a neckband

Secondly, I'd recommend replacing the neckline facing with a simple neckband - this will be less bulky, it won't try to pop out like a facing might in jersey, and it will pull in the neckline slightly so it doesn't gape in the stretchy fabric.

To make the neckband pattern, draw a rectangle to the following dimensions, depending on which size you're making:

Size 1 - 29.5cm (11 1/2in) x 5cm (2in)
Size 2 - 30cm (11 3/4in) x 5cm (2in)
Size 3 - 30.5cm (12in) x 5cm (2in)
Size 4 - 31cm (12 1/4in) x 5cm (2in)
Size 5 - 31.5cm (12 1/2in) x 5cm (2in)
Size 6 - 32cm (12 1/2in) x 5cm (2in)
Size 7 - 32.5cm (12 3/4in) x 5cm (2in)
Size 8 - 33cm (13in) x 5cm (2in)

Draw a "place on fold" arrow on one short side of the rectangle. This is your neckband pattern piece - fold your jersey lengthways and cut a double piece of fabric on the fold using this piece as a template.

Sewing a jersey neckband - Tilly and the Buttons

Sew the front and back bodice pieces together at the shoulders as normal, but don't staystitch the neckline. The steps for attaching the neckband are the same as for the Agnes top, so I'm borrowing the pictures from the Agnes sewing pattern instructions. Narrow zigzag stitch or overlock (serge) together the short edges, right sides together, to form a loop. Trim and press the seam allowances open or to one side. Fold the neckband in half lengthways, wrong sides together and press.

Sewing a jersey neckband - Tilly and the Buttons

Pin the raw edges of the neckband to the right side of the bodice neckline, aligning the seam line on the neckband with one of the shoulder seams. The neckband is slightly smaller than the neckline so it pulls in the jersey and stops it gaping, so you'll need to stretch the neckband slightly as you pin it. Keep the amount of stretch even and try not to stretch the bodice itself.

Sewing a jersey neckband - Tilly and the Buttons

Tack (baste) the neckband to the bodice neckline 10mm (3/8in) from the raw edges, gently stretching the neckband to fit. Depending on how stretchy your fabric is, you may find the neckline looks a bit gapey - in which case, unpick it, trim the neckband down and try again.

Once you're happy with the neckband, narrow zigzag stitch or overlock it to the bodice neckline using a 15mm (5/8in) seam allowance.

Sewing a jersey neckband - Tilly and the Buttons

Trim the seam allowances and press them to the inside of the bodice, pressing the neckband away from the bodice. With the bodice right side up, zigzag topstitch (or twin needle topstitch) the seam allowances to the bodice, close to the seam line, to keep them in place on the inside. Give the neckline a good press - steam can help neaten it up :)

3) Brush up on your jersey sewing skills


Learn to Sew Jersey Tops - online workshop from Tilly and the Buttons

Thirdly (and obviously), sew the dress as you would normally sew something in jersey. Use a stretch or ballpoint or stretch needle, use a walking foot or dual feed foot on your regular sewing machine if you have one (not essential but recommended), sew the seams with a narrow zigzag stitch or an overlocker (serger), hem the dress with a wide zigzag or twin needle...

If you're new to sewing jersey or need some extra help, take a look at our online video workshop, Learn to Sew Jersey Tops, which will walk you through my no-fuss approach to sewing jersey on a regular sewing machine (you don't need an overlocker or serger), including tips on how to apply a neat-looking neckband.

4) Consider making a Bettine t-shirt!

And finally, as I was sewing together the Bettine bodice, I realised that if you lengthen the bodice pattern pieces - maybe by 20-25cm (8-10in) - you could make a super simple grown-on sleeve jersey t-shirt. Knowing how quick this pattern is to sew already, the t-shirt version would probably only take about five minutes to make!! Ooh and wouldn't it'd be cute with the little cuff tabs and buttons?

If you make your own jersey Bettine dress - or any dress for that matter - don't forget to tag us in and use the hashtag #SewingBettine on Instagram or Twitter, or simply email us so we can see it and share it on the Maker Gallery. Can't wait to see!

PS. We've had quite a few emails and social media comments recently from people disappointed that our sewing patterns aren't stocked in a particular shop or country. While we ship patterns from our own shop worldwide, we are always working hard behind the scenes to expand our list of stockists, both in the UK and internationally. If your favourite shops don't stock our patterns, please please please ask them to! We'd really appreciate your help in spreading the word and letting shops know that their customers are interested in buying our patterns from them - it really does make a difference. Thank you so much! :)