If you're thinking of making the Sonny jacket and have a few questions about how to get a great fit, you've come to the right place.
Sonny is an ultra-versatile jacket with a relaxed, boxy fit, making it simple to fit. Good stuff! However, as we are all wonderfully unique in shape and size, you might want to make a few changes to your pattern pieces to make it suit your body better. Here, I'm going to talk you through the most common fitting adjustments you might want to consider making to your Sonny jacket.
In this post we're going to cover:
- Making a toile
- Choosing your size
- Lengthening or shortening pattern pieces
- How to combine pattern sizes
Making a toile
A toile - or a "muslin"- is an initial mock-up of your garment in fabric you don't mind using for testing purposes. A toile is a great opportunity to test the fit of a sewing pattern or practice a technique, like inserting a collar, before you cut into your nice fabric.
The Sonny jacket is a relaxed fit, meaning you don't necessarily need to make a toile for fitting purposes. If you're planning on wearing your favourite chunky knit under your Sonny and want to check it will be comfortable, we recommend making a quick toile of the front and back bodice pieces and sleeves to check the fit. Pick a fabric with a similar weight and drape to the fabric you have in mind for your final project.
We have a comprehensive blog post about toile making. Go check it out if you want to find out more!

Choosing your size
Sonny includes all 15 sizes in our range. Pattern sizes 1-6 (UK 6-16) and 7-15 (UK 18-34) have been drafted, fitted and graded separately to create a better fit. For this reason, you may notice the proportions change in the measurements chart and the shaping is slightly different on the pattern pieces – sizes 7-15 include room for a larger bust (10cm/4in difference between high bust and full bust, as opposed to 5cm/2in difference on sizes 1-6), and slightly more room at the waist.
To find your size, using a flexible tape measure, measure the circumference of your:
- Bust - take the measurement at the fullest point i.e. around your nipples
- Waist - where you bend at the side
Check the tape measure is sitting level with the floor - it can help to turn to the side and look in a mirror to check.
Circle your measurements on the ‘Body Measurements’ chart in the pattern instructions. If your measurements all fall into one size, then this is the size you'll cut.
However, it's common for your measurements to fall into different sizes too. In fact, most people's do! You can create a bespoke fit for you by combining sizes (we'll come onto that later!).
A quick note about bust measurements - for some closer fitting patterns, we sometimes advise you to consider doing a full or small bust adjustment to get a great fit across the bust. As this jacket has is a relaxed fit, there's no need to do a bust adjustment and you can choose your normal bust size - result!
Lengthening or shortening pattern pieces
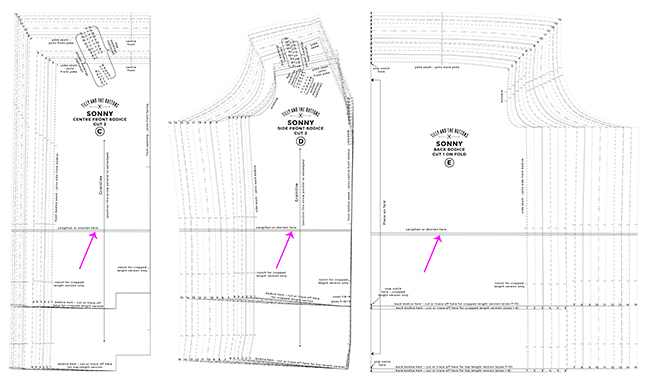
Our patterns are drafted for a height of around 5"5 (165cm). If you're particularly taller or shorter than this, or know you have a long or short torso, you can change the length of the pattern pieces to fit you better.
We have a blog post dedicated to explaining how to lengthen or shorten pattern pieces. It talks you through the process, step by step, so go check it out.
Remember, if you lengthen or shorten the front bodice pieces, make sure you make the exact same adjustment to the back bodice and facing so the seams end up the same length. Also, if you're lining your jacket using the Sonny lining add-on pattern, remember to do the same adjustments to your lining pieces so they are all the same length.
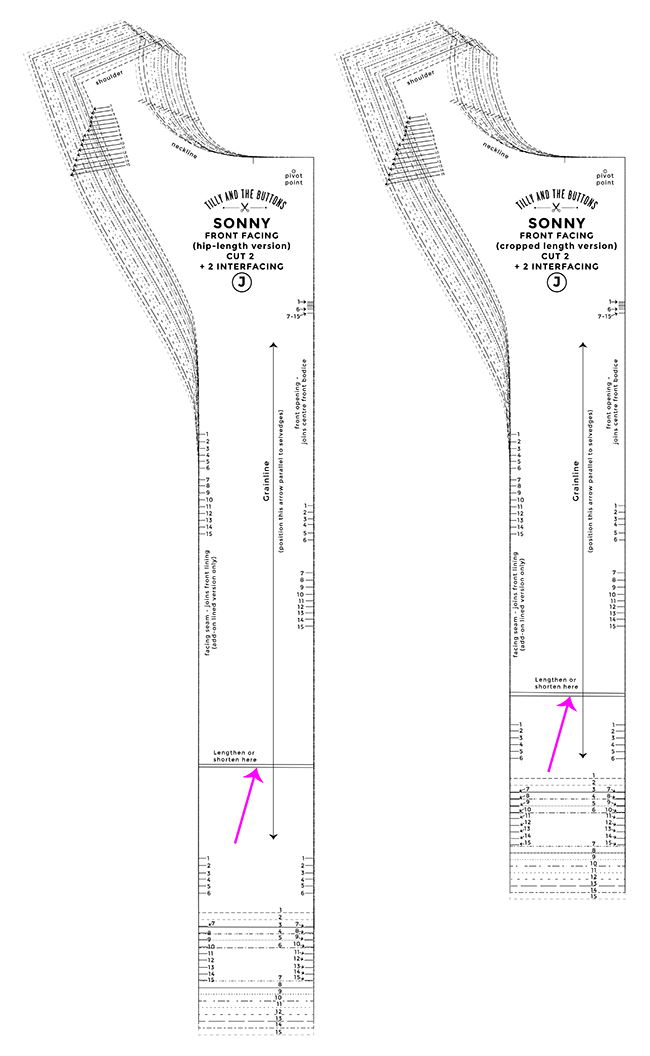
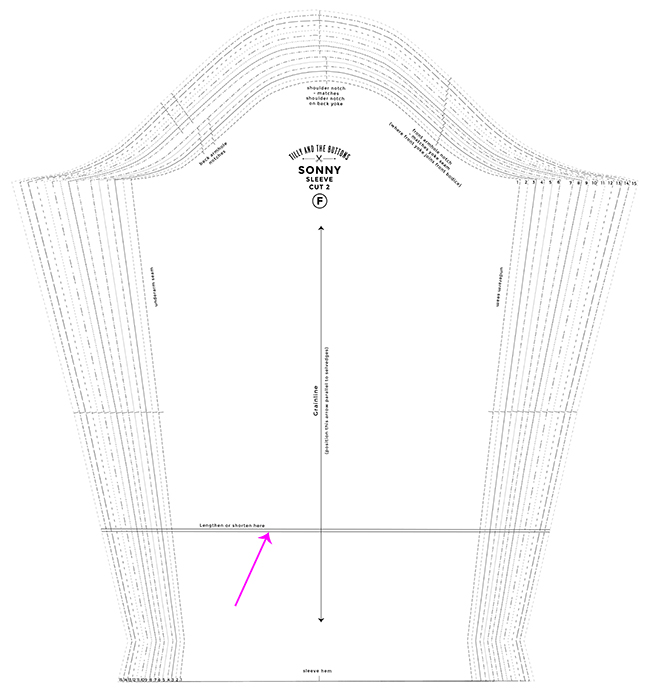
We have included the following sets of lengthen or shorten lines on the Sonny pattern pieces:
The Sonny jacket has two length options; hip-length and cropped. The hip-length version is designed to sit at the high hip, and the cropped length is 10cm (4in) shorter than that and should sit around the navel.
We've included the nape to hem length measurements for both the cropped and hip-length versions of Sonny in the finished garment measurements table, found on the 'find your pattern size' page in the Sonny booklet.
Use the lengthen or shorten lines on the bodice if you want to change the length of the bodice to better suit your proportions, or for stylistic reasons.
Are you lining your Sonny jacket with the lining add-on pattern? If the answer is yes, do the same alteration you have made to your bodice pattern pieces to the lining ones. For example, if you have lengthened your outer pattern by 2cm on the bodice, do the same to the front and back lining pieces.
The facing joins the front bodice. If you've altered the length of your jacket bodice, remember to make the same adjustment to the facing!
We've included the underarm to wrist sleeve measurement in the finished garment measurements chart in the Sonny booklet. If you feel like this measurement looks a bit too long or short for you, or if you often have to change the length of your sleeves, use these lengthen or shorten lines to alter the length.
As above, if you are lining your Sonny jacket, do the same pattern alterations you have done to the outer sleeve to the sleeve lining.
How to combine pattern sizes
If your bust and waist fall in different sizes on the body measurements chart, you can grade between these areas to get a bespoke fit for your exact body measurements. Check out our blog post which explains how to combine sizes.
The Sonny jacket is designed to have a relaxed fit with a moderate amount of positive ease, especially in the waist area. The only area you really need to fit is around the bust. There's quite a bit of ease around the waist so you don't have to worry about picking your exact waist size if your bust is a different size, unless there's a difference of more than two sizes. You can find the finished garment measurements in the booklet, which tell you how big the garment will be, to help you make a decision about sizing.
If you want to combine sizes between the bust and the waist, on the back and side front bodice pieces, mark 15mm (5/8in) down from the top and 4cm (1 1/2in) up from the bottom of the side seam. Starting from the top marking, draw a smooth curved line to the bottom marking by hand, or using a french curve or pattern master.
If you want to add a bit more room around the bust, you can also combine sizes on the front bodice seam of the centre front bodice.
And that's it! I hope you've found this post helpful. Remember, fitting is meant to be fun so don't get too bogged down with achieving the perfect fit.
We love stalking Instagram to see your gorgeous makes. Don't forget to tag us @TillyButtons using the hashtag #SewingSonny so we can swoon over what you're making. Happy sewing!
*****
Author: Nikki Hoar
Models: Averil de Souza & Sophie Prat
Photographer: Jane Looker
MUAH: Simone @ The Bridal Stylists
Samples: Sewn by Deborah Wilkins
Blue denim - Minerva
Corduroy - Lullabee Fabrics


