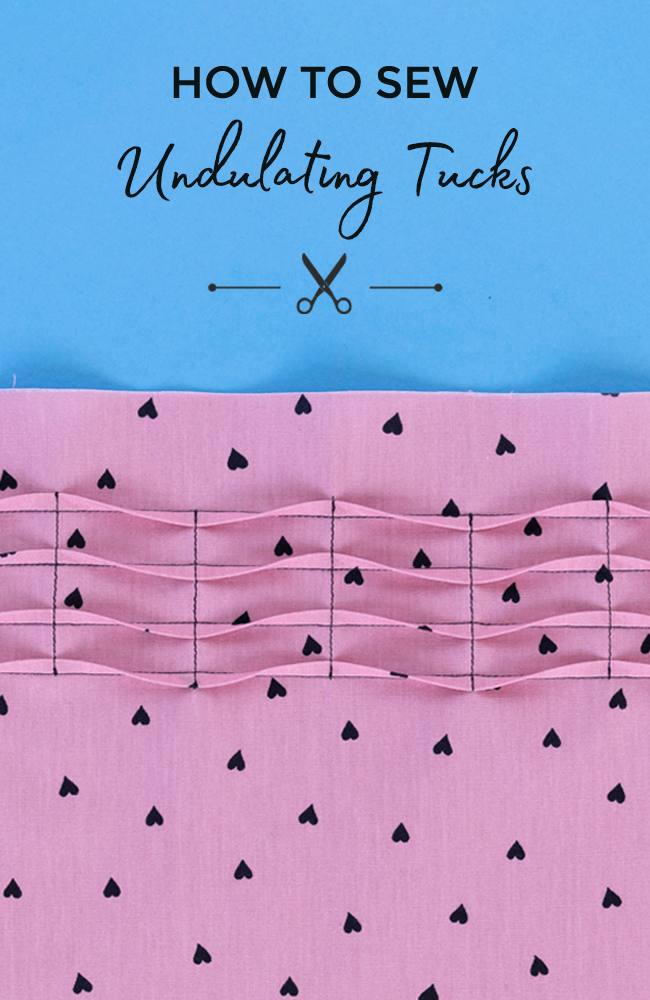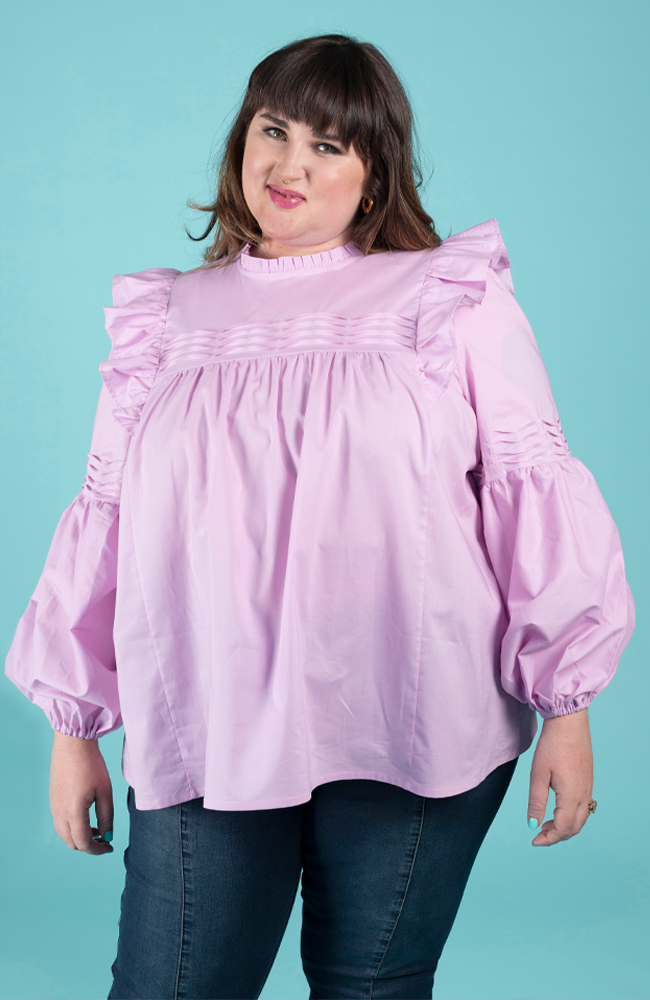
The optional undulating tucks on the front yoke and upper sleeves of our Marnie blouse and dress pattern are a particularly striking feature. Whether you’re looking for extra guidance for sewing Marnie, want help sewing tucks on another pattern, or are just curious about how the undulating ripple feature is formed, read on for more help and take a look at our step-by-step video.
But first…

What are tucks?
Tucks are folds of fabric that are pressed and stitched in place so they stand away from the rest of the fabric. They’re a bit like pleats, but with stitching running parallel to the folds.
What are undulating tucks?
Also known as cross-stitched tucks, undulating tucks are tucks that are then pressed and stitched in different directions to create a wave-like effect. The ripples create a pretty detail that looks complex to achieve but is actually surprisingly simple once you know how!

What fabric should I use to sew tucks?
Tucks are easiest to sew on crisp, cotton-based fabrics that press well – think cotton poplin, lawn, voile, chambray…
They show up particularly well on solid colour semi-sheer fabric, such as cotton voile, lawn, Swiss dot or dobby.
That’s not to say you can’t use a different fabric though. If you’re a more confident stitcher, try a more slippery substrate if you like, such as viscose (rayon), Tencel, silk or poly crepe de chine. You could try stabilising the fabric first with spray starch (do check it washes out before spraying though!), and pin close to each fold when pressing to help hold the tucks in place.
Read more tips for sewing with slippery fabrics
How do I sew neat-looking tucks?

Mark the tucks on the relevant fabric pieces with a short snip at each end – as marked on the Marnie pattern.
Alternatively you can draw tuck lines on the right (nice) side of the fabric in chalk pencil or washable pen, but do check that your chosen marker will wash out of your fabric easily first! I’m drawing on the central fold line, halfway between each pair of tuck notches.
Whether you mark them with notches or drawn lines, check the tuck markings are exactly parallel to the axis they are designed to run along – on the Marnie pattern, they should be parallel to the horizontal bottom edge of the front yoke or upper sleeve. Also check the tucks are exactly parallel to each other – on the Marnie pattern, they should be exactly 25mm (1in) apart.

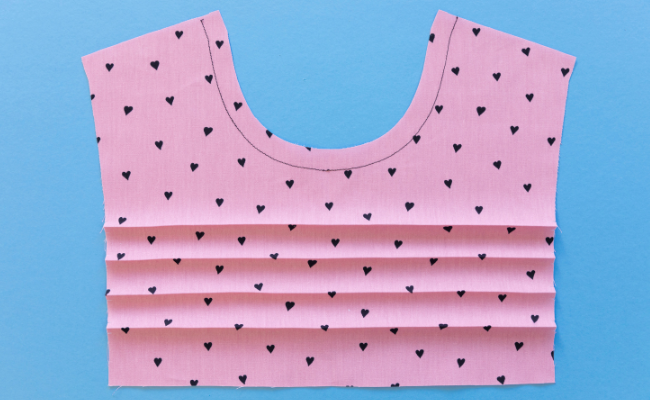
Fold the fabric horizontally, wrong sides together, to bring the first and second tuck notches on top of each other (labelled “Tuck 1” on the Marnie pattern) – or, if you drew on the fold line halfway between the notches, fold the fabric wrong sides together along the first line down. Press the fold.
Unfold and repeat for the third and fourth notches (“Tuck 2”) or fold line, and so on, until you’ve pressed in all the tucks – on the Marnie pattern, you should end up with four horizontal pressed lines. Measure the distance to the previous tuck to check they are exactly 25mm (1in) apart along the entire width of each pressed fold.

Fold the fabric wrong sides together again along one of the pressed lines. Using the tuck notches as a guide, stitch 5mm (just under 1/4in) from the fold.
Take your time to sew as accurately as you can, with an even seam allowance. You can use a ridge on your presser foot as a guide, or mark a guideline on the needle plate of your sewing machine using washi tape or similar. Keep the fold of the tuck lined up with the guide to sew at an even 5mm or just under 1/4in distance away.
Repeat for each tuck.
Press the tucks up and then down, pulling the fabric between the tucks away from the stitching lines to help define them.
If you want to undulate the tucks, keep reading!


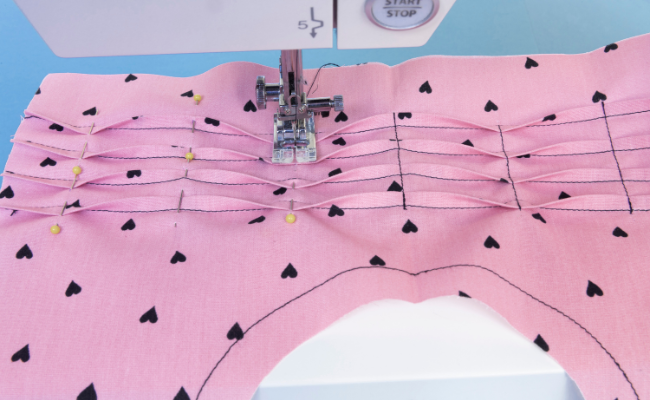
To undulate the tucks, find the centre front by folding the front yoke in half lengthways, and press to mark the centre front line. Unfold. Pin the tucks in a downwards direction along this line.
The pins will act as a guideline for sewing, so make sure you pin them in a straight line, exactly vertical. If you prefer, you could mark these guidelines on in dressmaker’s chalk or washable pen – but again, do make sure your marker will wash out of your fabric. Or try a FriXion pen, which should come out when you press it with a hot iron! (Again, do test it on a scrap of your fabric first!)
If you decide to use pins like I am, point the pin tips upwards when the tucks are pressed downwards, and point the pin tips downwards when the tucks are pressed upwards. This will make it easier to pull them out as you sew them in the next step.
Measure 40mm (1½in) across from the centre front on one side, and use the tip of the iron to press the tucks in an upwards direction at this point. Pin in place exactly 40mm (1½in) from the centre front. Repeat on the other side of the centre front.
Continue pressing and pinning the tucks in alternate directions at 40mm (1½in) intervals. For the Marnie front yoke, you should end up with 5 vertical lines if you’re making sizes 1-3, 7 vertical lines for sizes 4-12, or 9 vertical lines for sizes 13-15. On the Marnie upper sleeve, stop when you’ve pinned 7 vertical lines if you’re making sizes 1-2, 9 vertical lines for sizes 3-6, 11 vertical lines for sizes 7-10, or 13 vertical lines for sizes 11-15.

Using the pins as a guide, topstitch vertically across the tucks at each 40mm (1 1/2in) interval, backtacking at each end to secure the stitches.
You should be sewing the tucks in the direction they’re pressed, so you’ll be pivoting the project 180 degrees each time you take it out and move onto the next line of pins.

Using the tip of the iron, carefully press where you’ve just stitched.
Press each end of the tucks in the same direction as the closest line of vertical topstitching (see photo) – unless the topstitching lines are more than 3cm (1¼in) from the closest edge, in which case press them in the opposite direction. Staystitch the tucks along each side of the yoke, 10mm (3/8in) from the edge.

And that’s it!
On the Marnie sewing pattern, you can create this effect on both the front yoke and upper sleeves, then construct your garment following the instructions.
How pretty is that?!

*****
Author: Tilly Walnes
Photos: Jane Looker
