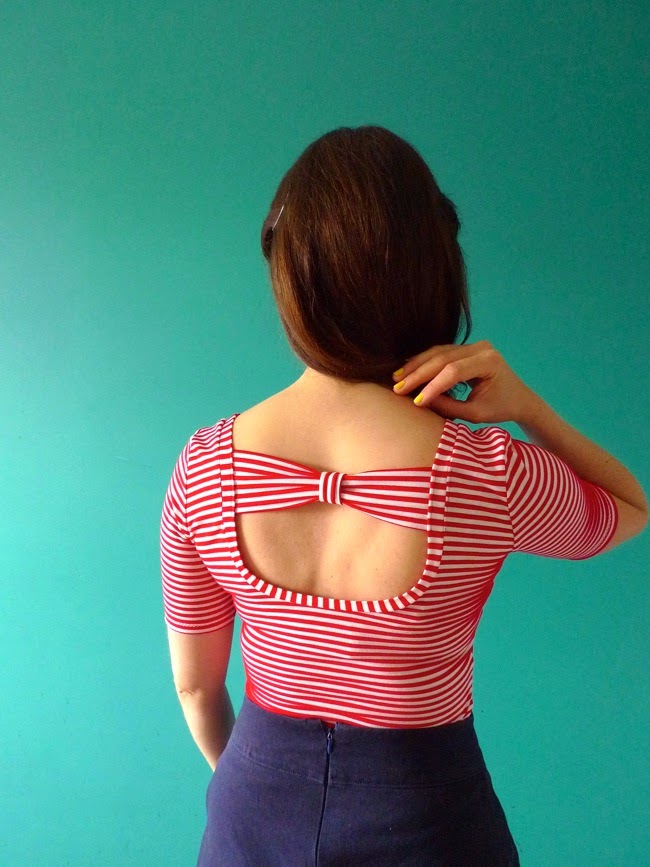
It's no secret that I love bows. And the Nettie pattern from Closet Case Files was just screaming out for a bow addition to that lovely scoop back. As promised in my previous post, I'm going to share with you how how I made this variation. Full disclosure - I totally ripped off this idea from a top by Louche that I have in my wardrobe (bought from Joy - love that shop). I'd tried to buy the same style in different colours from them, alas they were all too big for me at the shoulders and back. Hurrah for making it myself!

1) Make a scoop back Nettie, using Heather's wonderful instructions (the pattern is for a body suit or dress, but I just made it into a top). Decide where abouts on the back you want the top of your bow to sit and place pins in either side of the scoop back at this point - for reference, the top of my bow lies 5cm (2in) down from the shoulder seams. Measure the width between these two points across the scoop.

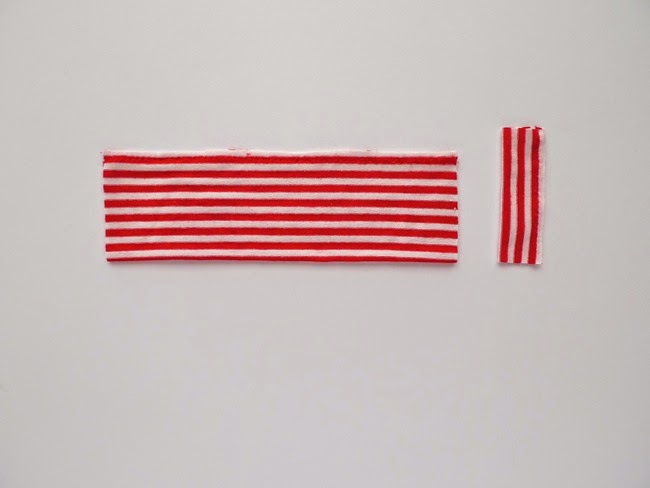
2) To make the bow, cut a piece of stretchy jersey fabric the width of [the measurement you just took + 3cm (1 1/4in)] x 14cm (5 1/2in) length/depth.
Now cut the knot piece that will go around the centre of the bow - 5cm (2in) wide x 8cm (3 1/4in) long/deep.

3) Fold the bow in half, right sides together, bringing together the longest edges. Pin them together and zigzag stitch. Now fold your knot in half, right sides together, bringing the longest edges together. Pin and zigzag stitch.


6) Turn your Nettie inside out. Line up the raw edges of the bow with the inside seam of the neckband just below your pin markings. Make sure the seam lines of the bow are facing up so they end up on the inside of the top. Try your Nettie on (be careful with the pins, obvs!) and check you're happy with the positioning of the bow. Depending on how stretchy your fabric is (and if you're using the same fabric as the top), you may also want to adjust how tightly the bow sits across your back (the bow will stretch when you wear it, as will the scoop of the back).

7) Once you're happy with the positioning of the bow, straight stitch the bow to the neckband using two parallel rows of stitching.

And there you have it! A lovely bow back Nettie for you to enjoy. Be sure to let me (and Heather!) know if you make one!


