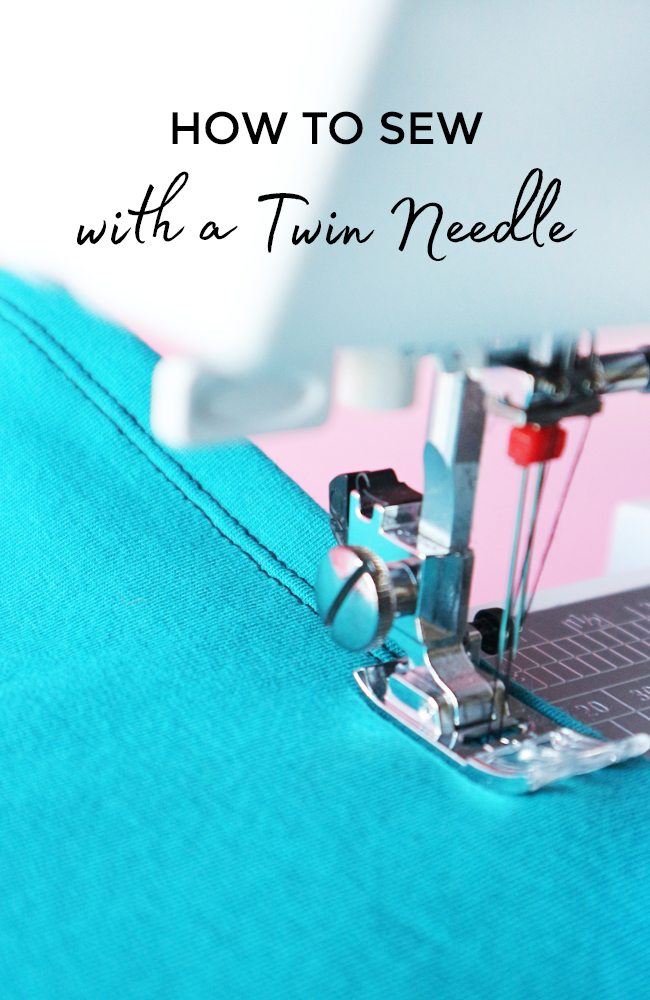
Sewing with a twin needle can be a great way of creating professional-looking hems and other finishes on your me-mades. It's one of those techniques that can seem tricky at first, so I'm here to show you how it's done!

What is a twin needle used for?
A twin needle (sometimes called a double needle) is composed of two needles connected by one shank at the top.
The twin needle creates two parallel lines of straight stitches on the top side, with a small zigzag stitch connecting them on the underside.
You can use it to topstitch the hems on garments made in stretch fabrics, like the Agnes jersey top or Billie sweatshirt, as well as topstitching on non-stretch garments such as the Jessa jeans or Rosa shirt.
Here's how to sew with your twin needle...
What supplies do I need to sew with a twin needle?
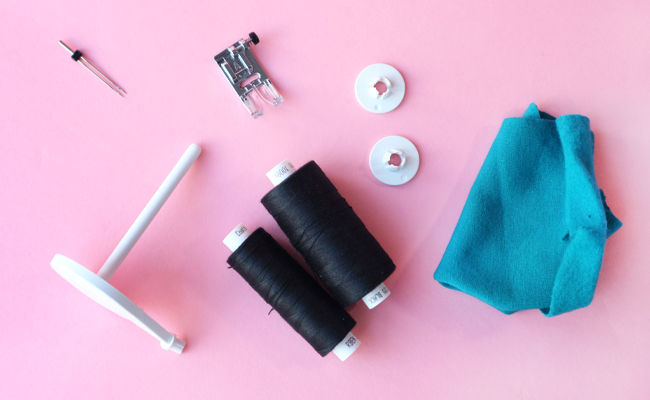
To sew with a twin needle, you will need:
- Twin needle (see below)
- Second spool pin if your machine came with one (don't worry if it doesn't have one)
- Presser foot with a hole wide enough to fit the twin needle (if your regular presser foot isn't wide enough, try a zigzag or walking foot)
- Two spools of good quality thread in the same colour, with one bobbin
- Scrap of your garment fabric to test your stitches on
How to insert a twin needle
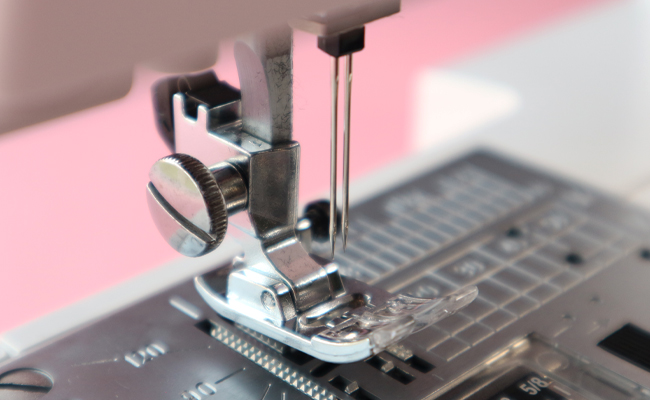
To install the needle, insert it into the machine the same way you would when you change your normal single needle, with the flat side of the needle shank at the back. Double-check your needles fit through the presser foot's opening by slowly lowering the needle with the hand wheel.

How to thread a twin needle
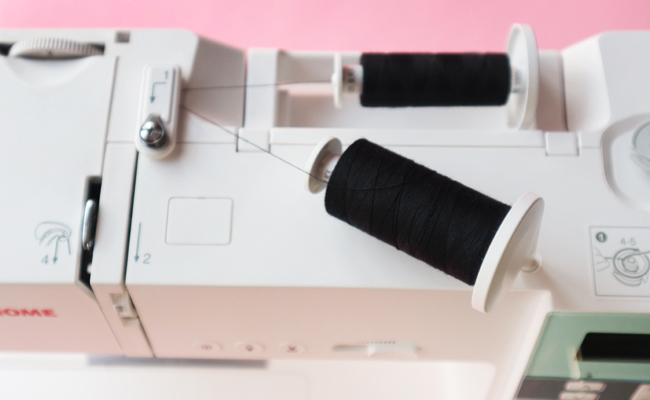
You will need two spools of thread of the same weight and colour (if you want your stitches to match).
Put the first spool on the main spool pin, thread it through your machine's guides and hooks as normal, and insert it through the left needle.
If your machine has a second spool pin, attach it to the top of your sewing machine - your manual should tell you how to do this. On my machine, there is a hole at the top of the machine where you insert it. If you don't have a hole or second spool pin, you could use the bobbin winder spindle, or put a bobbin of thread on the main spool pin alongside the first spool.
Put the second spool on the second spool pin, with the cover on top. Thread it through the machine's hooks - but, to avoid the two threads getting tangled, don't thread this one behind the needle bar thread guide (the little hook just above the needle). My machine has a separate, smaller hook on the right-hand side for this purpose - thread it here instead if you have this too, otherwise leave it off. Finish by threading the second spool through the right needle.
Thread your bobbin as you usually would.

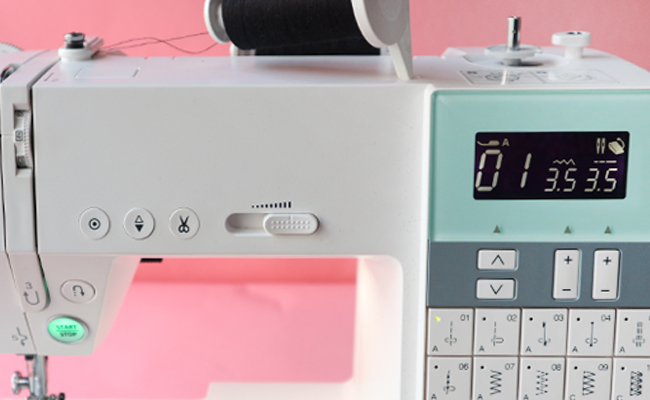
Stitch settings for twin needle sewing
Most sewing machines will come with a twin needle stitch setting, which may look like two parallel lines or double needles. Set the machine to this stitch.
Try raising the thread tension by one notch. Once you've done your first test (see below), if you're not happy with how the stitches are sitting, you could adjust this a bit more and see if that helps.
Set your stitch length slightly longer, to 3 - 3.5mm.
Now you're all threaded up, let's move on to the sewing...

Test your settings
It's important to test out your twin needle on a scrap of the fabric you'll be using for your project, even if you've used it successfully before, as different fabrics may need different levels of thread tension. Press a fold of fabric under to form a hem (if that's what you're sewing).
Place the scrap - right side up - under the presser foot and lower the foot onto the fabric. The left-hand needle should just overlap the edge of the hem (that's on the underside) so all the stitching ends up on the hem.
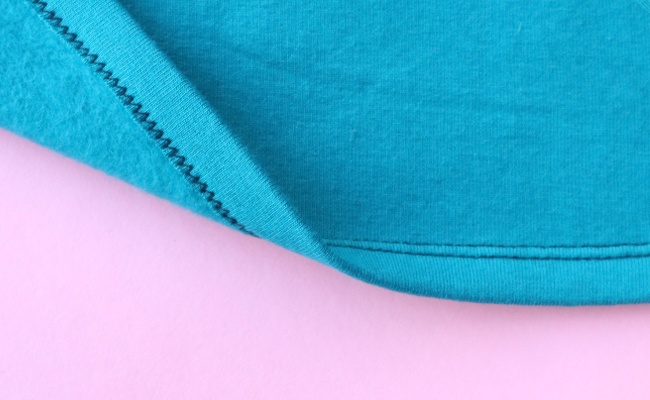
Check the stitches on your scrap. If the stitches on either side look too loose or too tight, try adjusting the thread tension and stitch length, and try again until you are happy with the result.
Once you're happy with your stitches, it's time to grab your project and start sewing!


Troubleshooting twin needle sewing
Threads tangling up?
Make sure you're using good-quality polyester thread.
Thread the two spools through your machine one at a time, and leave the second thread off the needle bar thread hook (hooking it behind the separate one on the right-hand side, if your machine has one).
Skipped stitches?
Make sure you're using a new, sharp twin needle.
Sew as evenly and steadily as you can, not too slowly or with too many pauses.
Top stitches showing on underside?
If the zigzag on the underside is small, with loops of the spool stitches showing on the underside, raise the needle thread tension and sew another test.
You can also try lowering the bobbin thread tension. It's best not to do this on your main bobbin case if it's the only one you have - you can get a dedicated bobbin case pre-set to a lower tension (this one linked is for Janome DKS100 and similar top-loading machines with an automatic thread cutter), or buy a spare standard bobbin case to adjust the tension yourself, and mark it with a blob of nail polish so you know which one it is.
Tunneling on the top side?
If there's a raised tube of fabric between the two rows of topstitches, start by giving it a steamy press to see if that flattens it out and neatens it up.
Raise the bobbin tension slightly and sew another test.
You could also try lowering the bobbin tension - see note above about this.
A twin needle with a narrower width between the needles will be less likely to tunnel.
You could also use a wash-out hemming tape to keep the hem edge flat before you stitch it.
Hem shifting?
If the pressed-up hem is moving around as you stitch it, a walking foot or dual feed foot can help to feed the layers through evenly.
You can also try using wash-out hemming tape to hold the hem in place before you start stitching.
Wanna give up?!
If all else fails, you can always use an even zigzag with a regular needle to topstitch to hem knit garments - easy!
Fancy some more guidance sewing with stretchy knit fabrics? Don't miss our popular online workshop Learn to Sew Jersey Tops featuring our best-selling Agnes top sewing pattern.
Liked this post? Check out How to Sew a Jersey Neckband and Ten Tips for Tip Top Topstitching.
