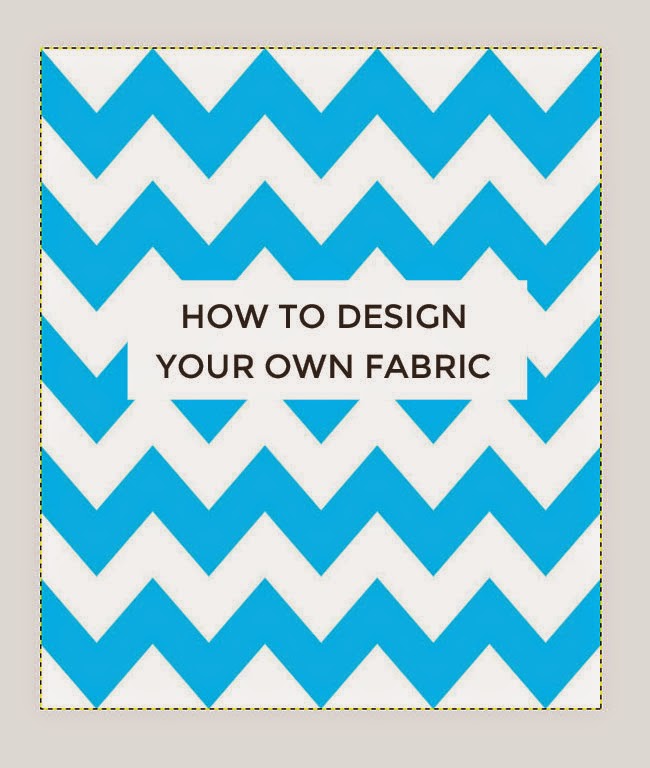
Have you ever struggled to find the perfect fabric? Do you fancy personalising your sewing projects with fabric you've designed yourself? I know I do, but the world of fabric design can seem like a big - daunting - subject. The closest I've come so far was getting a banner made by bespoke fabric printer Woven Monkey for my stand at Makegood earlier this year. I was so impressed by the quality of both the printing and the fabric, and started chatting to Ed from Woven Monkey about how to get into fabric design. It turns out that getting started isn't as difficult as I imagined, so I asked him to share some tips with us on how to go about it. Over to Ed...
******
"Hi everyone, this is Ed from Woven Monkey. I’m going to share a tutorial on how to create a chevron design using free GIMP software. But first, here are a few simple tips which will help you to start creating your own amazing and completely unique designs...
1) Use a photo editor
There are several different ways to create your artwork. Some people prefer to draw or paint their designs before scanning them. Others photograph their work. If you decide to use any of these methods then we’d advise you to upload your artwork to a photo editor first - sites such as
PicMonkey allow you to make any necessary alterations to your design before it’s printed.
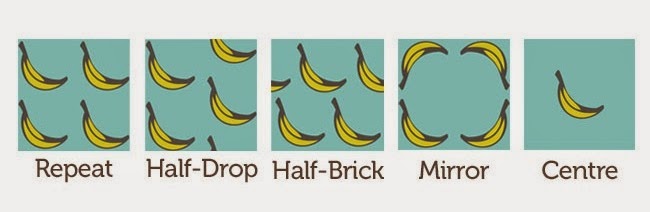
2) Be aware of the "repeat"
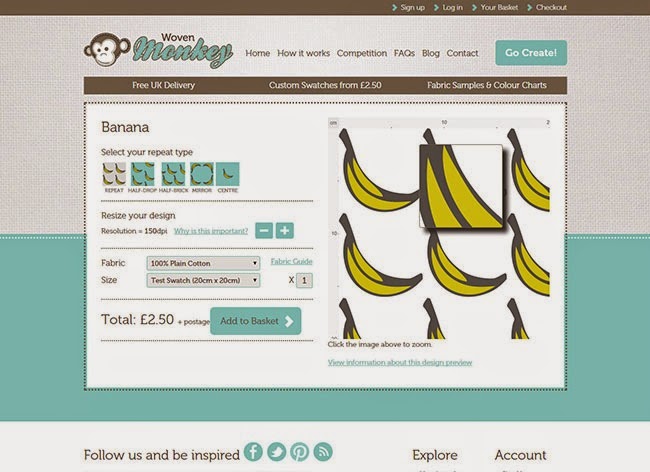
Most people who design their own fabric want to create a repeatable pattern, so at Woven Monkey we have five different repeat options to choose from on our site. It's easy to overlook tiny imperfections in your artwork, such as unintended white lines or borders, but these will also be repeated if you don't remove them first. Therefore it’s important to check for this by making use of the zoom tool in your design software. We also have a zoom function on our site in the design preview which you can use to examine your image in detail.
3) Order a test swatch
There will always be variations between the appearance of colours on a computer screen and how they actually look when printed onto fabric. So it's a good idea to order a test swatch of the fabric so you can see how the print and colours will appear in your artwork before committing to the final order. You may also find it useful to buy one of our colour charts. Hex codes (reference codes for RGB colours) are displayed on the charts which can be inputted into whichever design software you use. This way you will already know how colours will appear before you receive your fabric.
4) Set the correct dots per inch (DPI)
Dots per inch (DPI) is a measurement for image resolution. Put simply, the higher the DPI, the sharper the image. When you begin creating your artwork in a design package you will be asked to set this. To ensure the quality of any artwork printed with us we automatically select a DPI of 150 for any image uploaded to Woven Monkey. Therefore it’s important that you set the DPI to at least this amount before you start, otherwise your design will be printed to a different size than you intended. Don’t worry if you’ve created an image which is greater than 150, as you can make adjustments to the DPI on our site.
5) Preview your design
Our preview tool is a great way to check your design before committing to an order. Essentially, this is a mock up of how your image will appear on the fabric, thus enabling you to deal with any issues with the repeat (as previously mentioned). You can also use the rulers at this stage to make sure that the image is at the correct size. Using the preview should prevent mistakes occurring in your final design.
How to create a simple chevron pattern using GIMP
If this has tempted you to have a go at designing your own pattern, here's a tutorial to get you started...
I am using
GIMP, free software which you can
download here. Alternatively you could use Adobe
Photoshop or
Illustrator if you already have them, or
Inkscape is another free download.
1) Choose the correct size

The first step is to decide on the size of your design. In this tutorial, we’re going to create a canvas of 1000 pixels width x 1180 pixels length. The size is important as it will determine whether you will be able to repeat your pattern on our site. Click File > New, then click on the dropdown box, select cms, and enter the measurements.
Next click on Advanced Options and enter 150 pixels for both the X and Y resolution. (Tip: It is important to keep it on the default setting of landscape and RGB colour space.)
 2) Create your chevron pattern
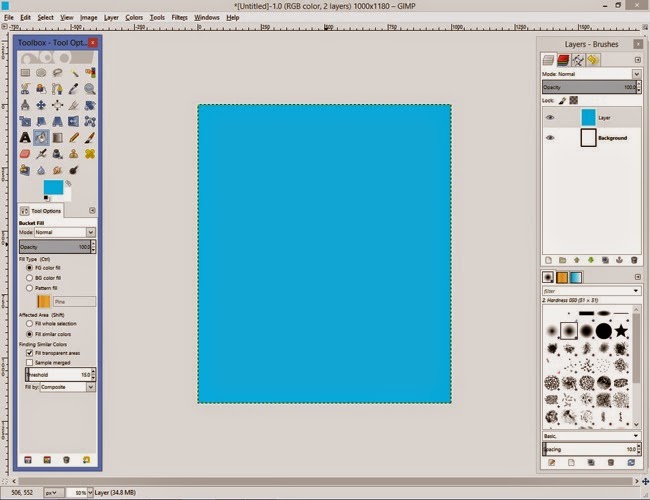
First you need to create a new layer. This can be done by selecting Layer > New Layer. Choose the foreground colour option then click ok. You now need to fill the canvas with colour. Click on the foreground colour located on the tool box. From here select the colour you want to make your chevrons. For this tutorial I’ve chosen blue. Next Select the Bucket Fill Tool from the Tool box and click this anywhere over the canvas.
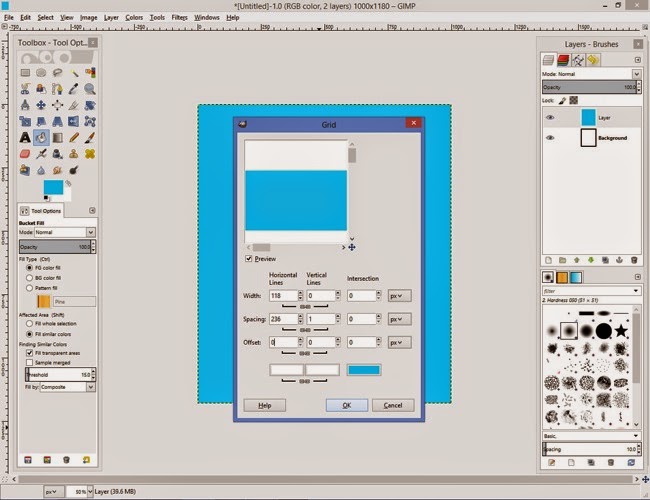
Now you’ll need to create your horizontal lines. To do this click on Filters > Render > Pattern > Grid
You’ll need to unlink the chains beneath the width and spacing options. The next step is to choose the colour, thickness and spacing between each chevron. I’ve chosen a width of 118 pixels and a spacing of 236 pixels and kept the colour as white. It is entirely up to you what you want to choose. However, the vertical lines and intersection should be left at 0, apart from the vertical line spacing which is 1 pixel.
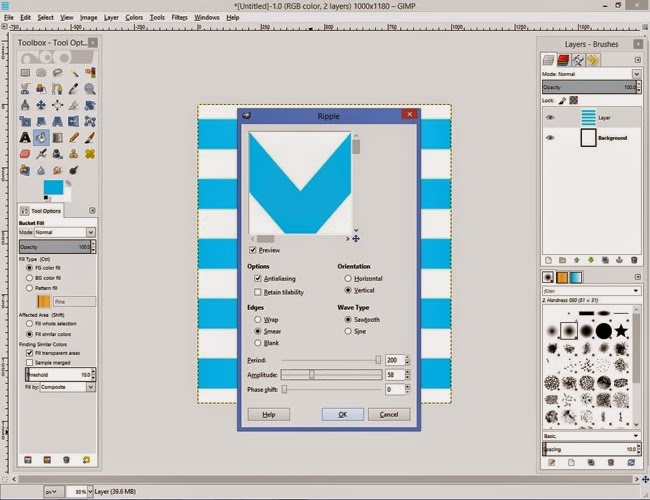
To convert our horizontal lines into v shapes, go to Filter > Distort > Ripple.
Next select the following options: Antiliasing, Vertical, Smear and Sawtooth.
For the period I selected 200, amplitude 58 and phase shift 0. These will dictate the shape of your chevrons so it’s worth playing around with them until you’re happy with the pattern. Please be careful though as some selections will cause issues with your design.
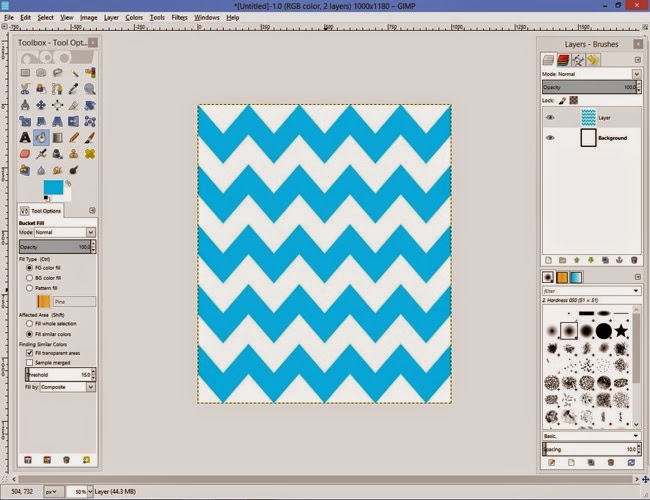
Once you’re pleased with your chevron pattern you’ll need to save it. To do this go to File > Export As > select file type (by extension). Then select png and click export.
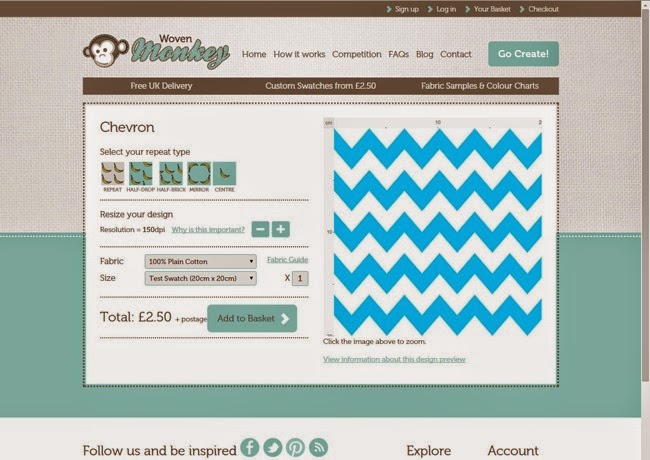
3) Upload your design to Woven Monkey
Now you can upload your design to
Woven Monkey. Click on the Go Create button then follow the instructions to create your fabric. You have several repeat options available on our website, but just select the basic repeat for a chevron-style pattern, otherwise the pattern won’t line up. You also have a very handy preview of how your design will look on the fabric. (Read more about
how our service works.)
Once you’ve created your design and placed your order then all you have to do is wait for delivery of your beautiful, custom-designed fabric! Usually your order will be despatched within 7 to 10 working days.
If this has inspired you to create more patterns, check out
GIMP’s official tutorials for more ideas."
******
Thanks so much for your help, Ed! So whaddya think, readers - fancy designing some fabric of your own? I know I'm tempted! The question is - stripes or kittens?