Welcome to part two of designing your own fabric with Spoonflower! If you missed part one you can find it here. Now that you have finished making your design (yay!), it’s time to start cleaning them up and getting them ready for Spoonflower to print. With the help of our wonderful teacher Suzie, we have put together some retouching tips for you.
You will need
- Scanner
- Computer
- Adobe Photoshop or any photo editing software of your choice
- Internet - to upload to Spoonflower
- Biscuits (as a treat for designing your own fabric, of course!)
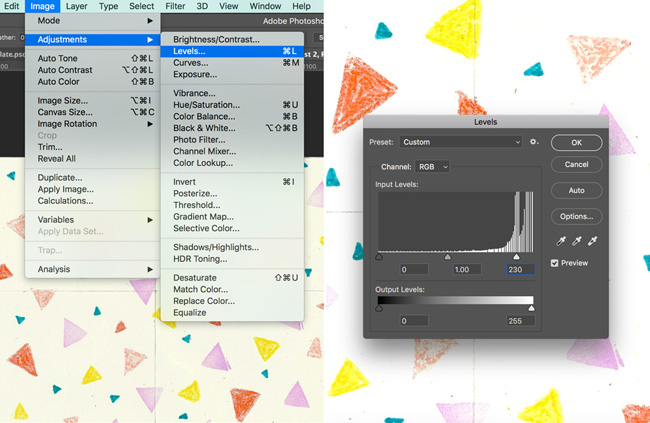
The following steps are shown using Adobe Photoshop, if you use an alternative editing software these may differ.
After opening up your scanned design in Photoshop (or equivalent) you’ll want to begin by adjusting the image using Levels (Image > Adjustments > Levels). If you move the slider (on the right) to the left it will brighten the image, making the whites more white. And by moving the opposite slider (on the left) to the right this will make the blacks more black. This helps to brighten up scans and make the ‘paper’ background disappear.
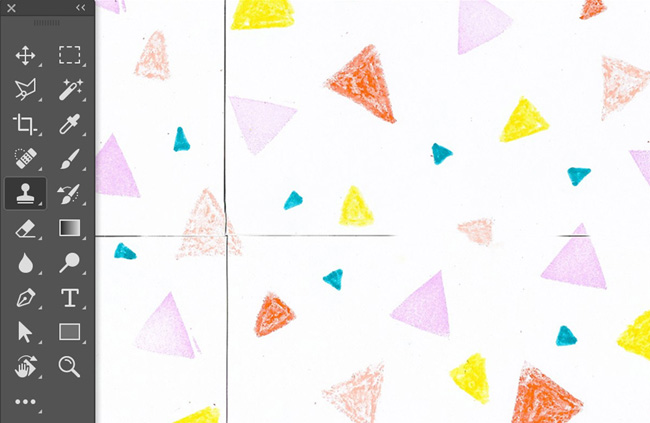
Next we’re going to clean up those cutting lines that we made earlier. With the Clone Stamp Tool (found in the Toolbar), you can select a bit of the design, such as the plain white background, and copy it onto a bit of the design you want to remove, such as the join line where you’ve taped the paper together. To select the area to copy, hold down the ‘Alt’ key on your keyboard while clicking the area you want to copy. Then you can ‘paint’ over the line and you will see it disappear.
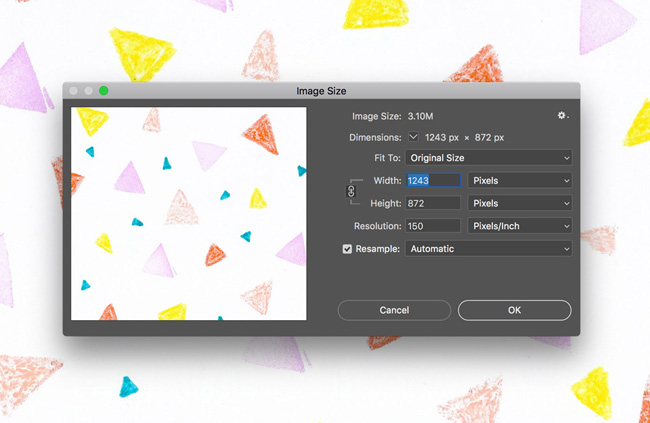
Another really nice feature in Photoshop is being able to ‘cut, move, and paste’ your image, the same way you did on paper, but digitally, to check the seamlessness of the repeat. To do this, first note down the size of your image, in pixels, by going to Image > Image Size. You might need to select ‘Pixels’ from the drop-down menus next to Width and Height. Write down the numbers of the width and height, then divide each of them by two, and write these down again.
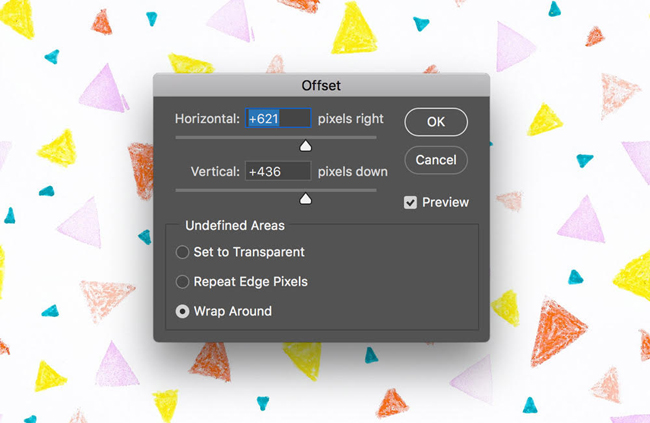
Then go to Filter > Other > Offset and type in the halved width and height numbers you wrote down. Make sure ‘Wrap Around’ is selected. You will then see your image move half-way across and half-way down (essentially back to how your design looked before your cut it up) so you can double check the ‘seams’. If you repeat this filter, your artwork will move back to how it was when you scanned it. I like to do this to double-check I’ve removed all seam lines!
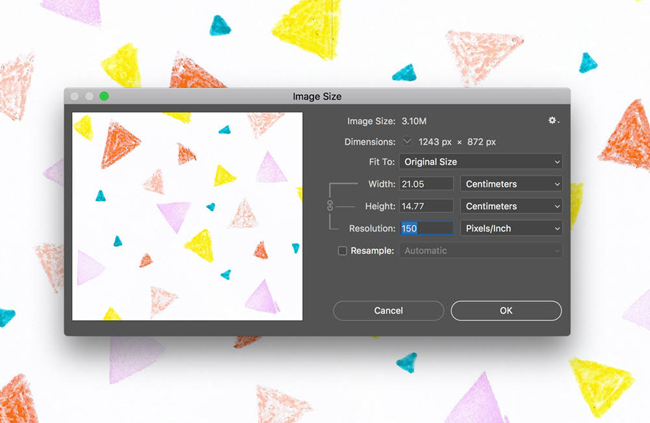
Make sure you save your artwork out at 150dpi (the minimum Spoonflower recommends for textile printing) or 300dpi. Go to Image > Image Size and type 150 or 300 into the Resolution box. Make sure the Resample box is unchecked. Then save your file out as a JPG. File > Save As.
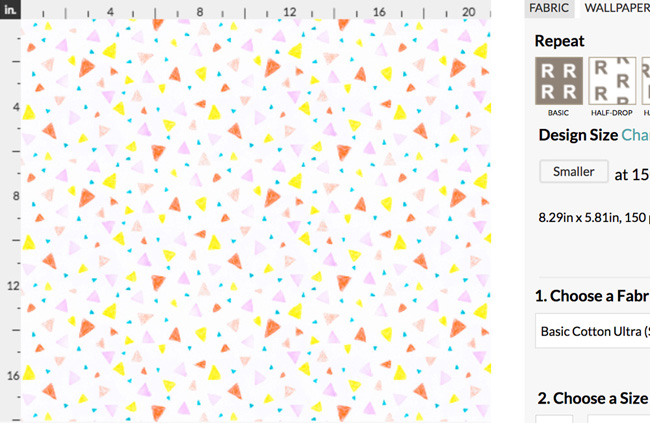
You are now ready to upload your design to Spoonflower! For a seamless repeat tile, you can simply select ‘Basic’ as the repeat, and you will see your design repeat seamlessly in the preview window. If you’re using a single motif, such as Tilly’s Breton tee design, you can experiment with the different repeat styles on Spoonflower's website.
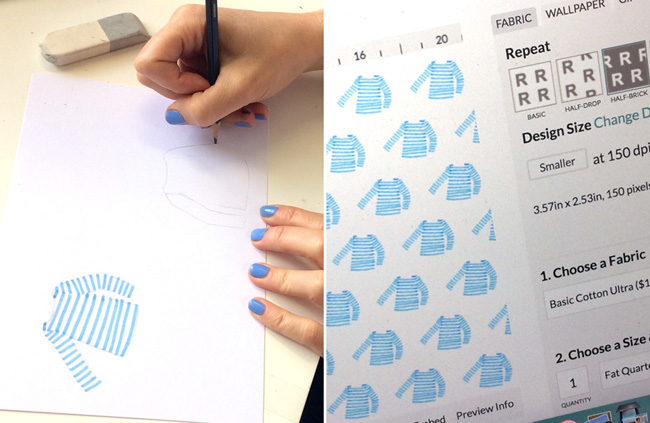
To upload your design you will need to open up the Spoonflower website. Click on Design > Upload on the homepage and then choose your file to upload. Now you can choose the repeat style for how you would like your design to be printed on the fabric.
The next step is to choose from Spoonflower's wide selection of fabric types to have your design printed on. There's so much choice, even wallpaper! Then you can decide how much of your fabric you would like to order. You can choose to have your design printed onto a test swatch, a fat quarter or in yard increments starting from a minimum of 1 yard.
Spoonflower also allows its users to sell their designs through their website too, if you'd like to do this you can read all about it in their Seller's agreement.
Wanna see how our designs turned out? :)
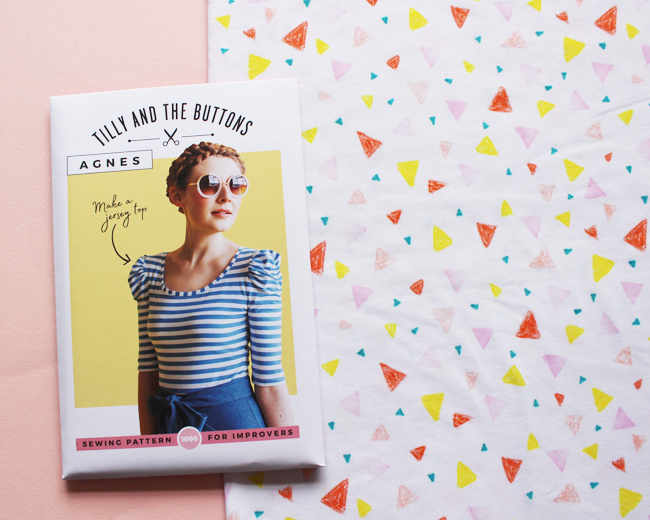
Kate's planning an Agnes tee with the ruched sweetheart neckline for her design that has been printed onto Spoonflower's Modern Jersey.
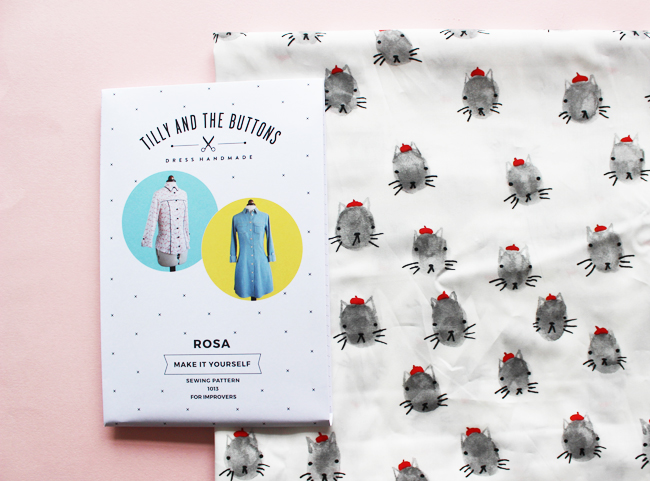
Louise is making a Rosa shirt with her cats in berets design which she has had printed onto Spoonflower's Cotton Poplin. She's also planning on using lilac piping - dreamy!
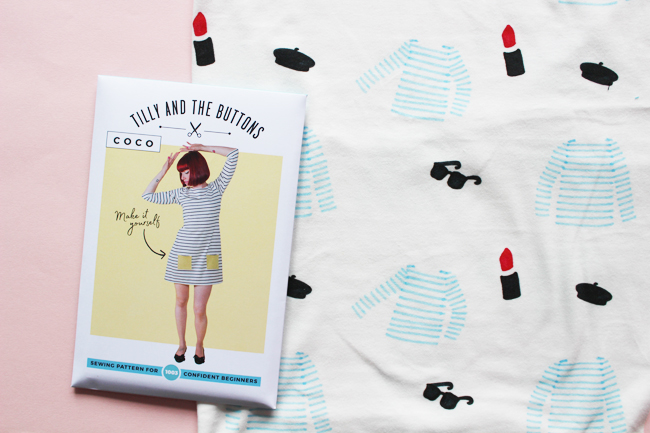
Tilly's making a Breton top with mini Breton tops on obviously! Tilly's design is printed onto Spoonflower's Organic Cotton Knit Ultra.
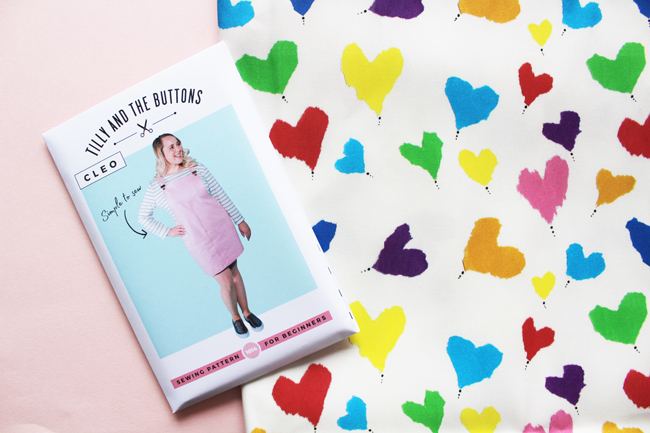
Serefina's super cool rainbow hearts are destined for a Cleo! Printed onto Spoonflower's Linen Cotton Canvas Ultra.
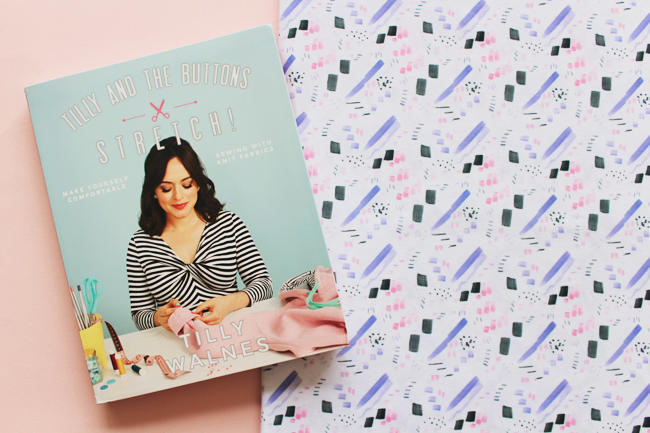
Jenny's design is going to become a colour blocked Frankie Tee from Stretch! Printed onto Spoonflower's Modern Jersey.
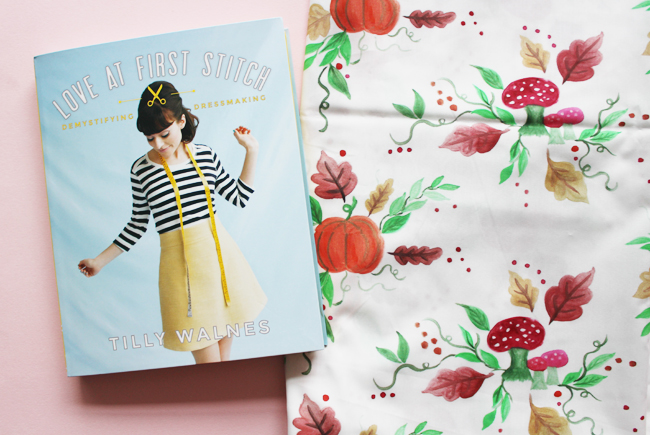
Katie is planning a blouse for her design and we think it would make a gorgeous Mimi Blouse from Love at First Stitch. Printed onto Spoonflower's Cotton Poplin.
We really hope this inspires you to give fabric printing a go. We had so much fun making ours and are now planning an entire fabric line of cats in a variety of hats! ;)
This post was sponsored - thanks to Spoonflower for providing us with the workshop and tools to give it a go!
And a big thanks to Suzie for all your help!
