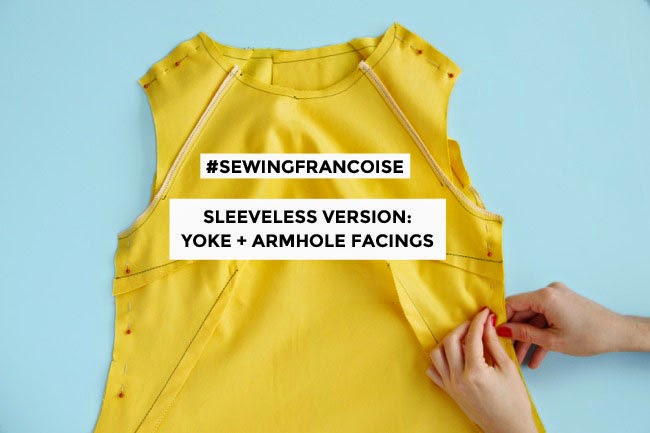
Sewing the Francoise dress? Today I’m going to show you how to sew the yoke, shoulder and side seams, and finish the armholes on the sleeveless version of the dress. If you’re making the version of the Francoise dress with sleeves, you can skip this post – I’ll show you how to sew the sleeves in the next post.
The Francoise dress includes a 15mm (5/8in) seam allowance. Sew with this seam allowance unless the step indicates otherwise.
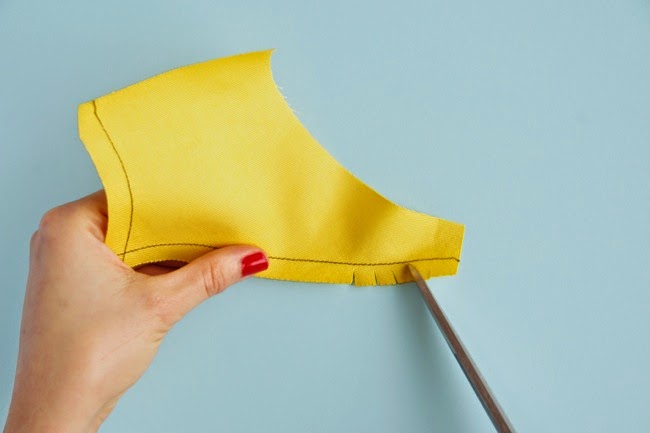
Let’s start by sewing the yoke. You should have cut two front yoke pieces and two back yoke pieces, and stay stitched the necklines and raglan seam lines (I've done my stitching in a contrast thread so you can see it clearly). On the raglan seam lines (marked on the pattern) of the front and back yokes, clip perpendicular snips into each curve between the second and third notches, up to (but not over) the stay stitching line. The reason we do this is, because of the curved shape of the raglan seams, the cutting line is a different length to the stitching line 15mm (5/8in) in – so we need open up the seam allowances so we can match up the stitching lines with those on the dress pieces more accurately.

Lay the front yokes on top of the front dress at the raglan seam lines, right sides together. Pin them together, matching at the shoulders and notches. You can see in the photo above that the yoke isn't meant to stretch all the way under the armhole - we'll finish that bit later with the binding. And don’t worry if the fabric doesn’t lie flat, it needs to curve for the seam lines to fit together. Stitch the yokes to the dress, using a 15mm (5/8in) seam allowance, back tacking at each end. Now stitch again using a 10mm (3/8 in) seam allowance to reinforce the seam.
Pin and stitch the back yokes to the back dress pieces in the same way.
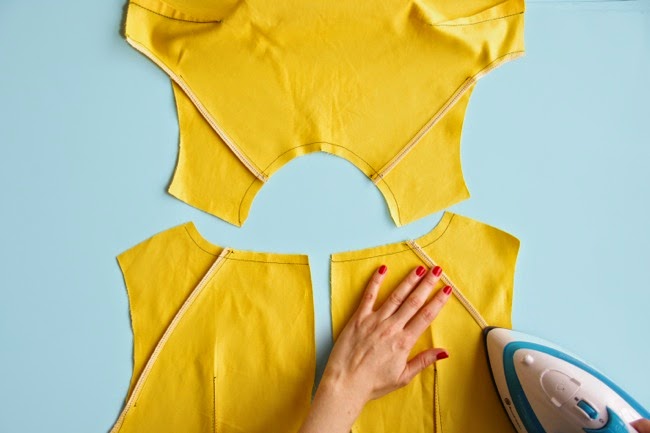
Trim the front and back seam allowances to about half their current width. Now you can finish the seams to neaten and strengthen them – either with zigzag stitch on your sewing machine or using an overlocker (serger) if you have one. Press the finished seam allowances up towards the yoke. (If your fabric is relatively heavy, you may prefer to finish the seam allowances separately and press them open.)
Now we can sew the shoulder seams and side seams of the dress. Lay the front dress on top of the back dress pieces, right sides together. Pin together at the shoulders and side seams, matching notches. Usually I like to insert pins perpendicular to the seams with the heads sticking out, so I can whip them out easily when sewing. This time though, pin parallel to the seams, directly on the stitching line – that way you can try your dress on and adjust the position of the stitching line (marking it with the pins) if you prefer a closer or looser fit.
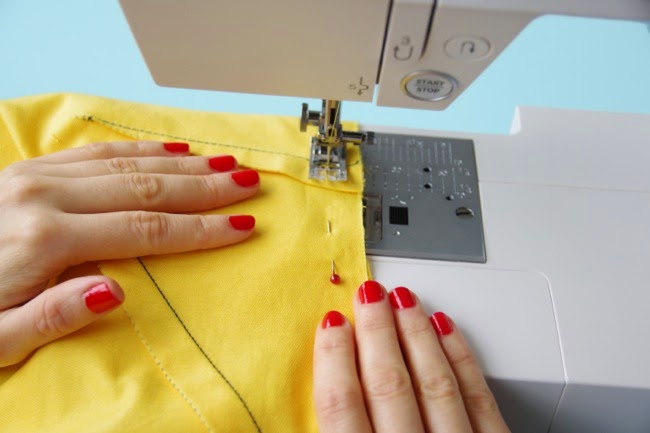
Once you’re happy with the position of the stitching lines, sew the dress at the shoulder seams and side seams, back tacking at either end. Trim, finish and press the seam allowances either open or towards the back.
Okay, now we can finish the armholes. The Francoise dress includes a pattern piece to cut two strips of armhole binding on the bias (the pattern piece placed diagonally across your fabric). Armhole binding works well in medium weight cotton or satin, so you may want to use a different fabric from your main dress fabric if it’s on the heavy side. Alternatively you can buy ready-made 35mm wide bias tape and press the folds open.
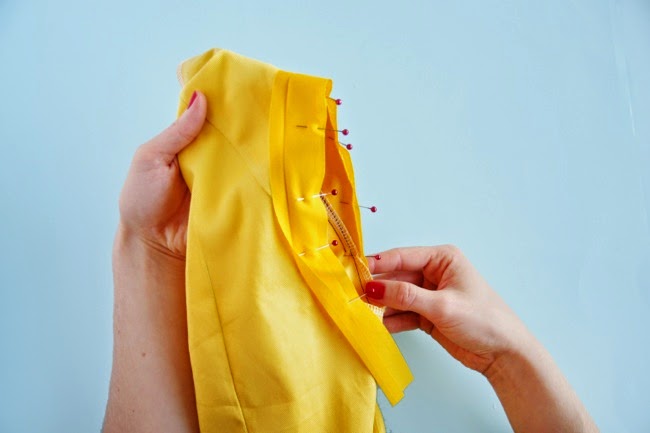
Press one long edge of each armhole binding piece under 10mm (3/8in), wrong sides together, then unfold. Pin the un-pressed long edge of each binding piece around each dress armhole, right sides together, leaving a tail at either end. It’s up to you where you position the ends of the binding – personally I think it looks neater if they’re at the underarm seam of the dress.
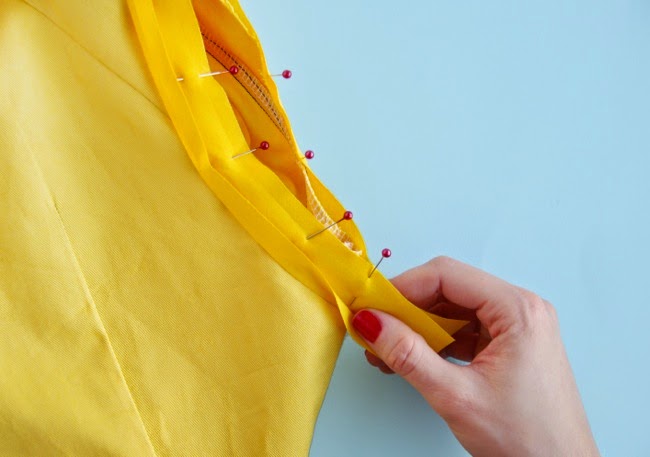
Pin the ends of the binding together at the point where they meet, flush to the armhole. Stitch them together at the point you marked with the pin, keeping the dress out of the way.
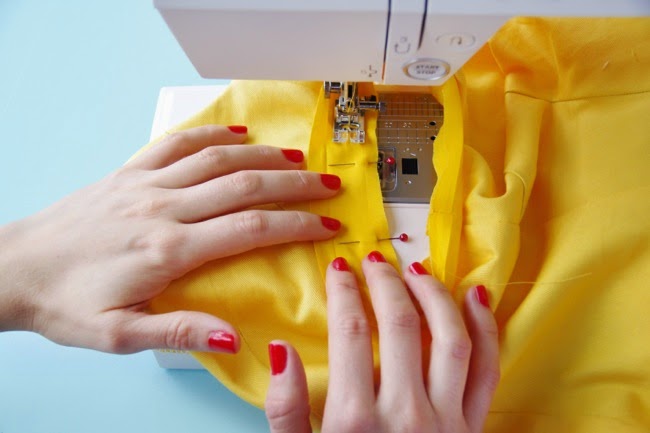
Trim the ends of the binding and press the seam allowances open. Now you can pin this bit to the armhole too. Stitch the binding to the armhole all the way round, using a regular 15mm (5/8in) seam allowance.

Trim the seam allowances to 5mm. Clip perpendicular snips into the seam allowance where it curves at the underarm – this will help open up the seam allowance so it will lie flat when we turn the binding to the inside of the dress. Be careful not to cut over the stitching line.
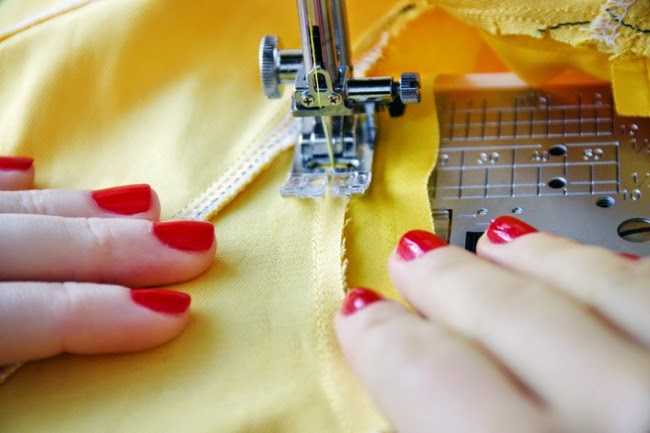
Press the binding away from the dress and towards the seam allowances. Now we’re going to understitch the binding to the seam allowances, which means sewing the binding to the seam allowances close to the seam line to help keep it on the inside of the garment. Hold the fabric nice and taut either side of the seam line as you’re understitching so you don’t get any wrinkles.
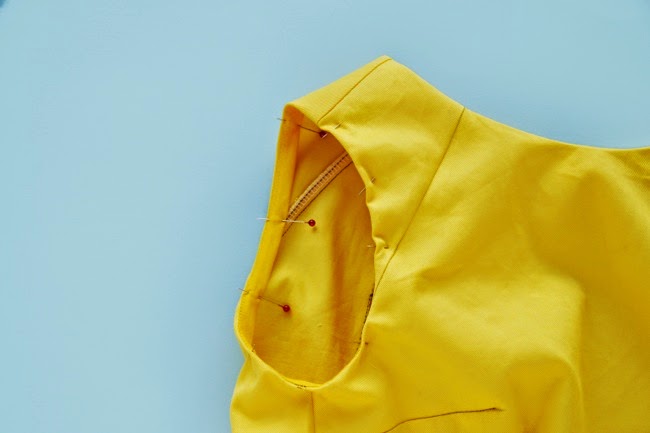
Fold the binding to the inside of the dress, rolling the seam line in slightly to hide it on the inside of the dress (you can press it if you want). Fold the raw edge of the binding under along the line you pressed earlier, and pin this fold to the inside of the armhole.
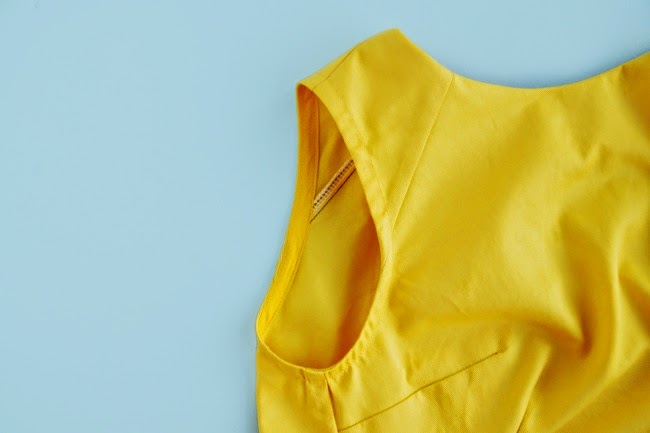
Topstitch the binding to the armhole close to the inside fold. Repeat on the other armhole, and give them both a good press to smooth out any wrinkles.
Done!
In the next post, I'll show you how to sew the sleeves on the other version of the Francoise dress, and after that we'll do the optional collar and neckline facings...
And don’t forget to enter your dress into the #SewingFrancoise contest!

