28 November 2014

#SewingFrancoise: Sewing the Raglan Sleeves


Sewing the Francoise dress? Today I’m going to show you how to sew the raglan sleeves onto the sleeved version of the dress. If you’re making the sleeveless version, you can skip this post – the previous post shows you how to sew the yoke and armholes onto the sleeveless dress.
how to sew raglan sleeves

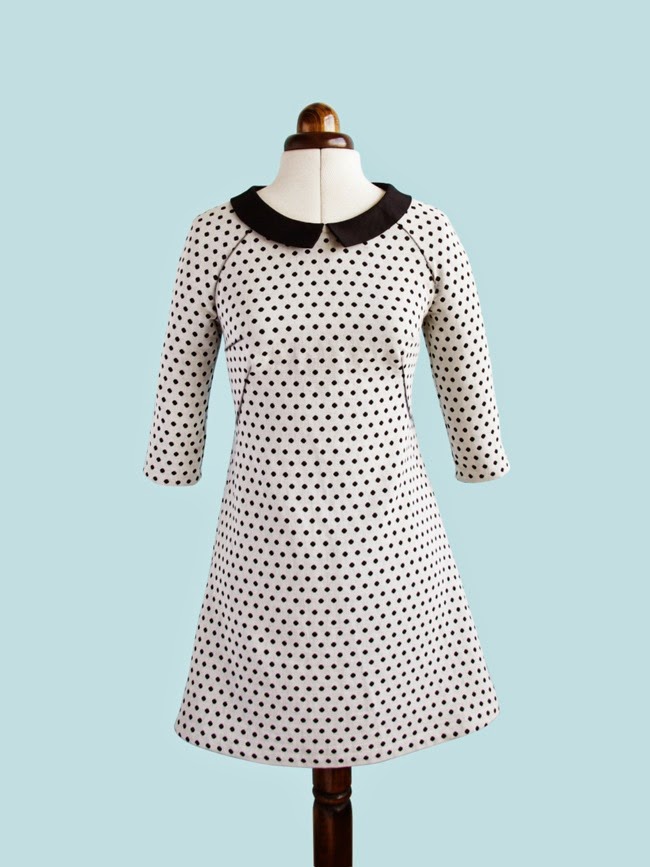
Raglan sleeves are joined to the dress with diagonal seams running from the neckline to the underarm. The raglan sleeves on the Francoise dress are each formed of two pieces, front and back, joined together with a seam line running from the shoulder to the wrist, which adds shaping to the sleeve at the shoulder.

I decided to feature raglan sleeves in this design as they can be sewn to the dress as flat pieces, before sewing the underarm, making them easier to construct than “set-in” sleeves, the kind that are sewn into a tube before being inserted into a round armhole (like on the Megan dress pattern from Love at First Stitch). This makes Francoise a great dress project for beginners. Or, if you’re a more experienced stitcher, it makes it a bit more interesting than a regular shift dress with set-in sleeves. Those seams are just screaming out for some decorative piping or imaginative colour blocking!

Since the sleeves incorporate the shoulder and part of the bodice into them, it’s definitely wise to make a toile (muslin) of the dress before cutting into your nice fabric, as you may need to tweak the pattern fit the unique shape of your shoulders, arms and torso.

Let’s get started. The Francoise dress includes a 15mm (5/8in) seam allowance. Sew with this seam allowance unless the step indicates otherwise.

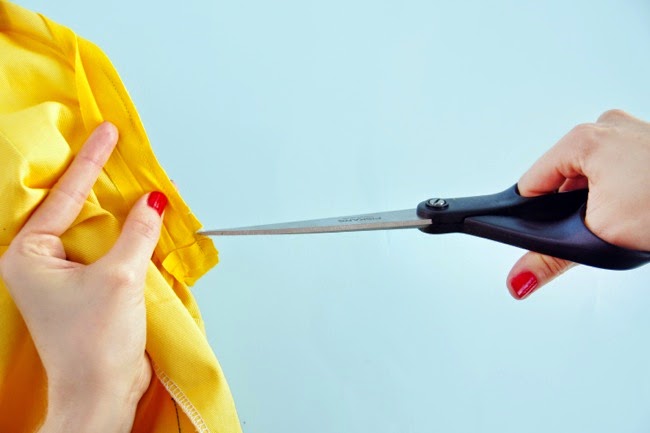
You should have cut two front sleeve pieces and two back sleeve pieces, and stay stitched the necklines and raglan seam lines. On the raglan seam lines (marked on the pattern) of the front and back sleeves, clip perpendicular snips into each curve between the second and third notches, up to (but not over) the stay stitching line. The reason we do this is, because of the curved shape of the raglan seams, the cutting line is a different length to the stitching line 15mm (5/8in) in – so we need open up the seam allowances so we can match up the stitching lines with those on the dress pieces more accurately.

how to sew raglan sleeves

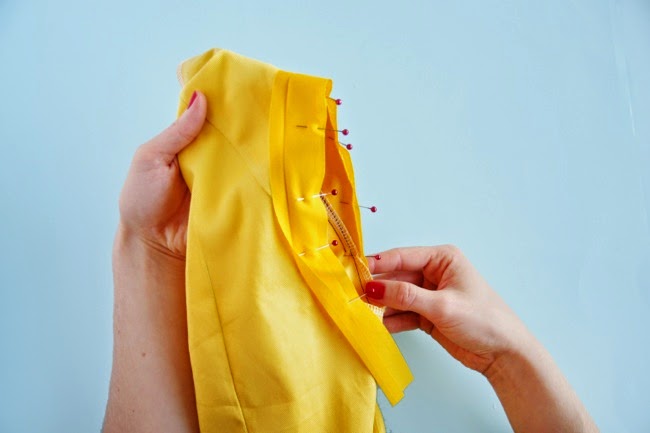
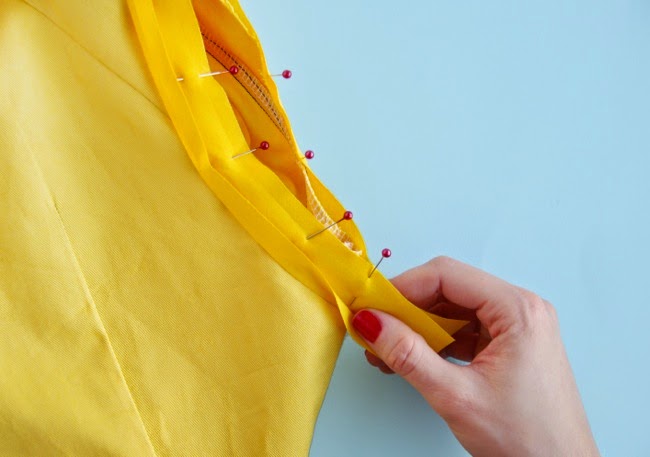
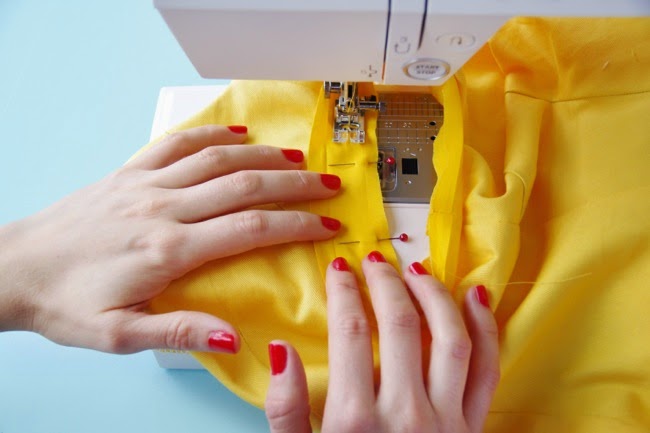
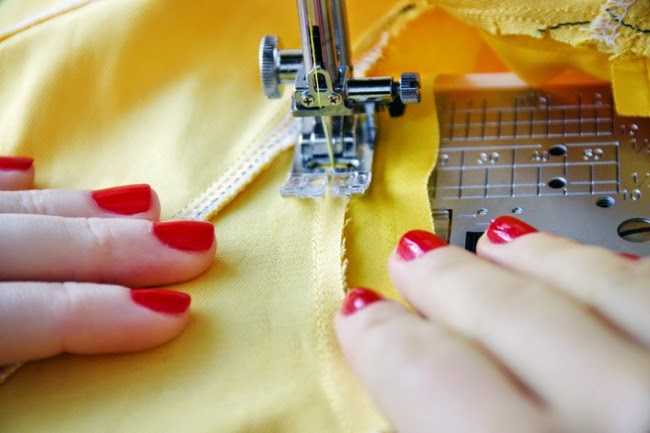
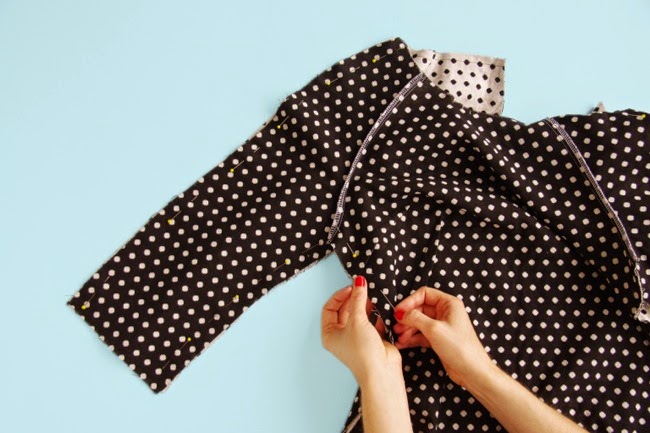
Lay the front sleeves on top of the front dress at the raglan seam lines, right sides together. Not sure which is the front sleeve? The front sleeve has single notches, the back sleeve has double notches and is wider than the front. Pin them together, matching the shoulders, underarms and notches. Don’t worry if the fabric doesn’t lie flat, it needs to curve for the seam lines to fit together. Stitch along the raglan seam lines using a 15mm (5/8in) seam allowance. Now stitch again using a 10mm (3/8in) seam allowance to reinforce the seam.

Pin and stitch the back sleeves to the back dress pieces in the same way.

how to sew raglan sleeves

Trim the front and back seam allowances. Now you can finish the seams to neaten and strengthen them – either with zigzag stitch on your sewing machine or using an overlocker (serger) if you have one. Press the finished seam allowances up towards the sleeves.
how to sew raglan sleeves

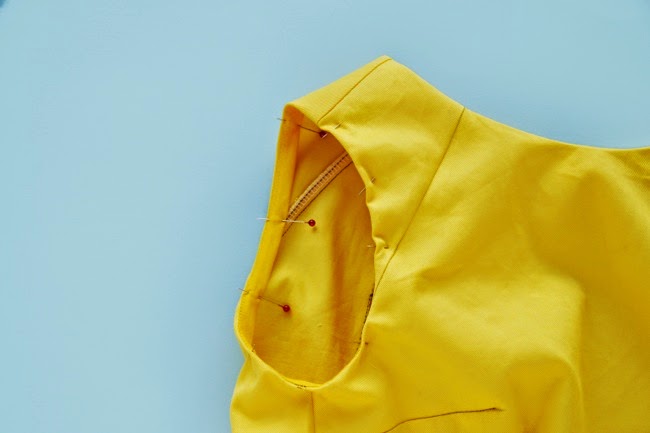
Now we can sew the shoulder seams and side seams of the dress. Lay the front dress on top of the back dress pieces, right sides together. Pin together at the shoulders, underarm seams and side seams, matching notches. Usually I like to insert pins perpendicular to the seams with the heads sticking out, so I can whip them out easily when sewing. This time though, pin parallel to the seams, directly on the stitching line – that way you can try your dress on and adjust the position of the stitching line (marking it with the pins) if you prefer a closer or looser fit. FYI the shoulder seam joining the front and back sleeves is designed to sit 1cm forward of your actual shoulder, so it should just be visible from the front.
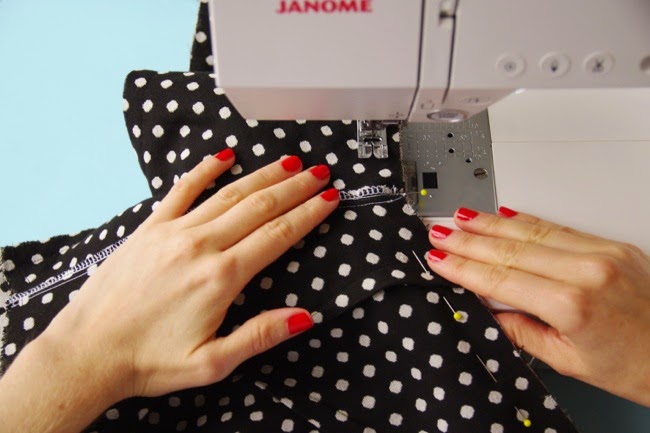
how to sew raglan sleeves

Stitch the front dress to the back dress at the shoulder seams (from the neckline to wrist). Stitch the underarm and side seams in one continuous line from the end of the sleeve to the dress hem, pivoting at the point where the sleeve meets the dress (this is the same way the underarm and side seam of the Coco top or dress is sewn if you’ve made that before). Trim, finish and press the seam allowances either open or towards the back. A sleeve board or rolled up towel will help you press the underarm and shoulder seams inside the sleeve.
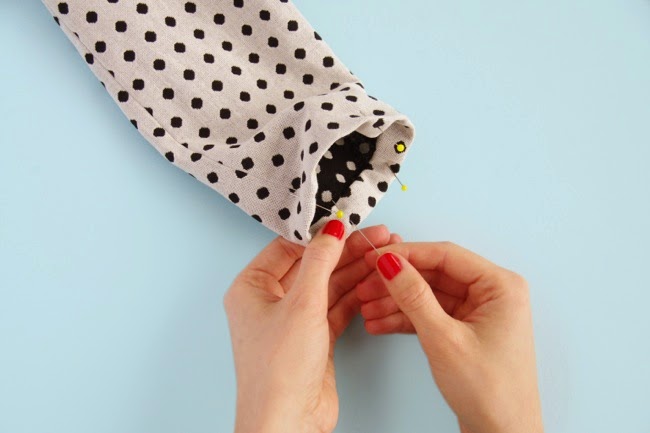
how to sew raglan sleeves

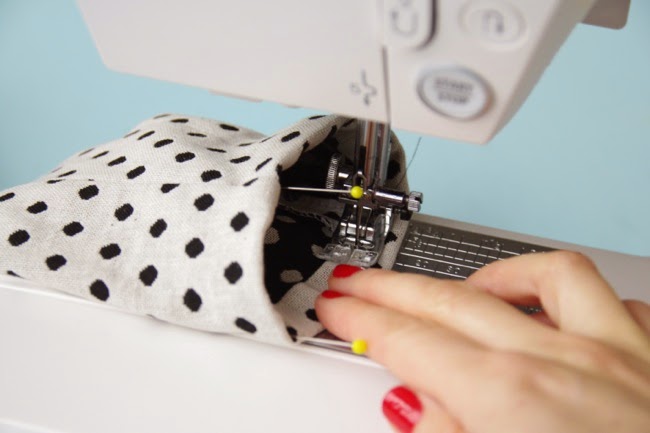
All that’s left to do now is to hem the sleeves. Try on your dress again and check you’re happy with the hem line – there is a 3cm (1 1/4in) hem allowance included. Once you’re happy, take off the dress, fold the hem of each sleeve under 15mm (5/8in) and press. Fold it under another 15mm (5/8in), press again and pin in place with the dress right side out.
how to sew raglan sleeves

Topstitch each sleeve hem close to the inner fold.

Done!

In the next post we’ll make the optional collar and the neckline facings…

27 November 2014

#SewingFrancoise: Sleeveless version – Yoke + Armhole Facings

Shift dress sewing pattern

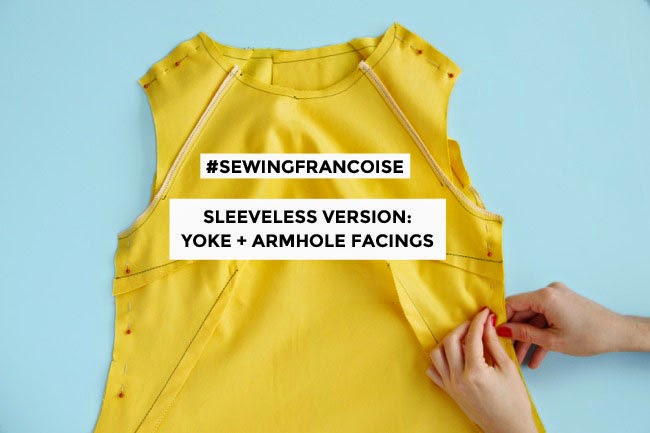
Sewing the Francoise dress? Today I’m going to show you how to sew the yoke, shoulder and side seams, and finish the armholes on the sleeveless version of the dress. If you’re making the version of the Francoise dress with sleeves, you can skip this post – I’ll show you how to sew the sleeves in the next post.

The Francoise dress includes a 15mm (5/8in) seam allowance. Sew with this seam allowance unless the step indicates otherwise.

Shift dress sewing pattern

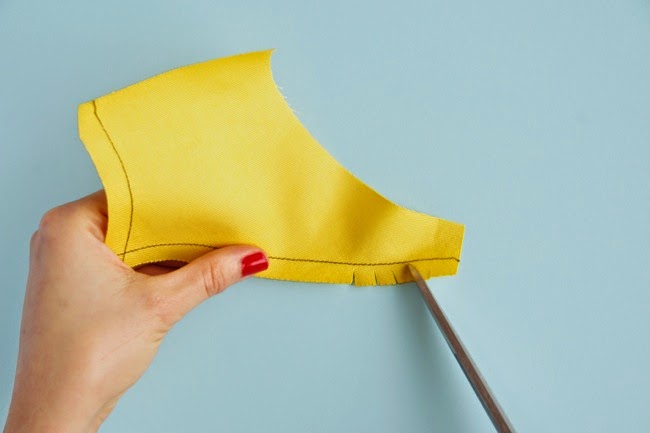
Let’s start by sewing the yoke. You should have cut two front yoke pieces and two back yoke pieces, and stay stitched the necklines and raglan seam lines (I've done my stitching in a contrast thread so you can see it clearly). On the raglan seam lines (marked on the pattern) of the front and back yokes, clip perpendicular snips into each curve between the second and third notches, up to (but not over) the stay stitching line. The reason we do this is, because of the curved shape of the raglan seams, the cutting line is a different length to the stitching line 15mm (5/8in) in – so we need open up the seam allowances so we can match up the stitching lines with those on the dress pieces more accurately.


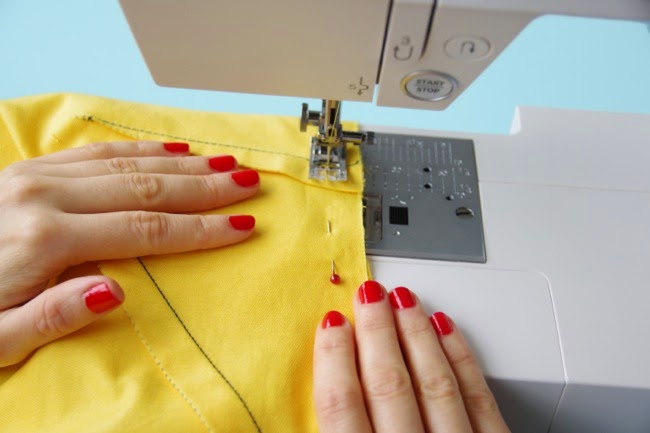
Lay the front yokes on top of the front dress at the raglan seam lines, right sides together. Pin them together, matching at the shoulders and notches. You can see in the photo above that the yoke isn't meant to stretch all the way under the armhole - we'll finish that bit later with the binding. And don’t worry if the fabric doesn’t lie flat, it needs to curve for the seam lines to fit together. Stitch the yokes to the dress, using a 15mm (5/8in) seam allowance, back tacking at each end. Now stitch again using a 10mm (3/8 in) seam allowance to reinforce the seam.

Pin and stitch the back yokes to the back dress pieces in the same way.

Shift dress sewing pattern

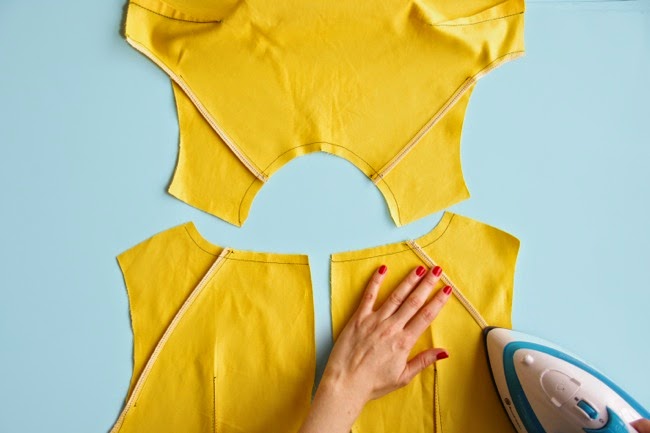
Trim the front and back seam allowances to about half their current width. Now you can finish the seams to neaten and strengthen them – either with zigzag stitch on your sewing machine or using an overlocker (serger) if you have one. Press the finished seam allowances up towards the yoke. (If your fabric is relatively heavy, you may prefer to finish the seam allowances separately and press them open.)

Shift dress sewing pattern

Now we can sew the shoulder seams and side seams of the dress. Lay the front dress on top of the back dress pieces, right sides together. Pin together at the shoulders and side seams, matching notches. Usually I like to insert pins perpendicular to the seams with the heads sticking out, so I can whip them out easily when sewing. This time though, pin parallel to the seams, directly on the stitching line – that way you can try your dress on and adjust the position of the stitching line (marking it with the pins) if you prefer a closer or looser fit.

Shift dress sewing pattern

Once you’re happy with the position of the stitching lines, sew the dress at the shoulder seams and side seams, back tacking at either end. Trim, finish and press the seam allowances either open or towards the back.

Okay, now we can finish the armholes. The Francoise dress includes a pattern piece to cut two strips of armhole binding on the bias (the pattern piece placed diagonally across your fabric). Armhole binding works well in medium weight cotton or satin, so you may want to use a different fabric from your main dress fabric if it’s on the heavy side. Alternatively you can buy ready-made 35mm wide bias tape and press the folds open.

Shift dress sewing pattern

Press one long edge of each armhole binding piece under 10mm (3/8in), wrong sides together, then unfold. Pin the un-pressed long edge of each binding piece around each dress armhole, right sides together, leaving a tail at either end. It’s up to you where you position the ends of the binding – personally I think it looks neater if they’re at the underarm seam of the dress.

Shift dress sewing pattern

Pin the ends of the binding together at the point where they meet, flush to the armhole. Stitch them together at the point you marked with the pin, keeping the dress out of the way.

Shift dress sewing pattern

Trim the ends of the binding and press the seam allowances open. Now you can pin this bit to the armhole too. Stitch the binding to the armhole all the way round, using a regular 15mm (5/8in) seam allowance.

Shift dress sewing pattern

Trim the seam allowances to 5mm. Clip perpendicular snips into the seam allowance where it curves at the underarm – this will help open up the seam allowance so it will lie flat when we turn the binding to the inside of the dress. Be careful not to cut over the stitching line.

Shift dress sewing pattern

Press the binding away from the dress and towards the seam allowances. Now we’re going to understitch the binding to the seam allowances, which means sewing the binding to the seam allowances close to the seam line to help keep it on the inside of the garment. Hold the fabric nice and taut either side of the seam line as you’re understitching so you don’t get any wrinkles.

Shift dress sewing pattern

Fold the binding to the inside of the dress, rolling the seam line in slightly to hide it on the inside of the dress (you can press it if you want). Fold the raw edge of the binding under along the line you pressed earlier, and pin this fold to the inside of the armhole.

Shift dress sewing pattern

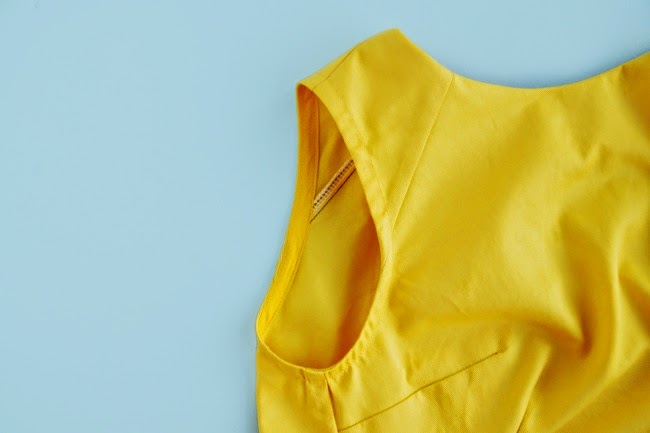
Topstitch the binding to the armhole close to the inside fold. Repeat on the other armhole, and give them both a good press to smooth out any wrinkles.

Done!

In the next post, I'll show you how to sew the sleeves on the other version of the Francoise dress, and after that we'll do the optional collar and neckline facings...

And don’t forget to enter your dress into the #SewingFrancoise contest!

26 November 2014

#SewingFrancoise: Sew the Darts


Sewing the Francoise dress? Today we’re going to sew the darts.

Darts are folds of fabric (often triangular- or diamond-shaped or a variation thereof) stitched down to shape a garment around your curves. The Francoise dress is great for practising sewing darts as it features no less than three different types – classic triangular-shaped bust darts; long diagonal French darts at the waist with a curved tip; and double-ended back darts.

Your darts should be marked on the wrong side of your fabric when you cut out your fabric. I like to also mark in the central line of each dart, as I find it easier to see where exactly to fold the fabric.


Let’s start with the bust darts on the front dress. You can do each pair of darts at the same time. Fold the fabric right sides together, bringing the dart lines (called the legs) directly on top of each other. Pin them together along the lines, with the tips of the pins pointing towards the edge of the fabric. Check that the pins are lined up with both dart legs on either side of the fabric - if they're not, try refolding the dart. Once the lines are lined up and pinned nicely, press the fold with an iron.


Stitch the lines of each dart together – start from the edge of the fabric, back tack (reverse stitch a couple of stitches) near the edge and sew to the tip of the dart, removing each pin just before the needle gets to it. Don’t back tack at the tip or it can cause an unsightly lump! Leave a couple of inches of thread and tie the threads in a tight double knot by hand. Alternatively, you can sew the last few stitches with a 1mm stitch length – the theory being that a tighter stitch is less likely to unravel so you won’t need to knot the threads.


Now you can press the darts downwards, on both wrong and right sides of the fabric. Placing a tailor’s ham or a rolled up towel under the dart while pressing and using plenty of steam (if your fabric can take it) will help you mould it into a nice curved shape.


Okay, let’s do the waist darts now – the long diagonal French darts on the front dress. Fold, pin and press the waist darts in the same way as you did the bust darts. There will be a weird sticky-out bit at the bottom like in this photo (above) - yes, it's meant to look like that! ;) Start stitching from the top point (notice that the top is gently curved, not straight) towards the bottom, tying the threads at each end by hand rather than back tacking (or sewing each end with a 1mm stitch length). If your fabric is fairly bulky, you can trim off some of the seam allowance of the dart – otherwise you may find it neater to leave the fold intact.


Press the waist darts towards the centre. The funny-shaped sticky-out bit should line up neatly with the side seam. Stay stitch across the bottom of the waist dart, by sewing a few stitches across the bottom flap, 10mm (3/8 in) from the raw edge. This will help keep it in place so we don’t accidentally fold it the wrong way when sewing the side seams.


Just the double-pointed darts on the back dress left to do. Fold, pin and press the back darts the same way you did the other darts. Stitch from the centre of the dart towards one tip, tying the threads at the tip together by hand. Now sew from the centre to the other tip, tying the end threads together by hand. You can also sew the centre threads to each other to stop them unravelling. Press the back darts towards the centre of the dress.

And finally, since there's always more than one way of doing the same thing, here are a few different dart-sewing techniques you might be interested to try. You’re welcome!

In the next post, I’ll show you how to sew the yoke and finish the armholes on the sleeveless version of the Francoise dress. And we’ll do the sleeves on the sleeved version after that…

25 November 2014

#SewingFrancoise: Cut, Interface + Stay Stitch Your Fabric

Sewing the Francoise dress? Chosen your size? Checked how it fits you on a toile and made your alterations? Now comes the fun stuff – let’s cut our fabric!


Fabric can shrink in the wash, so it’s best to wash and dry it before you cut it out. Once it’s dry, iron out any creases. Fold the fabric in half lengthways, with the right sides together, bringing together the selvedges. The “right side” of the fabric is the side that you want to show on the outside of your dress. The selvedges are the finished edges running down two sides of the fabric. Lay the folded fabric out on a table, smoothing out any wrinkles. Don't worry if your fabric is too long for your table - just roll one end up neatly.

Take the pattern sheets out of the envelope, and find the pieces you need for your chosen version of Françoise:

All versions:
Front dress – cut 1 on fold
Back dress – cut 2
Front neckline facing – cut 1 on fold
Back neckline facing – cut 2

Version with sleeves:
Front sleeve – cut 2
Back sleeve –cut 2

Sleeveless version:
Front yoke – cut 2
Back yoke –cut 2
Armhole binding – cut 2

Optional:
Collar – cut 4
Tab – cut 2

If your dress fabric is on the heavy side, it’s a good idea to cut the neckline facings in a slightly lighter fabric to make them less bulky. Similarly, the armhole binding for the sleeveless version works well in medium weight cotton or satin, or you could buy ready-made 35mm bias tape. And if you want to, you can make the collar, yoke or sleeves in a different fabric to your main dress fabric.


Once you’ve found the pattern pieces that you need for your chosen version of Francoise, cut roughly around them with paper scissors. Lay them out on the fabric – there’s a suggested cutting layout included in the pattern instructions, or you may find a layout that is more economical depending on what size you’re cutting and which variation you’re making. Whether you follow the layout or wing it, there are a few things to pay attention to when laying your pattern out on the fabric:

1) Position any lines that say “place on fold” along the fold of the fabric.

2) Line up the grainline arrows (labelled on the pattern pieces) so they are exactly parallel to the selvedges. Stick a pin in one end of the grainline arrow and measure the distance from here to the selvedges or folded edge. Now measure the same distance from the selvedges or folded edge at the other end of the arrow, and pivot it from the pin until both ends of the arrow are parallel. If you’re making the armhole binding, notice that the grainline is diagonal.

3) The list above – and the pattern pieces themselves – tell you how many of each to cut. Because we’ve folded the fabric in half, we can cut two symmetrical pieces at once, or one double piece where the pattern piece is placed along the fold line. If you’re making the collar, note that you need 4 pieces – so you’ll need to lay the pattern piece out and cut it twice.

4) If your fabric has a directional print, make sure you place the pieces with the design pointing the correct way, so it doesn’t end up upside down!

Pin the pattern pieces to the fabric or you can hold them in place with some kind of weights, such as food cans, scissors, rulers or whatever you have to hand.

Find your pattern size lines – these are marked with a particular style of dashed/dotted/solid line as well as numbers. My favourite way of transferring the pattern lines (just the outlines in your size) to the fabric is by using dressmaker’s carbon and a tracing wheel – read up on how to do that. Alternatively, you can cut through the pattern and fabric on your size lines using scissors. Lay down a cutting mat (or some cardboard) if you don't want to mark the table! Next, mark the notches (the little lines perpendicular to the seam lines), darts (labelled on the pattern) and small circles (on the optional tab) on the wrong side of both layers of fabric. I like to use dressmakers’ carbon to do this too. (You don’t need to mark the grainlines or text on the fabric.) Read more on marking and cutting tools and techniques.


Remove the pattern pieces from the fabric and - if you traced with dressmaker’s carbon - carefully cut directly on the outlines using fabric scissors. The bottom of the waist dart on the front dress sticks out the side a little – take care to cut around it, not into it. I know if looks a bit weird right now, but it’ll make sense later when you come to sew it!


Cut short snips for the notches - about 5mm / 1/4in. (Snipped notches are more accurate than those little triangles you may have seen before, and are less likely to distort the edge of your fabric.) Snip an extra notch at the centre of the neckline on the front dress and front neckline facing. These notches will help us match everything up neatly later when it comes to sewing the pieces together.

You also need to cut the following pieces in interfacing:
Front neckline facing – cut 1 on fold
Back neckline facing – cut 2
Collar – optional, cut 2
Tab – optional, cut 1


Interfacing is a stiffening material which will give the neckline and optional collar and tab more structure. You can buy interfacing that you sew in, but if your fabric can handle it I recommend the iron-on stuff as it’s so easy to use. (Read more about interfacing.) Apply the interfacing to all three neckline facing pieces and, if you’re adding them, to two symmetrical collar pieces and one tab piece.

To apply the interfacing, place the (rough) glue side face down on the wrong side of the fabric and hold a hot, dry iron on top for a few seconds. Resist the urge to move the iron back and forth, or you might squidge up the interfacing into a gluey mess. And try to avoid touching the glue side of the interfacing to your iron or ironing board – again, messville!


We’re also going to stabilise the curved and diagonal lines on some of the dress pieces by “stay stitching” them – this will help prevent the fabric from stretching out of shape while we’re handling it and sewing with it. With your machine on a normal stitch length (2.2 - 2.5mm), sew a line of stitching 10mm (3/8 in) from the raw edge at the neckline and raglan seam lines on the front dress, back dress, front sleeve/yoke (depending on which version you’re making) and back sleeve/yoke. Try to sew in the same direction on each piece so that if any of them stretch a little during under the sewing machine, they all go the same way - so start each line of stitching from the shoulder. When you stay stitch the neckline on the front dress, sew from one shoulder to the centre (marked by the notch you cut earlier), then from the other shoulder to the centre.

And that’s it for today! Your fabric is all cut out and stabilised. In the next post, we’ll sew the darts…

24 November 2014

Christmas Gift Shop!


Can you believe Christmas is just a month away?! It's time to get shopping. Woop!


Take a look at our gift shop for prezzie ideas for your sewing friends, such as gorgeous dressmaking patterns and the 'Dress Handmade' Fairtrade tote bag and badge set. For the friends you want to convert to sewing, Love at First Stitch offers the perfect introduction.

Not sure what to choose? Give a gift voucher! Gift vouchers are delivered as a code by email, but if you want something snazzy to print out, simply reply to the email and we'll send you a lovely PDF gift voucher to print at home.


And yes - getting a gift for yourself is totally legit!

21 November 2014

#SewingFrancoise: More Fitting Alterations


Making the Francoise dress? We’ve talked quite a bit about fitting:
Today I want to show you a few more examples of pinching out or slashing and spreading fabric on a toile and transferring those changes to the paper pattern. Fitting is a huge topic and this list is by no means comprehensive - but I hope that it will give you a general understanding of the principle of adding and removing fullness which you can use on the particular area that you need to alter.

If you do need more help, I'm going to link to some further resources at the end of this post, written by people with much broader knowledge of the subject than me. Don't feel overwhelmed though, you really don't have to read a fitting book cover to cover in order to make something that fits you - you probably only need to make a handful of tweaks to a sewing pattern for your own fitting issues, and once you know what they are it'll become easier and easier for you to make these changes as you sew more things. Hooray!

(Ooh, BTW, in case you're looking at the piccies of the toile below and thinking, "But she said I didn't need to finish the seams on my toile!", you don't - ignore the zigzag stitching and stay stitching in the photos, this was a toile made by lovely Laura when she was testing out the pattern instructions - that lady is thorough!)

Right, onwards...


Adjusting the sleeve shoulder seams
One of the versions of the Francoise dress features two-piece raglan sleeves. Since our shoulders are different shapes, you may find that you need to alter the shape of the curve of the shoulder seam that joins the front and back sleeve pieces at the front. (The two-piece shoulder seam is designed to sit 1cm forward of the centre of your shoulder so you can see the style line from the front.) Repin the shoulder curve into a shape that fits you (you may need to unstitch the toile if you need to add fullness here), then draw your new shoulder seam shape onto the paper pattern - on both front and back sleeve pieces. Measure the seams on the front and back sleeves from the neckline to the first notch to check they are the same length, and adjust if you need to.

You can make a similar alteration if you need to add or subtract fullness at the raglan seam lines.


Wide or narrow shoulder
You can also add or subtract fullness horizontally. For example, if you find you have excess - or not enough - fabric at the shoulder on the sleeves, you can pinch some it out or slash and spread it on the toile. Then draw a cutting line in the same place on the paper pattern, marking the stitching line 15mm / 5/8in from the raglan seam line. Cut from each end of the line to this point, leaving a teeny bit of paper intact as a hinge. Slash open the shoulder seam side if you need extra space, or overlap the pieces if you are removing it. Glue or tape in place (with a new bit of paper under the gap if you've spread it open), and redraw the shoulder seam. Do the same on the front and back sleeve so that the shoulder seams end up the same length.


Sway back
If your lower back curves inwards more than most, you may find you have some excess fabric pooling itself horizontally around that area. Pinch out a wedge of fabric where you need to. Mark a cutting line in the same place on the paper pattern, and mark the stitching line 15mm / 5/8in in from the side seam. Cut from each end of the line to this point, leaving a teeny bit of paper intact as a hinge. Overlap the pieces at the centre back seam by the amount you removed from the toile. Glue or tape in place and redraw in smooth seam lines. Redraw the back waist dart.


Gaping or tight back neckline
If you find you have excess fabric - or not enough fabric - around the back neckline, the simplest place to make the alteration is on one of the existing seam lines. Try taking in or letting out the seam at the centre back opening or at the raglan seams joining the back dress to the back sleeve. Depending on the shape of your body, however, this might not always fix the problem...


If you tried that and found that actually the excess fabric falls around the middle of the back neckline, then that's where you want to pinch out a wedge of fabric. Measure how much you pinched out, then draw a dart the same size and in the same position on the paper pattern. If you are happy to sew a dart here on your real dress, then "true" the dart the same way as we did when we moved the bust dart.


If you'd rather not have a dart here, I get you. What you can do instead is draw a long wedge from the top of each dart leg to the bottom of the pattern (or to the waistline). Cut up one of the lines of the wedge, overlap the pieces at the lines and stick them down. Redraw smooth seam lines at the neckline, centre back and hemline if you need to.

If you change the neckline, don't forget to add or subtract the same amount of fullness to or from the neckline facings and the collar if you're making it.

******

I do hope this helps. But if you do need a more comprehensive list of fitting alterations, may I suggest the following resources:


Next week, we're going to cut out our Francoise dresses and then get sewing. I'm so excited to see what you make! Have you chosen your fabric yet? What did you pick? Tell me, tell me!

20 November 2014

#SewingFrancoise: Bust Adjustments


Sewing the Francoise dress? Let's talk about boobs.

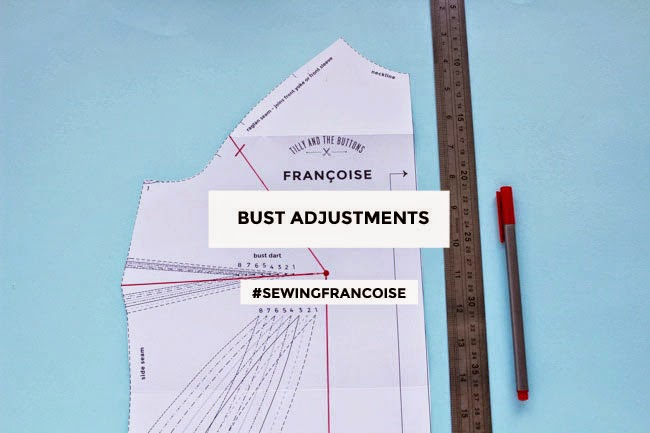
The pattern is fitted at the bust and - since our chests and boobies are all different shapes and sizes - you might find that you need to alter the bust on the pattern to fit your body. Today I'm going to show you three fitting alterations that you may or may not need - moving the darts, adjusting the pattern for a fuller bust, and adjusting the pattern for a smaller bust.

Moving the darts

Let’s talk nipples. (Teehee, nipples!) Our nipples don’t always necessarily land at the point where a sewing pattern hopes they will, in which case you may need to tilt the tip of the bust dart. You want the tip of the dart to point towards your nipples but end about 2cm / 3/4in before them to avoid them looking too pointy.


Personally I find the simplest way to tilt a dart to fit my body shape is to move it on the toile. Unstitch the original dart and refold it in the new position. Pin it in place and baste stitch (tack) it to check the position. Mark the new dart lines onto the paper pattern - like in the photo above, but your darts may be higher or lower or pointing in a different angle.


All you need to do now is “true” the dart, ie. get the dart leg lines the same length and redraw the side seam of the dart so that when you sew it together you don’t get any weird sticky-out bits at the seam allowance. Fold the dart closed temporarily, bringing the two legs (lines) together, folding the dart downwards, and taping it in place. Redraw a smooth side seam across your new (folded) dart, then roll a tracing wheel over it.


Untape and unfold the dart and you should see the perforations made by the tracing wheel – draw over these lines from the centre fold to make the side seams of your dart.

You may also want to redraw the waist darts so they are also pointing towards your boobs.

Adjusting bust fullness

If your boobies are on the larger side, you may find that the pattern fits your bust but is baggy above the bust at the upper chest and shoulders. Our sewing patterns include a 5cm / 2in difference between the full bust (measured around your nipples) and high bust measurement (measured around your upper chest just under your armpits). If you have around 7.5cm / 3in or more difference between your full bust and high bust, then what you can do is pick a smaller pattern size based on your high bust and then add extra room at the full bust by doing a full bust adjustment – AKA an “FBA”.

If, on the other hand, your bosoms are on the smaller side, you may find that while the full bust fits you, the upper chest and shoulders are too tight. In this case you can pick a larger pattern size based on your high bust and then subtract room at the full bust by doing a small bust adjustment, an “SBA”.

Measure your high bust (around your upper chest just under your armpits) and add 5cm / 2in. Choose the pattern size with that measurement at the bust to do your bust adjustment on. How much larger or smaller is your actual full bust measurement from the bust measurement on that pattern size? If it’s 2.5cm / 1in bigger, you’ll be adding 2.5cm / 1in when you do your full bust adjustment; or if it’s 2.5cm / 1in smaller, you’ll be subtracting 2.5cm / 1in when you do your small bust adjustment, and so on. Since the front dress pattern represents one half of the front dress (as the fabric is cut on the fold) – or one boob – you’ll be adding or subtracting half of that difference - 1.25cm / 1/2in in this example - to the pattern piece.

Both adjustments start off the same way by marking some cutting lines on your toile or pattern, slashing them open, then either spreading them apart or overlapping them depending on whether you want to make the bust larger or smaller. I’m going to show you how to do them on the pattern pieces since it’s easier to see what’s going on, but the same principle applies to altering the toile – you might prefer to make the alterations to the toile first, before transferring the changes back to the pattern, so you can be sure that you’re increasing or decreasing the fullness by the right amount for your body. Whichever method you choose, trace off copy of your pattern so you can keep the original one intact in case you need to go back to it.

Okay, let’s do this.


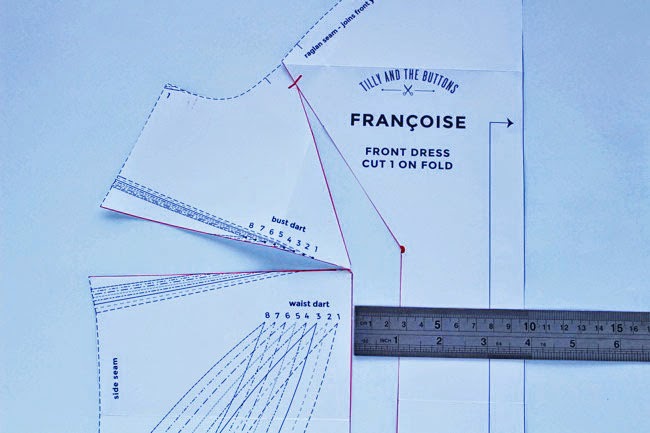
Mark the apex of your bust on your toile or pattern – ie. where your nipple lands. Now draw three lines fanning out from this point – one through the centre of the bust dart; one vertical line straight down the dress (parallel to the centre front line and perpendicular to the lengthen/shorten lines); and one diagonally through the raglan seam. We’re going to ignore the seam allowance so we don’t change the length of the raglan seam line – mark a point 15mm / 5/8in in from the cutting line on the line you just drew through the raglan seam.


Cut up the long vertical line to the bust apex, and from here up the diagonal line to the point 15mm / 5/8in from the raglan seam. Snip in from the raglan cutting line to a teeny bit before the point you just stopped cutting to, creating a hinge. (If you accidentally cut through the hinge or if it falls apart, don’t worry, just keep the pieces touching at this point when you come to move them later.) Cut along the dart line too, from the side seam to the bust apex, again stopping just short of it to create another hinge.


Full bust adjustment

Lay your pattern over a new sheet of paper, taping the centre front of the pattern to the paper to hold it in place. Spread the pieces apart at the vertical cutting line by the amount you need – either based on what you added to your toile or the amount you calculated based on your high bust measurement (see above). The bust dart will open up and the seam allowance at the raglan seam will close. Pin, tape or glue the pattern to the new piece of paper.


Now to redraw the enlarged bust dart lines. Draw a line through the centre of the new dart to the tip of where it’s been opened up. Mark a point about 2cm / 3/4in to the left – this is now the tip of your new dart. Draw in the dart legs from this point out to the points where the old dart legs started at the side seams. Redraw in the side seam lines, connecting at the centre line.


The changes we’ve made have also made the hemline uneven – now to tidy it up. Extend the centre front line downwards, and extend the hemline from the piece on the left across to meet the centre front line, making sure that there is a 90 degree angle at the corner.

And that’s your new pattern piece!

Small bust adjustment


Overlap the pieces by the amount you need – either based on what you subtracted from your toile or the amount you calculated based on your high bust measurement (see above). The bust dart will become narrower and the seam allowance at the raglan seam will open up. Pin, tape or glue the pattern in place.


Redraw the narrowed bust dart legs from the tip to points where the old dart legs started at the side seams. Draw a line through the centre of the dart, then redraw in the side seam lines, connecting at the centre line. (See the green lines.)


The changes we’ve made have also made the hemline uneven – now to tidy it up. Extend the hemline from the piece on the left across to meet the centre front line, making sure that there is a 90 degree angle at the corner. Cut off the piece below the line you just drew.

And that’s your new pattern piece!

I'll be back soon with some more fitting tips for you...