Circle your bust and waist measurements on the ‘Body Measurements’ chart in the pattern instructions. If a measurement falls between two sizes (for example, if your bust is 39in rather than 38in or 40in), it’s usually better to choose the larger size as you can take it in more easily than you can let it out.
If your bust and waist measurements all fall into one size on the body measurements chart, that is your size. Take a look at the size key on the pattern sheets and find the corresponding size line. Each size has its own solid or dashed line to make it easy to spot and help you follow it easily.
If your bust and waist measurements fall into different sizes, you can combine pattern sizes to create tailored pattern pieces that will fit your unique measurements - yay! This is super easy to do - see 'How to combine pattern sizes' below for more details. Alternatively, you might want to do a bust adjustment to add a bit more room at the bust - we'll also cover this below.
But, before you grab a pencil and get stuck in, you might want to consider...

Lengthening or shortening the bodice or sleeve
Our patterns are drafted for a height of around 5"5 (165cm), so if you're particularly taller or shorter than this, or if you have particularly long or short arms or torso, then you might want to adjust your pattern pieces to better suit your unique proportions.
We have included the following sets of lengthen or shorten lines on the Pearl pattern pieces:
1) Bodice
If you often find that tops and dresses are a bit too long or short for you in the bodice, you can lengthen or shorten the front and back bodice pattern pieces using the lengthen or shorten lines. We've included the nape (nobbly bit at the bottom of your neck) to hem measurements for the cardigan in the finished garment measurements section of the booklet so you can compare them against your own measurements.
The Pearl cardigan is designed to sit on your natural waist, which is where you bend at the side. If you prefer your tops longer, you may be wondering if you could lengthen the cardigan to sit more on your hips.
You certainly can, but bear in mind that the end result will be a different look, and it may want to ride up to your natural waist when you wear it. If your hips are bigger than your waist, after lengthening the pattern as set out below, you'd need to
grade out to a larger size at the bottom of the side seams. If you compare your hip measurement to the waist measurement on the finished measurements chart in the instructions, it will help you find which size line to grade out to at the bottom.
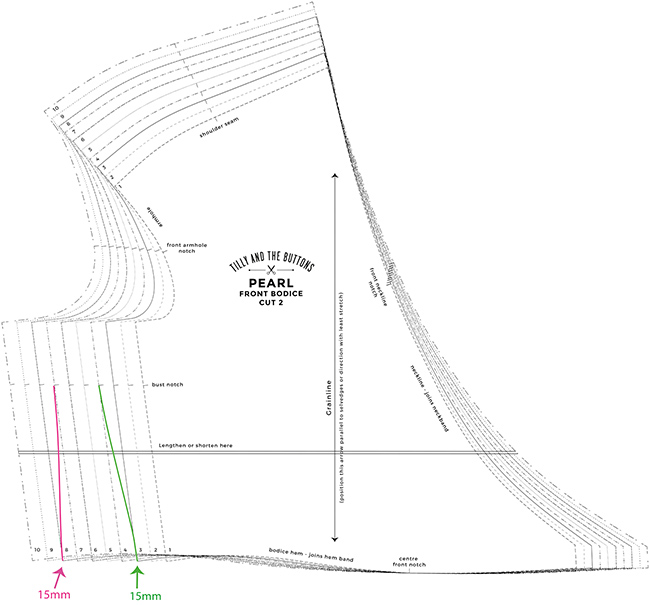
The lengthen or shorten lines on the Pearl cardigan are located around halfway down the side seam on the front bodice and back bodice, and on the left hand side of the neckband. You can adjust your pattern here if you feel like you need a bit more length, or conversely a bit less length - in the torso.
If you decide to lengthen or shorten the bodice pattern pieces, remember to adjust both the front and back bodices, as well as the neckband so that they all fit together perfectly when sewing.
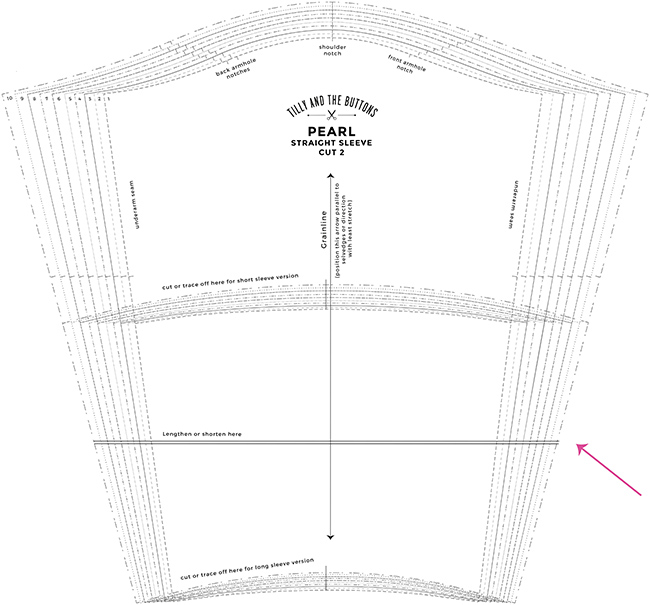
2) Sleeves (both long sleeve versions)
There are three sleeve options available for the Pearl cardigan - a short sleeve, a long straight sleeve, and a balloon sleeve. The short sleeve and long straight sleeve are cut from the same pattern piece.
Both the long sleeve and balloon sleeve are designed to sit just past the wrist, between the bottom of the hand and base of the thumb, and the short sleeve sits just above the elbow.
If you frequently find your sleeves are too long, or if you have the opposite problem and find they are always riding up, then you can shorten or lengthen the sleeve pattern pieces using these lengthen or shorten lines.
How to combine different bust and waist sizes
If your bust and waist measurements fall into different pattern sizes, you can draw a new line ("grade") between pattern sizes to get a bespoke fit for your exact body measurements. We have a
blog post with step-by-step instructions and diagrams to show you how to do this in more detail :)
If you want to combine sizes, draw a smooth, curved line between sizes, between the bust notch on the front and back bodice, to the bottom of the bodice, stopping 15mm (5/8in) above the bodice hem. Stopping here means the seams will be the exact right size at the bottom when it comes to attaching the hem band.
Speaking of the hem band, cut this pattern piece in the same size as your new waist size so it's the right size for your waist. You will also need to cut the top of the sleeve head in the same size as the one you cut for the bodice.
If you feel like you would benefit from more room in the bust only, as opposed to more room in the shoulders, sleeve etc., you might want to consider a...
Full bust adjustment
If you find that your me-mades often feel tight across the bust, with excess fabric pooling above, you may benefit from doing a full bust adjustment. You may also find that on wrap garments that the wrap cross-over sits quite low or feel like it doesn't fully close.
Small bust adjustment
What about if you have a smaller bust? If you're making the 6-24 size band, the shape of the pattern pieces along with the fact that it's designed for knits makes it unlikely you'd need to a fitting adjustment.
If you're making the 16-34 size band and there is less than 5cm (2in) difference between your high bust and full bust measurement, you could try making a small bust adjustment. The simplest way to approach it would be to follow the
full bust adjustment instructions but subtracting volume rather than adding it.
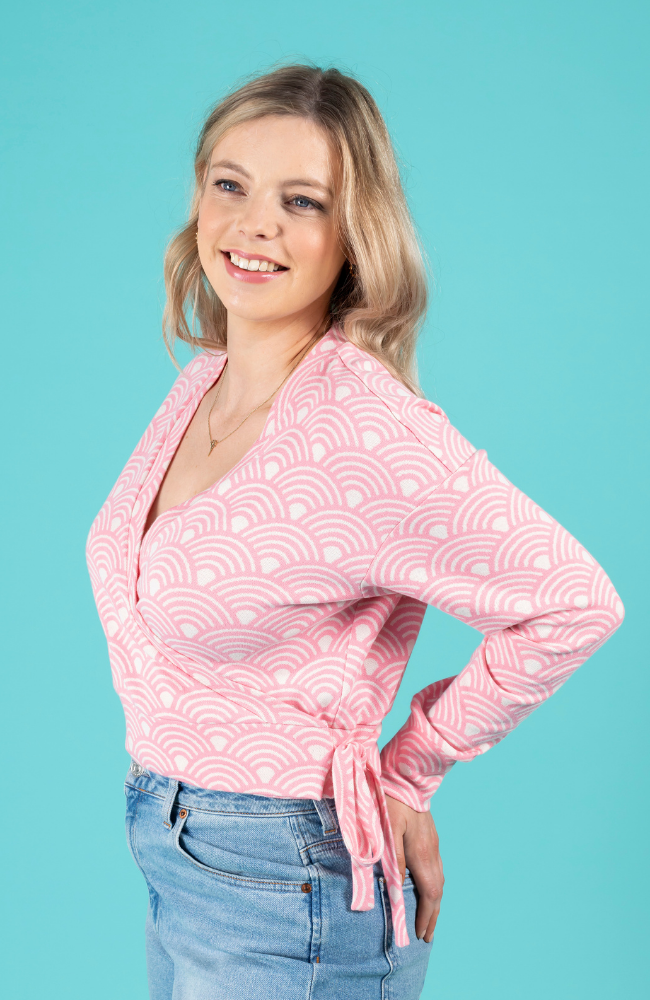
And finally, if you put on your Pearl cardigan and it's looking a bit odd, simply have a fiddle around with how tight or loose you've tied it and you may find it suddenly looks a lot better :)
And that's it! I hope you've found this post useful and feel confident about fitting your Pearl cardigan. We love seeing your finished makes and progress shots. Tag us on Insta
@TillyButtons using the hashtag
#SewingPearl.
*****
Author: Nikki Hoar
Photography:
Jane Looker 


