
Now it's time for the fun stuff! Let's get sewing the Erin dungarees or overalls - woo!
We're breaking down the Erin dungarees sewalong, supported by Janome, into manageable chunks so no matter how much time you have to sew today, you can make some progress with your project.
We're starting with assembling the bib of the dungas. In this part of the Erin sewalong we'll cover:
- Applying interfacing to your facings
- Staystitching the bib underarm curves
- Stitch settings for woven and knit fabrics
- Starting to assemble the front bib

Watch the video for this step of the Erin sewalong here:
INTERFACING
We're starting by applying the interfacing to the yoke, which will give the top of the dungas some structure to stop it drooping.
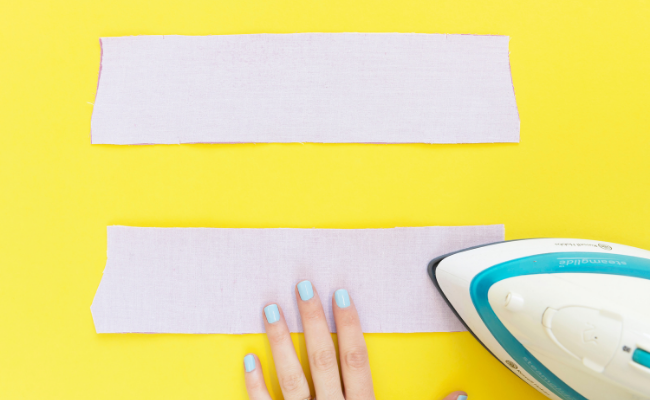
You should have cut out two front yokes and two back yokes, plus one front yoke and one back yoke in interfacing. Place the interfacing pieces glue side down on the wrong side of one front yoke and one back yoke - the glue side of the interfacing is the one that feels rough to the touch, and the "wrong" side of the fabric is the side that will go on the inside.
Hold a hot, dry iron on top for a few seconds to fuse the interfacing to the fabric. When applying the interfacing, try not to move the iron back and forth - instead use an up-down motion to move into you don't squidge up the interfacing while the glue is melting.
Snip the notches. The notch can stick together again if you snip them before applying the interfacing, so snip them after applying the interfacing instead.
These interfaced yokes will go on the outside of the dungas, and the ones that aren't interfaced will join the lining on the inside.
Bonus blog post: Tips for Interfacing Fabric!
STAYSTITCHING
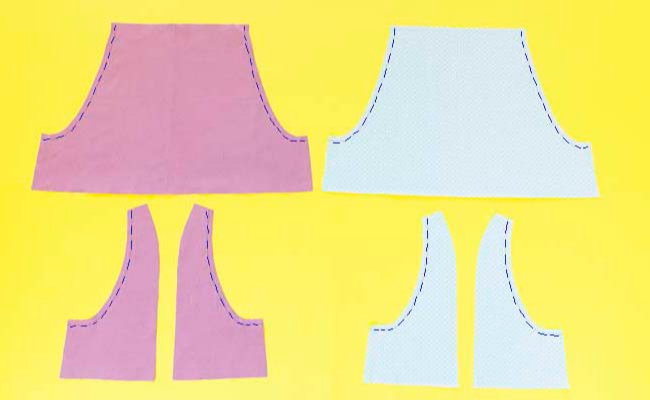
Next, we'll staystitch the bib. Staystitching (in this context) is simply a line of stitching close to a raw edge, which helps prevent curved areas from stretching out during handling, construction and wear.
You'll need the back bib, back bib lining, front side bibs and front side bib linings. Remember, if your fabric is on the thicker side, you can use a lighter-weight fabric such as cotton for the bib lining - otherwise you can use the main fabric for the lining too. In the sewalong photos we're using a different fabric for the lining so you can tell it apart from the outer pieces.
Using a regular sewing machine, sew a line of staystitching on the curved armhole edges of all these pieces 10mm (3/8in) from the edge. (Don't worry if your sewing here isn't exactly accurate - so long as the stitching stays within the 15mm [5/8in] seam allowance that we'll use to join the pieces later!) Whatever fabric you're using, just use a regular straight stitch, around 2.2-2.5mm long. It's a good idea to sew in the same direction on each piece to keep them symmetrical, as staystitching itself could potentially distort the fabric slightly, so sew them all from the top downwards.
Bonus blog post: Tips for Staystitching!

To help the bib lining stay hidden on the inside of the dungarees, we're going to trim the edges down a teeny bit. Once the lining is joined to the outer bib, this will encourage the seams to roll to the inside so you don't see them when you wear your lovely handmade dungarees.
Trim the curved armhole edges of the back bib linings by 2mm (1/8in), tapering to 0mm (0in) at the corners. Trim the top and sides of the un-interfaced front yoke and back yoke in the same way.
If you're using the same fabric for the lining and outer, it's a good idea to mark the bib lining pieces with a safety pin or washable chalk pencil once trimmed so you can easily see which pieces are the lining when you come to sew them later.

LET'S SEW!
Now we can start joining the pieces together - woohoo!
Lay out your front centre bibs and front side bibs, right side (or nice side) up.
Flip one of the front side bibs over the front centre bib so they're right sides together. Pin along the front bib seams, starting by pinning the corners and notches, then pin the rest of the seam. Pin the other front side bib to the other side of the front centre bib.
Repeat with the bib linings.
Stitch the four seams you've just pinned - for help with your stitch settings, read on...
Bonus blog post: How to Stitch (Starting & Finishing)!
STITCH SETTINGS
For woven fabrics, use a regular sewing machine and sew with a regular straight stitch. For medium-weight wovens like cotton twill or chambray, a stitch length of 2.4-2.5 should be about right; if you're using needlecord (as seen in this sewalong) lengthen it to around 2.8-3 to get over the wales, or ridges; or if you're using a lightweight woven like viscose, you could shorten the stitch to around 2.2-2.3.
For knit fabric, like French terry or ponte, you can use an overlocker (serger) to join the seams, trimming off the excess seam allowance with the blade as you sew. But there's no problem if you don't have an overlocker - use a regular sewing machine and stitch with a narrow zigzag (2.2-2.5mm long by 1-1.5mm wide). It's a good idea to use a ballpoint needle for knits - this has a slightly rounded tip which will avoid snagging the material.
Sew seams together using a 15mm (5/8in) seam allowance unless the step says otherwise, back tacking at each end if you're using a regular sewing machine.
PRESSING THE SEAMS
If you're using a regular sewing machine, trim the seam allowances you've just sewn by about half their current width to stop them from being too bulky. There's no need to finish (i.e. zigzag stitch or overlock the raw edges) these bib seam allowances as they'll be hidden by the lining.
If you used an overlocker, the knife should have already trimmed off excess seam allowances.
Press the seam allowances open if you used a regular sewing machine, or towards the centre if you used an overlocker - pressing will help define the seam lines and neaten them up. When we attach the interfacing, we used a dry iron, but you can turn the steam back on now as long as your fabric can take it - it's always a good idea to test press a swatch of your fabric first to check the settings.
Start by pressing on the wrong side - gently pulling the fabric away from the seam to define it, then flip the project over and press the right side.
Bonus blog post: Tips for Pressing Your Sewing Projects Like a Pro!
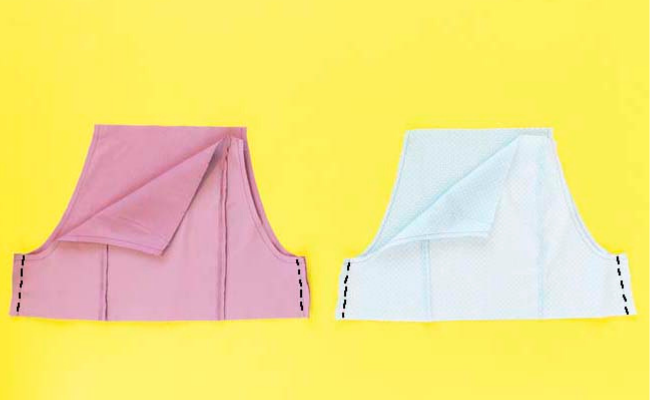
Now we're going to attach the front bib to the back bib. Lay the front bib over the back bib, so the right sides are together, and pin them together at the side seams, matching up the corners and notches. Repeat with the linings. Stitch the seams you've just pinned.
If you used a regular sewing machine, trim the seam allowances. Press the seam allowances open or towards the back bib.

Now we’re going to attach the yokes. The interfaced yokes are going to join the outer bib, and the yokes that aren’t interfaced – the ones we trimmed down earlier – are going to join the bib lining.
Let’s start with the interfaced yoke and outer bib – pin the longest bottom edge of the front yoke to the top edge of the front bib, right sides together, matching up the corners and notches. Remember, the front bib is the one with the princess seams down it, and if you’re not sure which yoke is the front, check it against your pattern pieces. Repeat with the uninterfaced front yoke and front bib lining. Stitch the seams you’ve just pinned.
Attach the interfaced back yoke to the back bib in the same way - so the long bottom edge of the interfaced back yoke is pinned and stitched to the top of the back bib. Repeat for the uninterfaced back yoke and lining.
If you used a regular sewing machine, trim and "grade" the seam allowances, which means trimming the layers to slightly different widths – trim the yoke seam allowances slightly narrower than the bib seam allowances. This will cut down the bulk so they sit flatter once they’re turned to the inside.
Press the yokes and all seam allowances up away from the bib – start by pressing the wrong side, then the right side.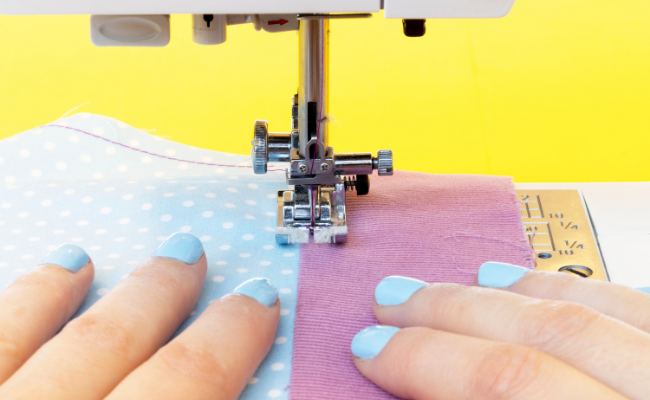
Now we’re going to edgestitch the seam allowances to the yokes to hold them in place and keep this seam neat. Edgestitching means topstitching (which means sewing stitches that will be visible on the outside of the garment) close to an edge. From the right side of the fabric, position your needle so it’s 2-3mm (1/8in) from the seam joining the yoke to the bib, on the yoke side, with the seam allowances still folded up towards the yoke underneath.
You can use a ridge on your presser foot as a guide to help you sew at an even distance from the seam all the way along. Alternatively, some sewing machines allow you to shift the needle to one side, in which case shift it 2-3mm (1/8in) towards the yoke side, and keep the seam lined up with the centre of your presser foot as you sew. Or try using an edgestitch foot if you have one.
You may want to lengthen the stitch ever so slightly, or even use a contrast thread to create some a feature out of the stitching.
As you sew, hold the fabric nice and flat away from the seam to avoid creating a ridge.
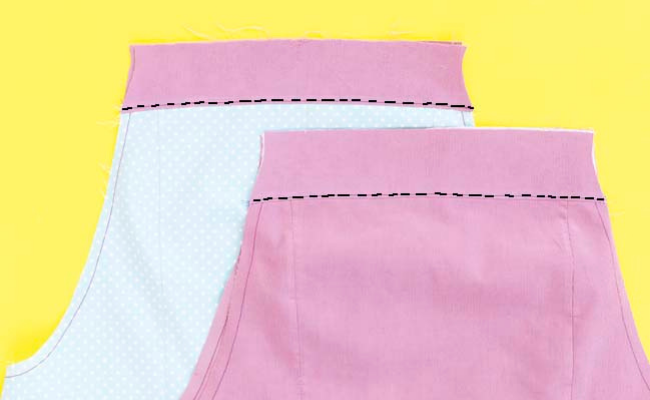
Edgestitch all four yoke seams – so on the front bib, back bib, front bib lining and back bib lining.
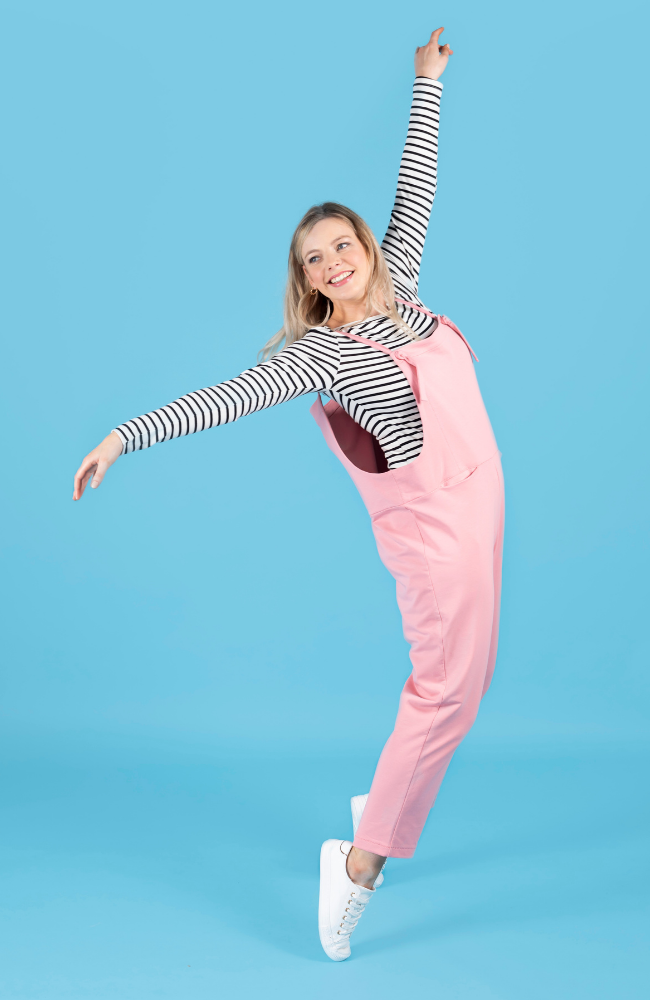

That’s it for now - we’ve made a great start! In the next part of the Erin dungarees sewalong, we’ll make the straps and join the bib, straps and lining together.
Share what you're making
We absolutely looove seeing all your Tilly and the Buttons makes, and we're especially excited to see your Erin dungarees throughout this sewalong and beyond. So let us know you're joining in by using #SewingErin when you share your posts on social media. Don't forget we love project planning and in-progress shots too!
Grab your copy of our Erin dungarees sewing pattern and meet us in the next blog post...
*****
Video sewalong: Abi Dyson
Photos: Jane Looker


