

INTERFACING THE POCKETS
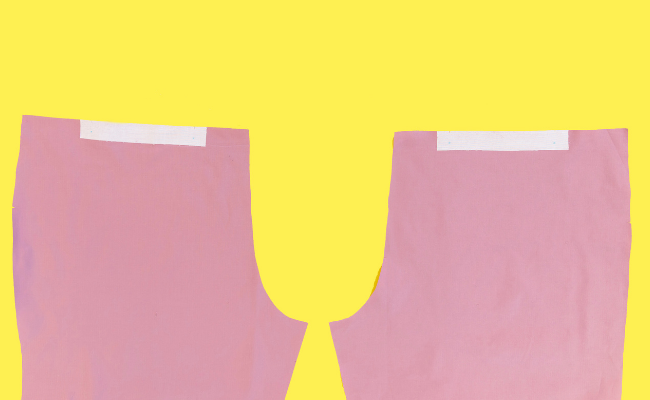
You should have cut two pocket interfacing strips in, you guessed it, interfacing, and marked on the pivot points. We’re going to apply them to the top edges of the front legs where the pocket openings will be – the interfacing will add some structure to the pocket openings so they stand up to wear and aren't too droopy.
The front legs are the ones that have single notches along the crotch curve (the back legs have double notches here). With the front legs wrong side up, lay the pocket interfacing strips over them at the waistline, or top edge, positioning them so the pivot points are 15mm (5/8in) from the waistline raw edge and aligned with the pocket bag notches on the legs. The rough, glue side of the interfacing should be face down. Press them in place with a dry iron. Snip the pocket bag notches again if you can’t see them.
SEWING THE LEGS
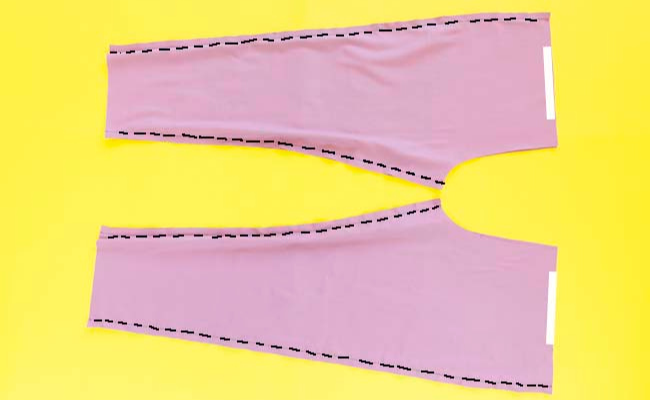
Lay each back leg over its matching front leg, right sides together. Pin each leg together along the inside legs and side seams, matching up the corners and notches. The back legs are slightly shorter than the front legs between the top two notches on the inside leg seam – this will help give a nicer shape on the bum. So you’ll need to ease the seams together between these points, distributing the excess length on the front legs evenly between the notches.
Also, something that sometimes throws newbies when sewing trousers - the leg pieces won't lie completely flat as they are different shapes - just match up the edges.
Stitch each of these four pinned seams, sewing from the top to the hem.
If you are sewing knit fabric on an overlocker or serger, your machine will have already trimmed and finished the seams. If you used a regular sewing machine, trim the seam allowances down to about half their current width. If you are using woven fabric, finish the seam allowances to neaten and strengthen them, using an overlocker if you have one, otherwise, you can use a zigzag stitch on your regular sewing machine. If you’re sewing knit fabric on a regular sewing machine, you can skip the finishing if you like, as knit fabrics don’t fray.
Bonus blog post: How to Finish Seams with a Zigzag Stitch!
Press the seam allowances open or towards the back, on the wrong side and then the right side. If you’re not sure which side is the back, remember it’s the one that doesn’t have the interfacing strips at the front, or the one with the double notches on the crotch curve.
JOINING THE CROTCH
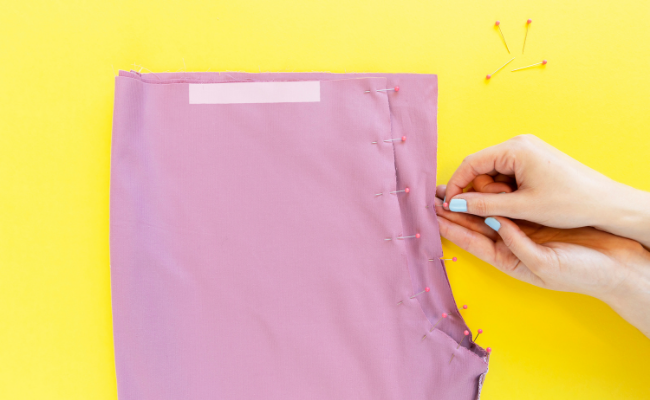
Now we're going to join the two legs together along the crotch seams. Turn one leg right side out and slip it inside the other leg so the right sides are facing each other. Line up the crotch seams. Pin the two legs together along the crotch seam – start by aligning the top of the inside legs with each other. Match the corners and notches, then pin together the rest of the crotch curve. Take note - you’re pinning together two layers here, not four. When joining curves like this, it's helpful to insert the pins at right angles to the edges, the pin heads sticking out. It keeps the layers together accurately, and you'll be able to quickly whip the pins out as you sew.
We’re going to sew all the way around this pinned curve, starting from one of the top edges. Stitch, making sure you’re not sewing two layers together, not four.
Trim the seam allowances if you used a regular sewing machine. If you’re using woven fabric, finish the seam allowances with a zigzag stitch or an overlocker. Pull the legs wrong side out. Press seam allowances open or to one side.
TIP: If you want to check the fit, you could tack (baste) the bib to the legs around the waistline now. Try the dungarees on and check you’re happy with the length of the bodice, where the waistline is sitting, and side seam fit, adjusting if necessary. Remember to sit down as well as stand up when trying them on. Bear in mind the waistline is designed to sit low, and you will need to be able to fit your hips through the bib.
ATTACHING THE POCKETS
Now we’re going to attach the pockets. If you prefer, you can leave the pockets out. But they are cute - and handy!
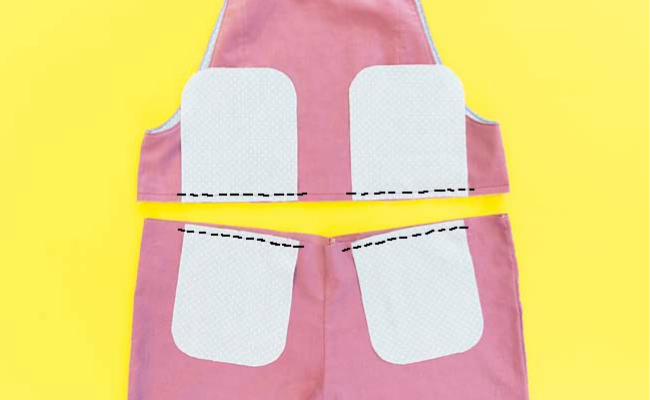
Lay out the bib and the legs right side out, the front facing up – remember the front bib is the one with the princess seams, and the front legs have the interfacing strips on the inside. You should have cut four pocket bags – lay two of these over the bib at the waistline, right sides together, matching up the pocket bag notches, and pin in place (only pin through the pockets and front bib, not the back bib).
Lay the other two pocket pieces over the front legs at the waistline, right sides together, again matching up the pocket bag notches, and pinning in place (only pin through the pockets and front legs, not the back legs).
Using a regular sewing machine, stitch the pockets in place 10mm (3/8in) from the edge – remember, you’re not stitching through the back bib or back legs. If you’re using woven fabric, or if you’re an overlocker on knit fabric, finish the seam allowances together without trimming where you’ve just sewn the pocket bags. (If you’re sewing knit fabric on a regular sewing machine, you can skip this part.)
Press the pocket bags away from the bib and legs.
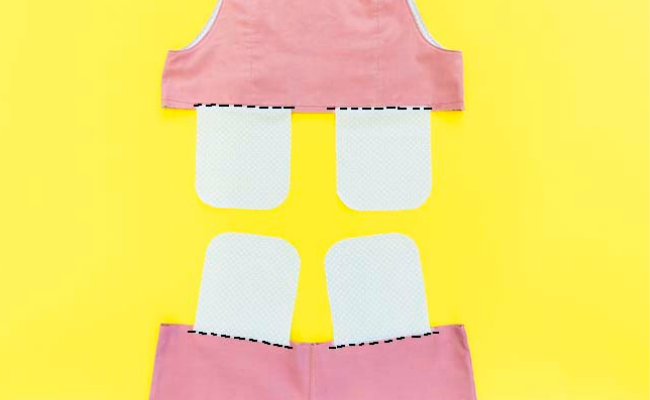
Now we’re going to understitch the pocket bags to the seam allowances, close to the seam line. This is similar to edgestitching – sewing through the layers close to the edge to keep everything neat - but it won't be visible on the outside of the garment when you wear it as it will sit inside the pockets.

Edgestitch on the pocket bag side, 2-3mm (1/8in) from the seam. Like with edgestitching, you can use a notch on your presser foot as a guide or shift the needle to one side. Hold the fabric taut away from the seam as you sew to avoid stitching in a ridge.
Bonus blog post: Five Tips for Neat Understitching!

JOINING THE BIB TO THE LEGS
Now we can join the bib to the legs. With the bib and legs right sides out and the pockets still pressed away from them, flip the bib over the legs, turning it inside out over them, so the bib and legs are right sides together. Pin the bib to the legs all the way around the waistline and outer edges of the pocket bags, leaving the pocket openings – where the pocket bags join the bib and legs – unpinned. Start by matching up the side seams, then pin the rest in place, matching the notches.
We’re going to sew where you've pinned (so around the waistline and outer edges of the pockets, but not across the pocket openings) with the legs still turned right sides out, sewing around the inside of this loop so the interfacing strips are visible. Start at one side seam. When you reach the first pivot point on the pocket interfacing strips, pause with the needle down, raise the presser foot and pivot the project to sew around the pocket bag. Pivot again at the next pivot point, and continue.

If you’re using woven fabric, finish the seam allowances on the areas you’ve just sewn. Press the pockets and seam allowances down towards the legs.
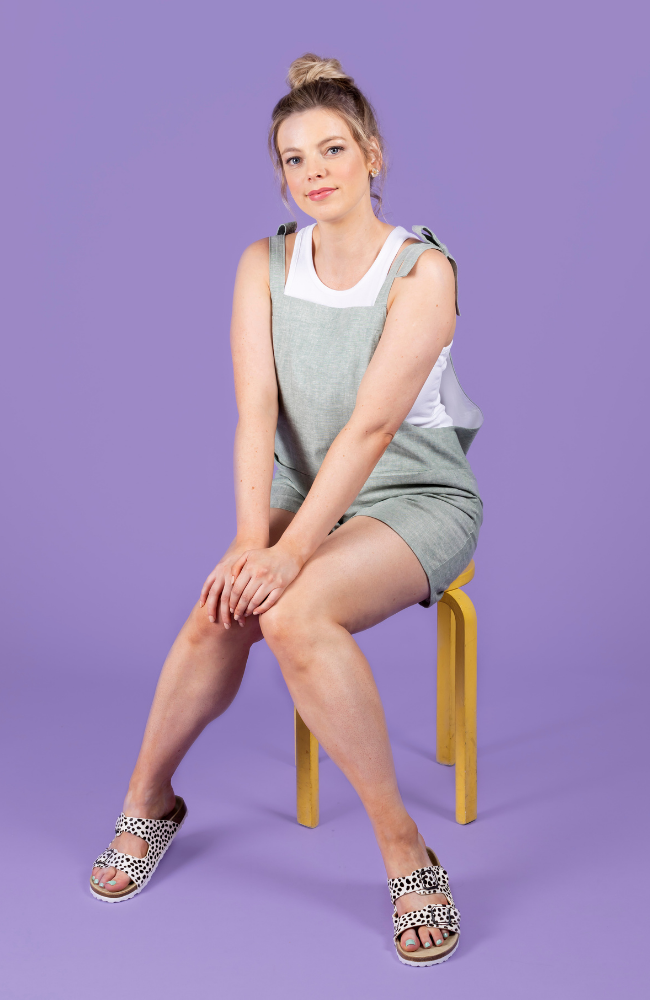
We are nearly there! In the next post we’ll be finishing the Erin dungarees - woohoo!
Share what you're making
*****
Video sewalong: Abi Dyson
Photos: Jane Looker


